
Get Started with AI in KNIME
The KNIME AI Extension adds nodes for working with large language models (LLMs), building AI agents, and implementing Retrieval-Augmented Generation (RAG) pipelines in KNIME workflows. To install it, see Install the KNIME AI Extension.
Typical use cases include:
- Classifying text into categories
- Summarizing long documents into key points
- Extracting names, dates, or other details from unstructured text
- Translating text between languages
- Answering questions about your own data
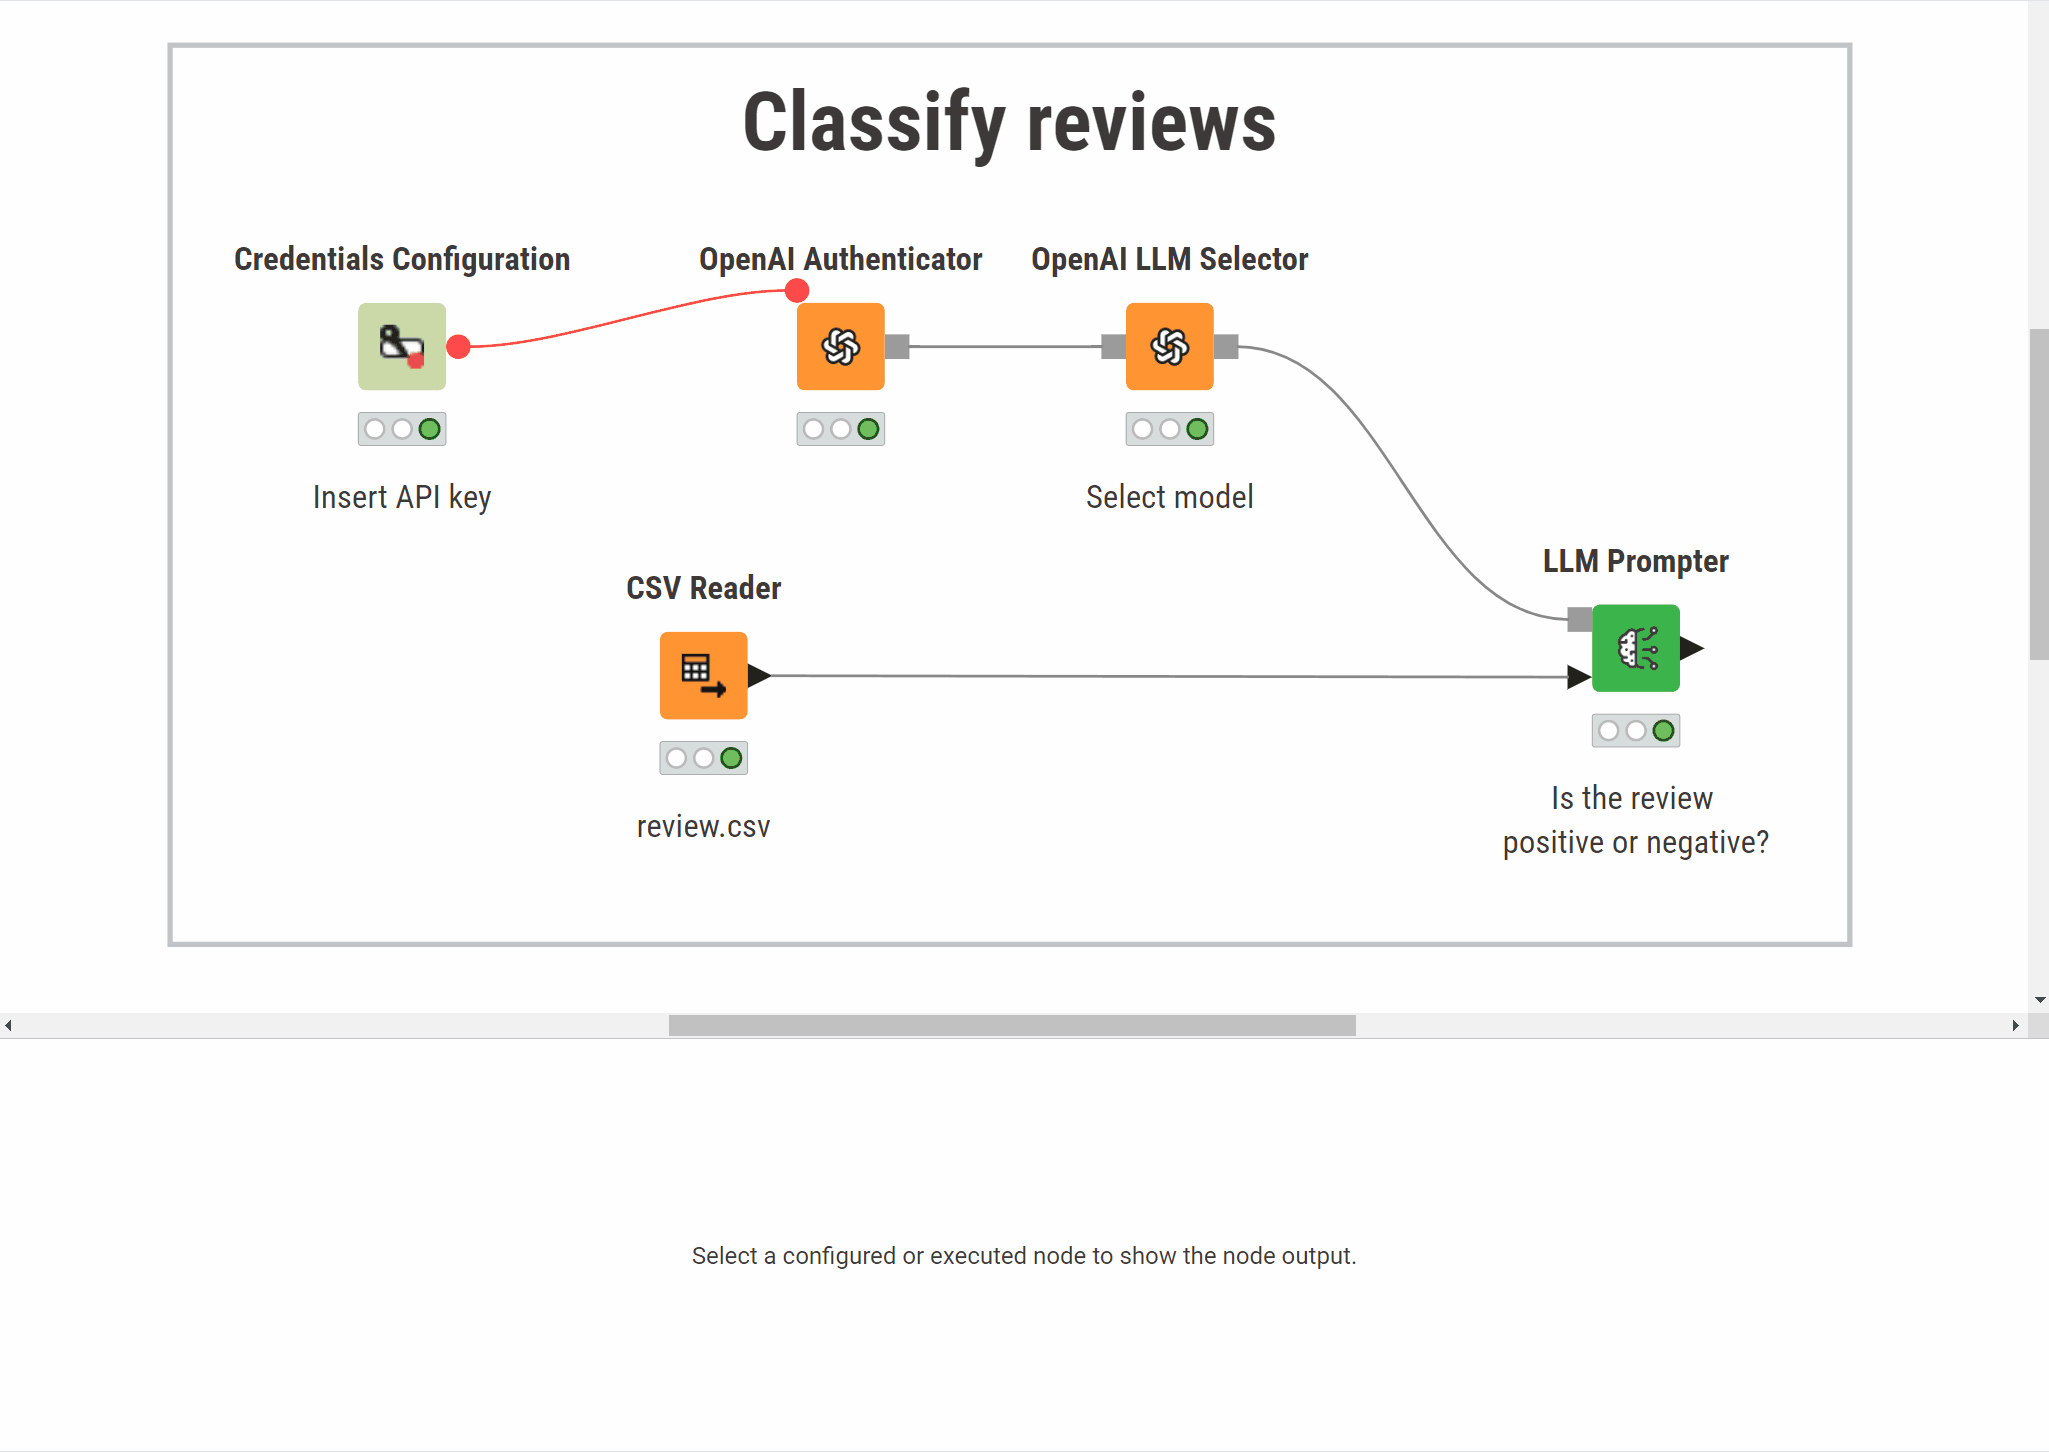
The example below classifies customer reviews. The workflow sends each review to an OpenAI model asking it to assign a sentiment category (positive or negative). The model's response is added to the table as a new column:
Prompt a model
Send a text instruction to a language model and receive a response. A prompting workflow connects three nodes: an authenticator (API credentials), a model selector, and the LLM Prompter:
- Prompt a model: Build a prompting workflow step by step.
- Providers and models: Supported providers, required credentials, and example workflows.
Run a model locally
The same prompting pattern works with models running on your machine. Data stays local and there are no API costs.
- Prompt a local model via Ollama: Use a model running locally through Ollama.
- Prompt a local model via GPT4All: Use a model running locally through GPT4All.
Get structured output
By default, a model returns free-form text. Structured output mode maps the response directly to table columns with defined types.
- Prompt with structured output: Configure an output schema and get structured responses.
Create embeddings
Embeddings are numerical vectors that capture the meaning of text. They are used for similarity search, clustering, and as the basis for RAG pipelines.
- Create embeddings: Generate vector representations from text.
Generate or edit images
Use AI models to create new images or modify existing ones from text prompts.
- Generate or edit images: Produce or edit images inside a workflow.
Agents and RAG
- Agents: Build workflows where a language model decides what to do next, calling tools like database lookups or APIs across multiple steps.
- Retrieval-Augmented Generation (RAG): Ground model answers in your own documents by retrieving relevant passages before prompting.