
KNIME Business Hub Admin Workflows Guide
This guide assembles KNIME Business Hub data apps and workflows that help you monitor, diagnose, and maintain your Hub. It is intended for global admins and team admins who manage Hub infrastructure, users, and resources.
Use Cases
Monitoring
- User & Team activity: Analyze how users interact with the system, including active logins, team distribution, and access methods with the Admin Dashboard for a general overview and the Monitor Users Usage data app for a detailed session investigation.
- Resource utilization: Assess execution contexts, workflow scheduling, and resource scaling to optimize performance with the Admin Dashboard for a general overview and the Workflow Jobs Monitoring data app for details on workflow execution.
- Content & Storage Management: Identify large items, popular downloads, and opportunities for space optimization with the Admin Dashboard.
- Performance & Reliability: Monitor workflow execution trends, failures, and overall execution efficiency with the Workflow Jobs Monitoring data app.
- Gen AI & Assistance usage: Measure engagement with K-AI, script assistance, and user support needs with the Gen AI Monitoring data app.
- Deployment performance: Identify high and low performing deployments with the Deployment Diagnostics data app.
Diagnostics
- List installed extensions, nodes, conda environments, and Linux packages with the Executor Diagnostics data app.
- Test URL accessibility from an execution context in the Executor Diagnostics data app.
- Investigate proxy or network issues by entering a URL in the Executor Diagnostics data app.
- Inspect active or inspectable jobs with the Manage Existing Jobs data app.
Maintenance
- Find and fix deployments whose setting are out of sync with the defaults of their execution context with the Deployment Diagnostics data app.
- Delete unused workflow versions with the Manage Workflow Versions data app.
- Remove outdated executions with the Manage Existing Jobs data app.
- Delete unhealthy deployments that can't be used anymore with the Deployment Diagnostics data app.
- Bulk change deployments to point to the latest version of their workflow with the Deployment Diagnostics data app.
Admin Dashboard
The Admin Dashboard data app highlights:
- User, item, and deployment distribution across the Hub and individual teams.
- Growth trends for users, items, and deployments.
- Hub snapshots that provide anonymized counts to compare growth across time or between Hub instances.
Setup
Download the workflow.
Navigate to the target space on your Hub.
Upload the workflow by using the upload button (learn more).
Run the workflow to start an ad hoc execution (learn more).
- (Optional) Deploy the workflow as a data app to persist configuration and share it with other users (learn how).
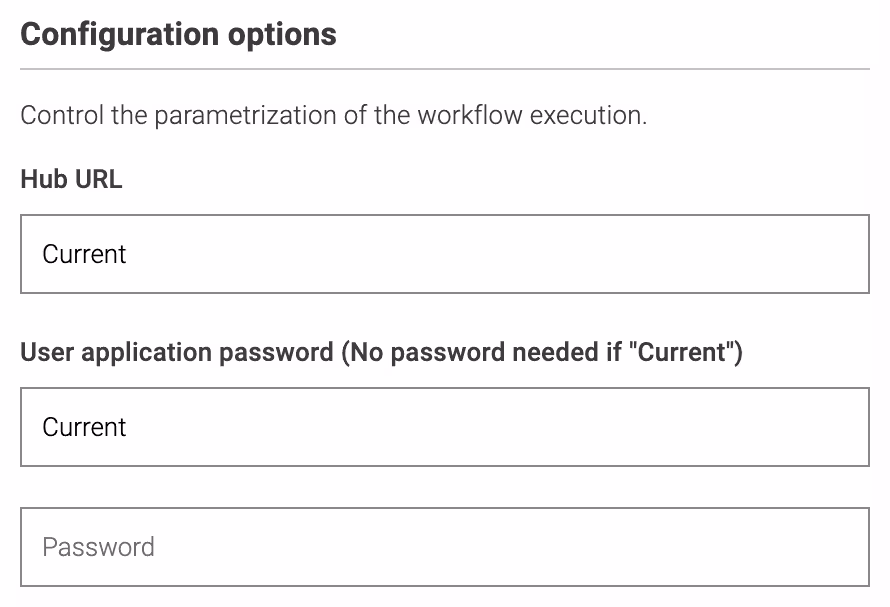
(Optional) Configure impersonation or a different Hub connection in the execution dialog.
- User application password: keep Current to run with the logged-in user, or provide an application password of a different user to reuse their permissions.
- Hub URL: keep Current to reference the Hub where the execution runs, or enter another Hub URL.
Run the workflow or launch the deployed data app.
Deployment Diagnostics
Gather intelligence about your deployments with the Deployment Diagnostics data app and maintain them:
- Identify high and low performing deployments in terms of execution
- Find times of high and low usage, helping to find favorable times for schedules
- Find deployments whose setting are not the same as their execution context and reset them to the defaults
- Identify and delete unhealthy deployments that can't be used anymore, for example because the user was deleted or removed from the team
- Bulk change deployments to point to the latest version of their workflow
Setup
Download the workflow.
Navigate to the target space on your Hub.
Upload the workflow by using the upload button (learn more).
Run the workflow to start an ad hoc execution (learn more).
- (Optional) Deploy the workflow as a data app to persist configuration and share it with other users (learn how).
(Optional) Configure impersonation or a different Hub connection in the execution dialog.
- User application password: keep Current to run with the logged-in user, or provide an application password of a different user to reuse their permissions.
- Hub URL: keep Current to reference the Hub where the execution runs, or enter another Hub URL.
Run the workflow or launch the deployed data app.
Workflow Jobs Monitoring
The Workflow Jobs Monitoring data app helps you:
- Identify scheduling windows when execution contexts are less busy.
- Track workflow execution trends and failure rates.
- Investigate individual jobs that failed or are running longer than expected.
Enable job instrumentation data collection
Enable job instrumentation and storage as described in the Business Hub Advanced Admin Guide. The data app requires this information to display execution statistics.
Setup
Download the workflow.
Navigate to the target space on your Hub.
Upload the workflow (learn more).
Run the workflow for an ad hoc execution (learn more).
- (Optional) Deploy it as a data app for shared access (learn how).
(Optional) Configure impersonation or a different Hub connection using the same dialog shown above.
Run the workflow or the deployed data app.
User Usage Monitoring
The User Usage Monitoring data app allows you to:
- Count active users and identify unused license seats (see Users and Consumers).
- Discover peak login times.
- Determine whether users access the Hub through KNIME Analytics Platform, a browser, or both.
Keycloak service client configuration
Configure Keycloak to store session events and create a service client that can retrieve them. This client is required by the data app.
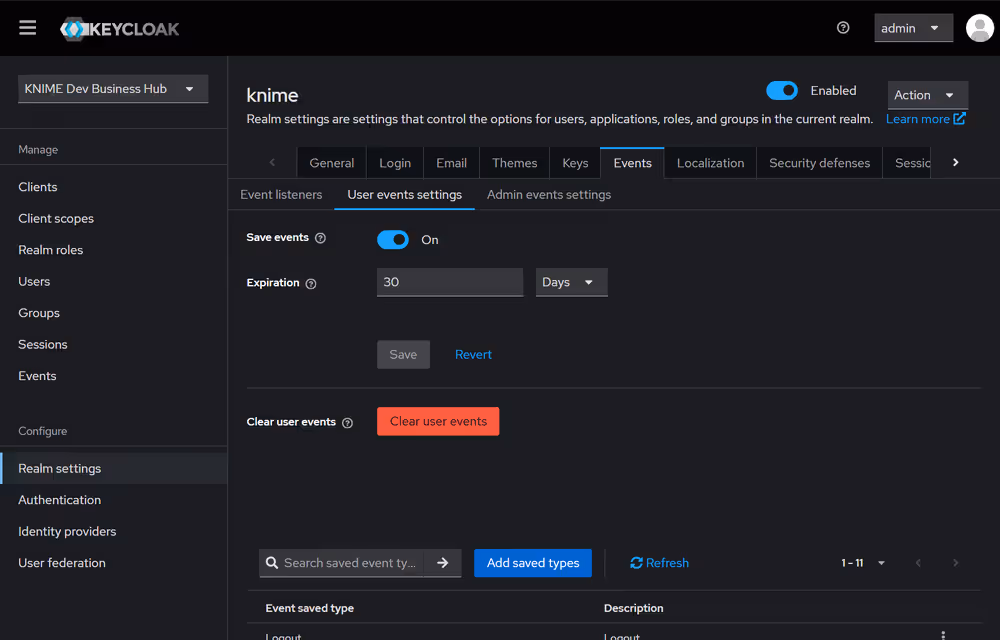
Log in to the Keycloak Admin Console at
https://auth.<base-url>(see Access Keycloak).Select the
knimerealm (or your custom realm).In Realm Settings > Events > User events settings, activate Save events and define how many days to keep session events.
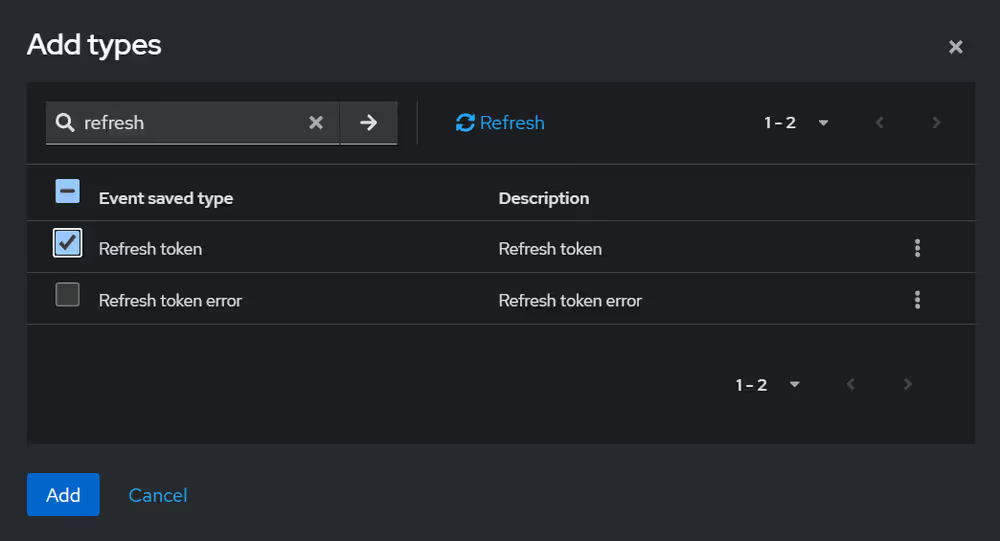
Choose Add saved types and include the refresh token event.
Create a new client in Clients.
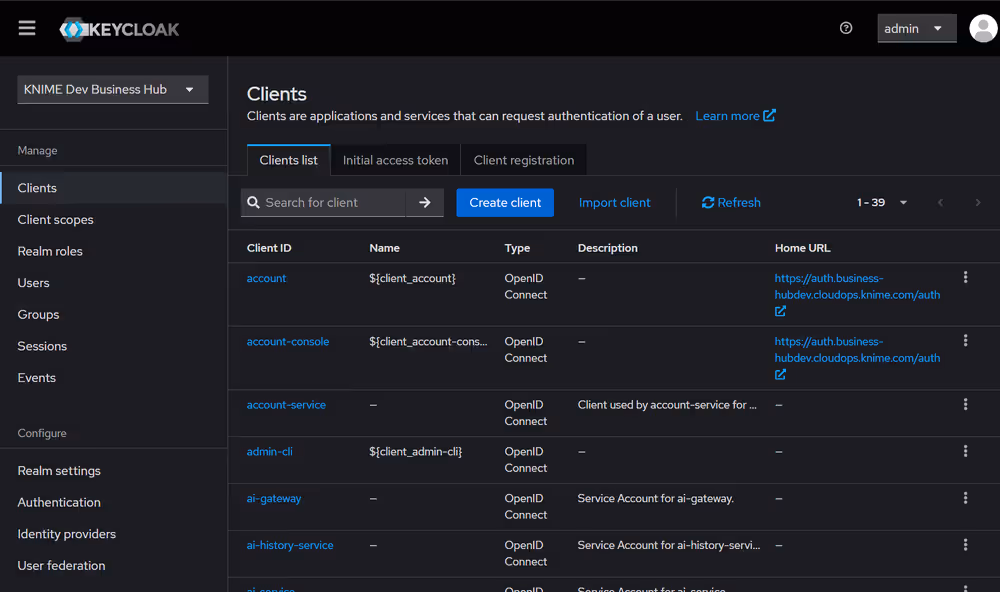
Provide a Client ID (for example,
monitor-user-usage) and optionally a name and description.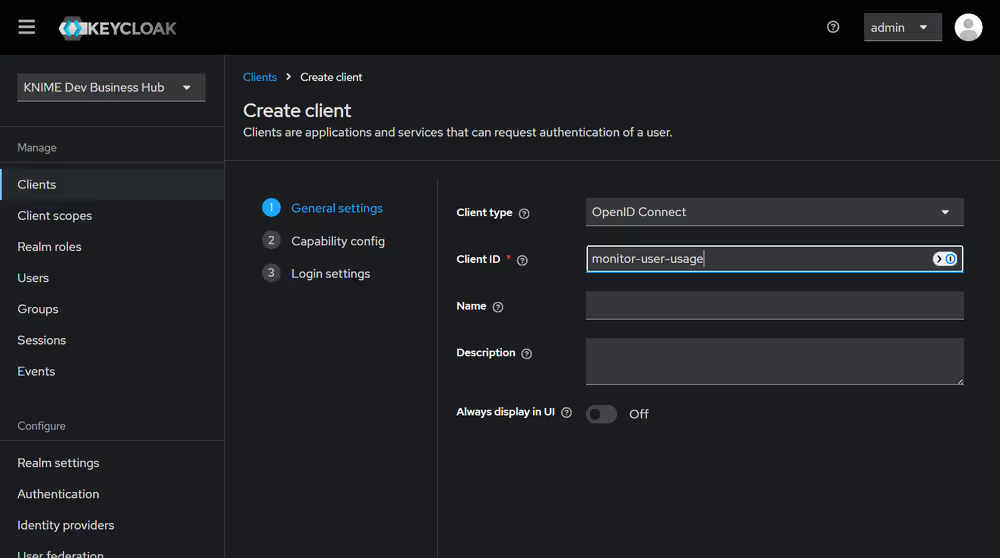
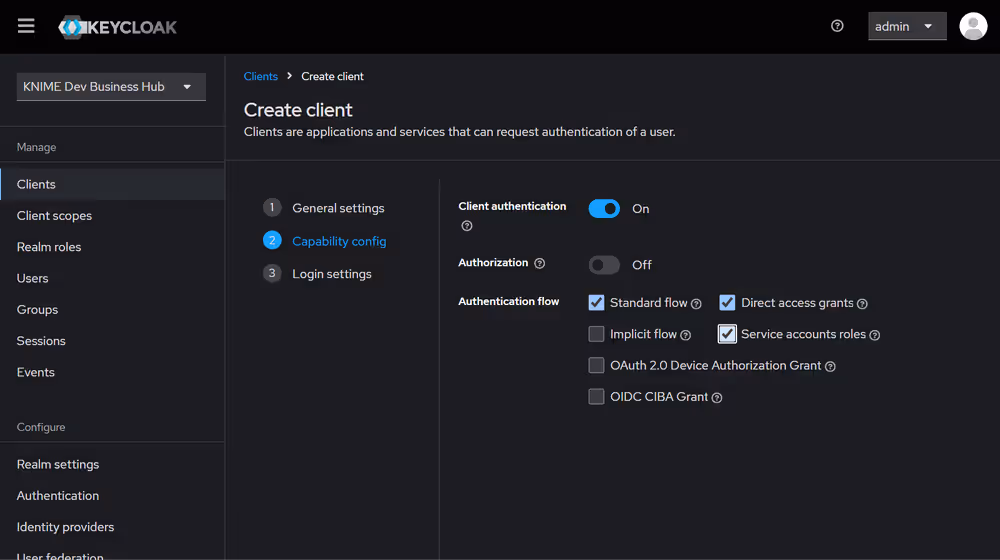
In Capability config, enable Client authentication and select Service account roles. Save the client.
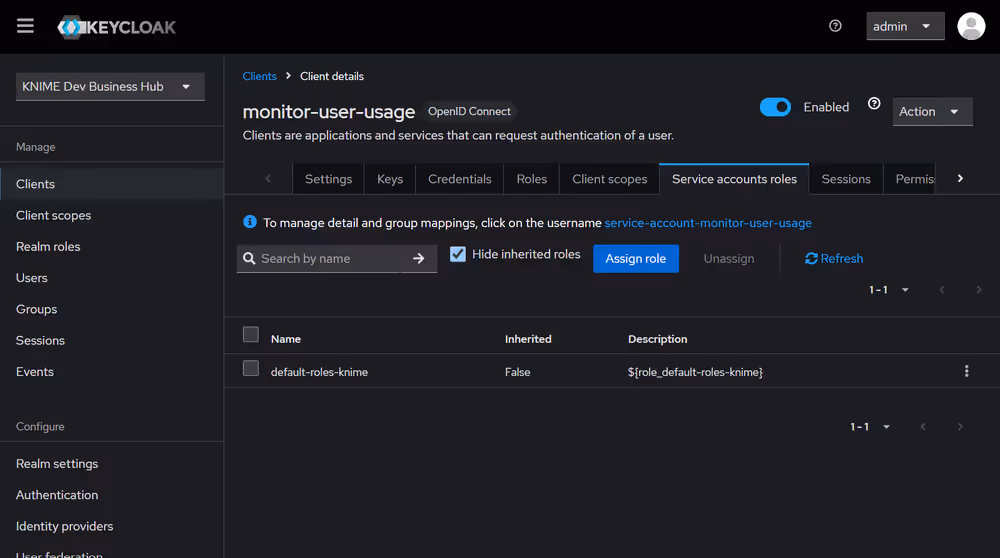
Open the newly created client and configure its service account roles.
Filter by clients, search for
view-events, and assign the role.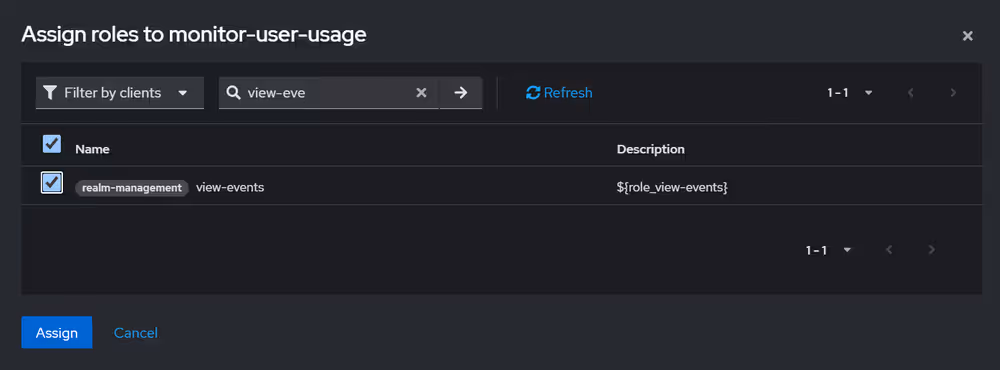
Assign the
manage-usersrole as well.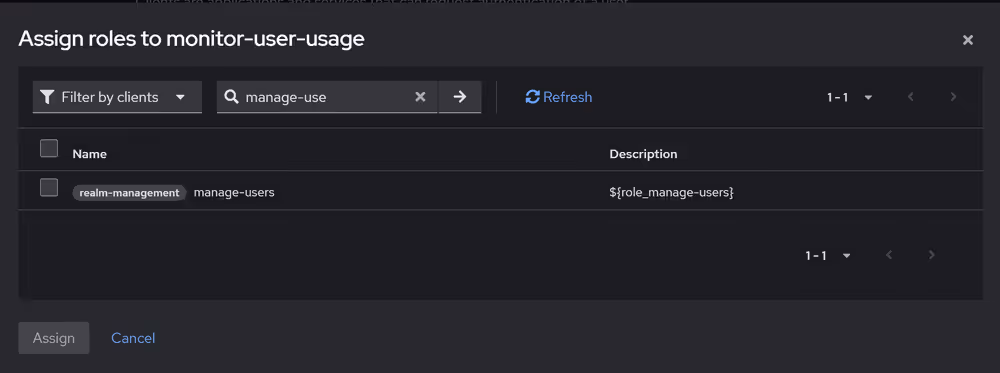
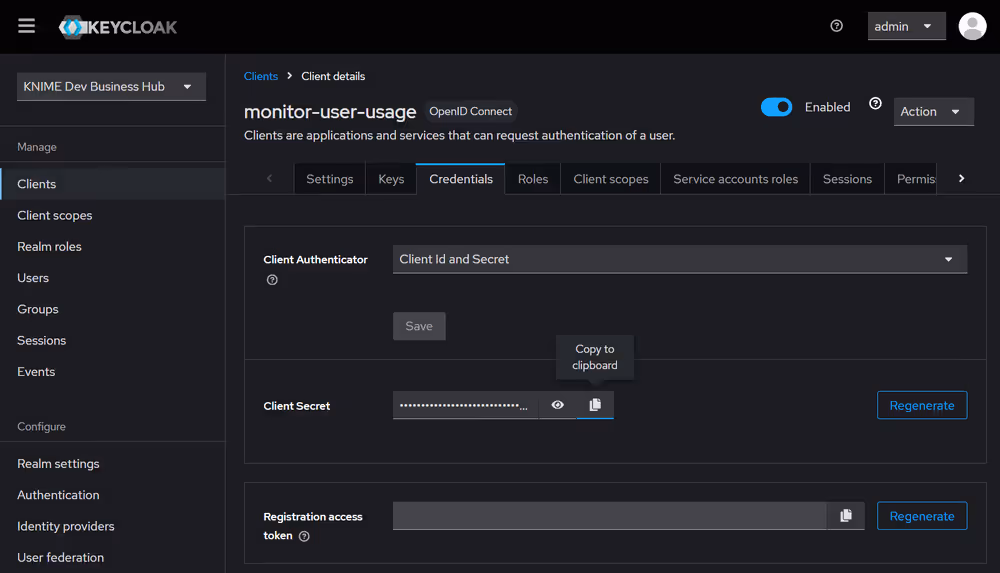
Retrieve the Client ID and Client secret from the Credentials tab.
Setup
Download the workflow.
Navigate to the desired Hub space.
Upload the workflow (learn more).
Run the workflow for an ad hoc execution (learn more).
- (Optional) Deploy it as a data app to reuse the configuration (learn how).
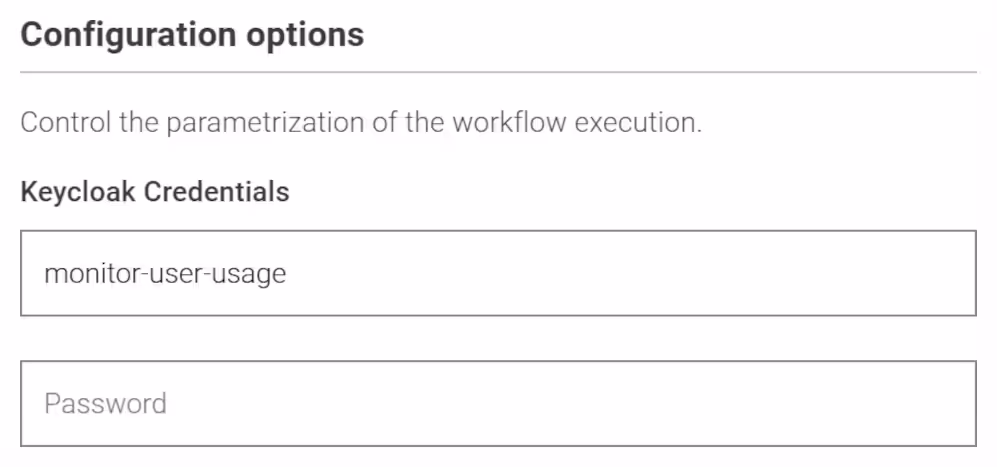
Provide the Keycloak service client ID and secret gathered above.
Run the workflow or the deployed data app.
Idle Users Cleanup
The Idle Users Cleanup schedule frees up seats by removing inactive users. A user is considered inactive when both conditions apply:
- They have not logged in for the configured number of days.
- They do not own active deployments in their user scope (learn more).
When the workflow removes a user from every team, the account automatically becomes a consumer. Optionally, the workflow can notify teams about removals and collect API errors for review.
Keycloak service client configuration
This workflow uses the same Keycloak configuration as the User Usage Monitoring data app. Reuse the service client created in the previous section so the workflow can access session events.
Setup
Download the workflow.
Navigate to the target space on your Hub.
Upload the workflow (learn more).
Run the workflow for an ad hoc execution or schedule it for recurring cleanup (learn more).
(Optional) Configure impersonation or another Hub connection as needed.
Provide the Keycloak service client ID and secret you gathered earlier.
Define the inactivity threshold in days (default: 30).
Run or schedule the workflow.
Notification setup (optional)
The workflow includes a Notify User component that sends email alerts. Remove the Active Branch Inverter to enable the notification branch, then configure SMTP settings, encryption, credentials, sender, recipients, subject, and message.
Executor Diagnostics
The Executor Diagnostics data app helps you:
- Verify installed extensions, nodes, conda environments, and Linux packages on an execution context.
- Download the conda environment to replicate it elsewhere.
- Troubleshoot proxy settings and reachability of external URLs.
Setup
- Download the workflow.
- Navigate to the target space.
- Upload the workflow (learn more).
- Run the workflow for an ad hoc execution (learn more).
- (Optional) Deploy it as a data app for repeated use (learn how).
- Run the workflow or deployed data app.
Gen AI Monitoring
The Gen AI Monitoring data app tracks GenAI-related activity:
- Measure K-AI, script assistance, and user prompt usage.
- Analyze GenAI cost metrics.
Enable AI Services
Enable the AI Service as described in the Business Hub Admin Guide before you run the data app.
Setup
Download the workflow.
Navigate to the workspace where you want to host it.
Upload the workflow (learn more).
Run the workflow for an ad hoc execution (learn more).
- (Optional) Deploy it as a data app for shared access (learn how).
(Optional) Configure impersonation or a different Hub connection.
Run the workflow or the deployed data app.
Manage Existing Jobs
The Manage Existing Jobs data app supports:
- Inspecting jobs that remain available in executor memory or object store.
- Cleaning up jobs to reclaim storage or memory.
Setup
Download the workflow.
Navigate to the space on your Hub where you want to store it.
Upload the workflow (learn more).
Run the workflow for an ad hoc execution (learn more).
- (Optional) Deploy it as a data app so others can access it (learn how).
(Optional) Configure impersonation or a different Hub connection.
Run the workflow or deployed data app.
Manage Workflow Versions
The Manage Workflow Versions data app helps you:
- Detect workflow versions that are no longer used in deployments.
- Delete outdated versions to free up storage.
Setup
Download the workflow.
Navigate to the chosen Hub space.
Upload the workflow (learn more).
Run the workflow for an ad hoc execution (learn more).
- (Optional) Deploy it as a data app (learn how).
(Optional) Configure impersonation or a different Hub connection.
Run the workflow or the deployed data app.