Introduction
Secrets provide a way to centrally store and manage logins to other systems. For example, a secret could be credentials to log into an external database, file system or service. Secrets are owned and managed by a user or team. User secrets are intended for managing personal logins e.g. john.smith. Team secrets on the other hand are intended for shared logins sometimes referred to as technical or service users e.g. hr_read_only, that are shared with multiple users.
Managing secrets
Secrets are managed via the KNIME Business Hub.
-
To manage your personal secrets navigate to your account page and select Secrets from the menu on the left. On your Secrets page you can create, edit and delete your personal secrets.
-
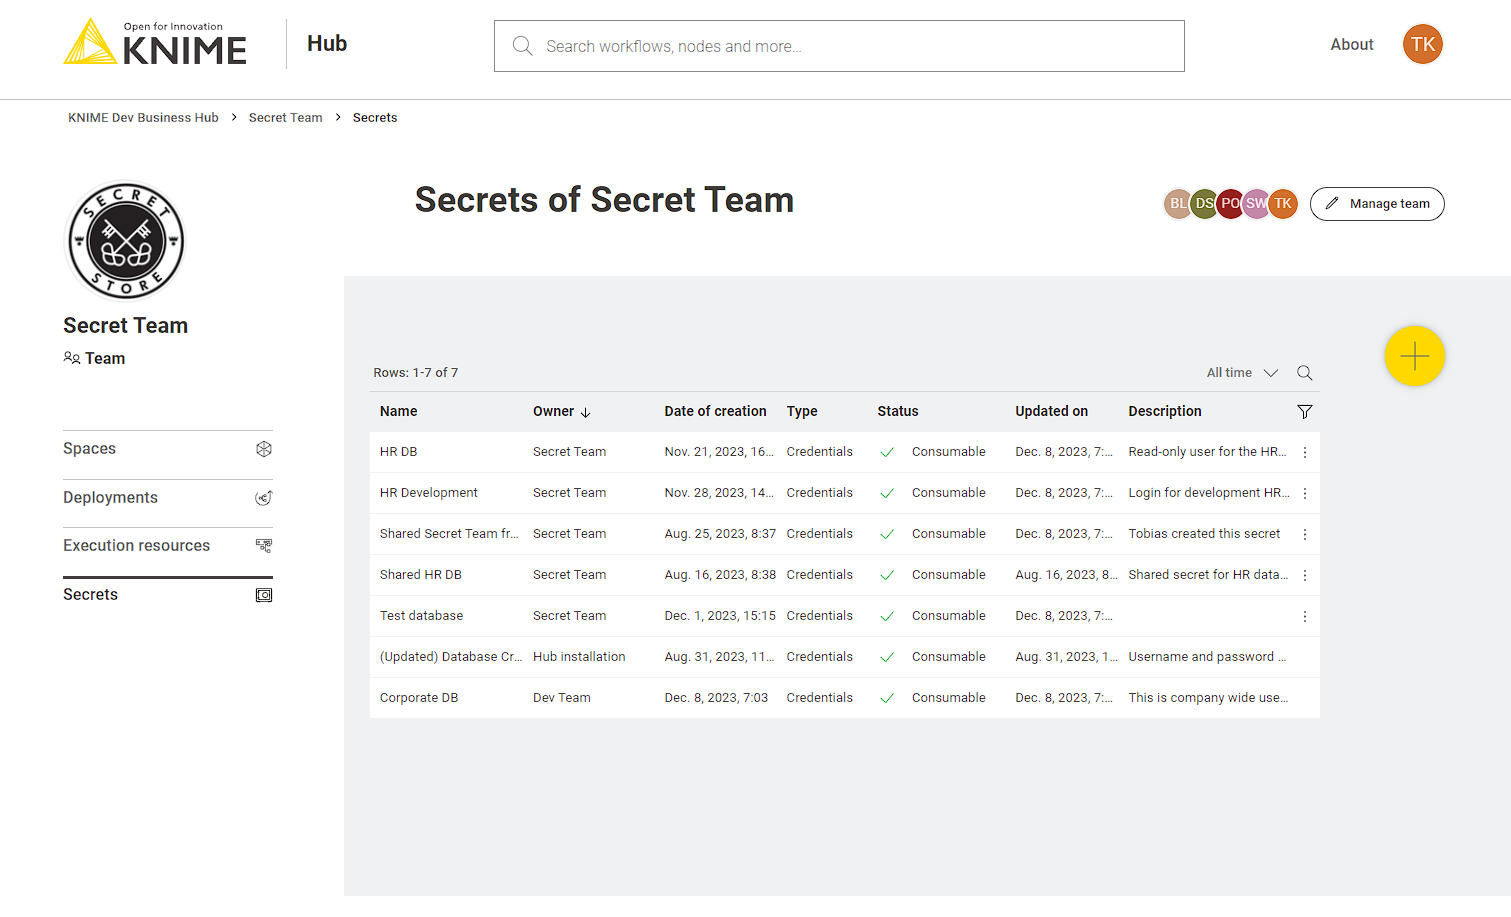
To manage team secrets you have to navigate to the team page you want to manage the secrets for. Once you are on the team page select Secrets from the menu on the left.
Creation, editing and deletion for personal and team secrets works the same and is described below. Please note, that team secrets can only be created by team admins.
Create a new secret
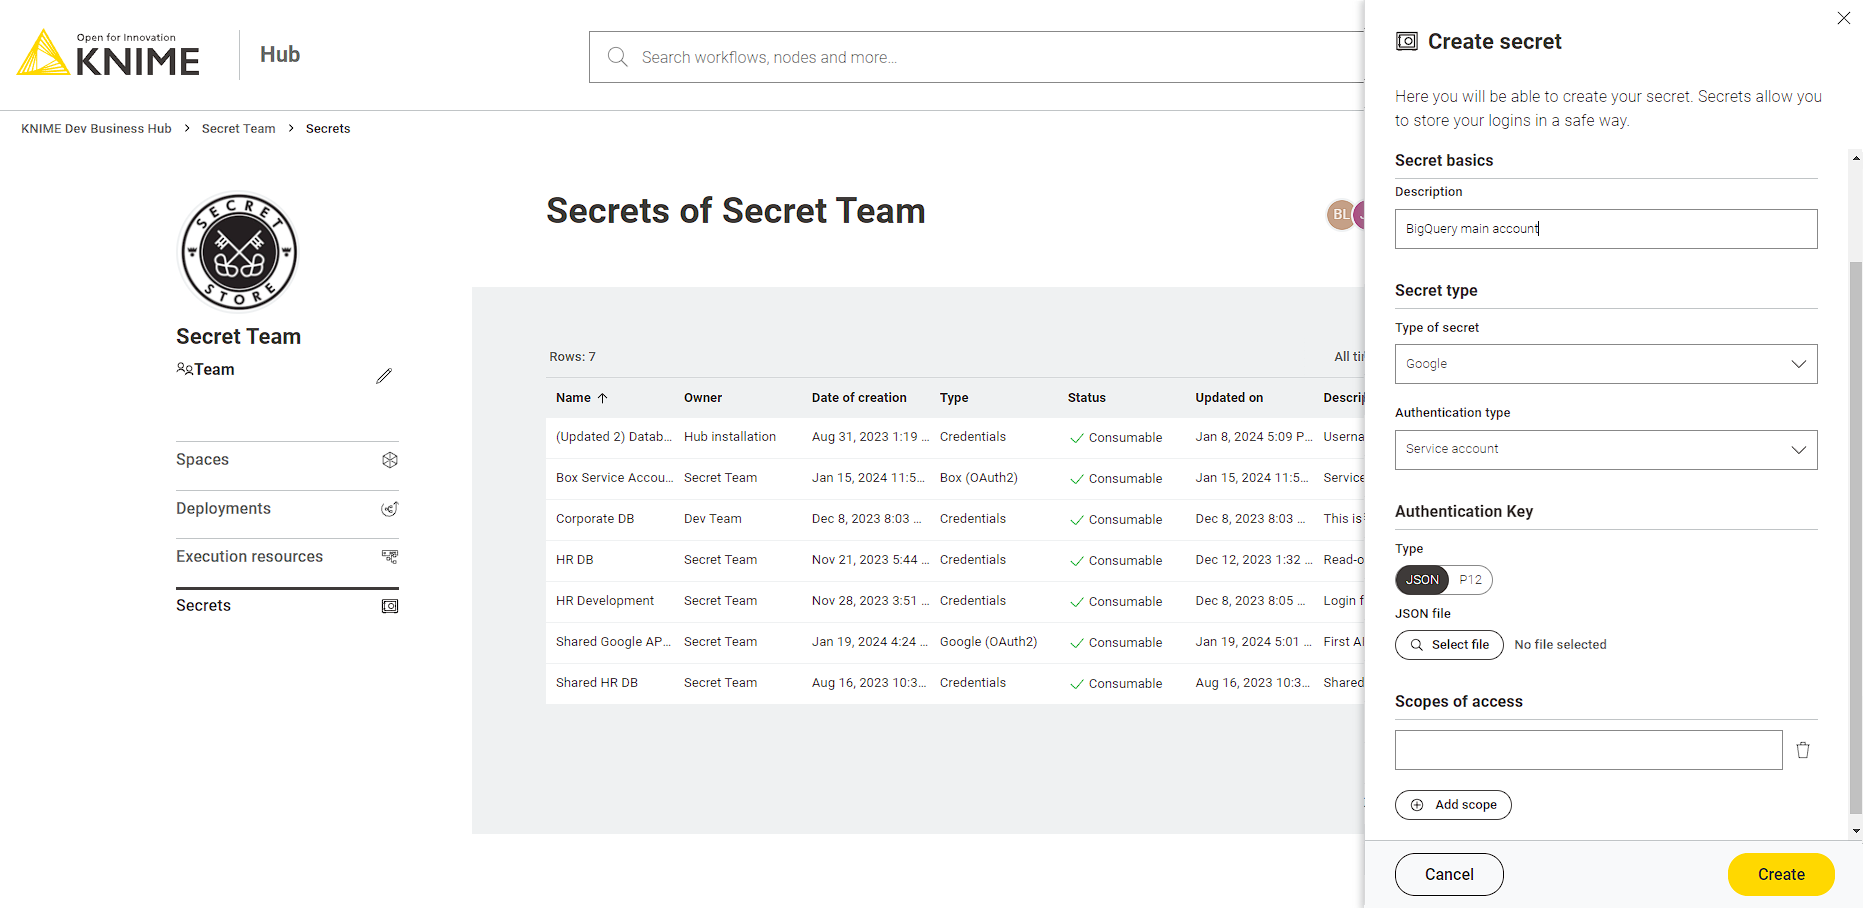
To create a new secret click the ![]() button.
Each secret consists of a unique name, optional description, secret type and authentication type.
Depending on the selected secret and authentication type the additional input fields are different (for more details
see the Secret types section).
Once the secret is created it is visible in the secrets table that lists all secrets that you have access to,
including the ones that have been shared with you.
button.
Each secret consists of a unique name, optional description, secret type and authentication type.
Depending on the selected secret and authentication type the additional input fields are different (for more details
see the Secret types section).
Once the secret is created it is visible in the secrets table that lists all secrets that you have access to,
including the ones that have been shared with you.
Edit an existing secret
To edit an existing secret click the ![]() icon on the row corresponding to the secret
you want to edit, and then click Edit. This will open the edit menu bar where you can adapt the values of the secret.
To store the changes click the Save changes button.
Please note that the secret and authentication type cannot be changed. To change these you need to create a new secret.
icon on the row corresponding to the secret
you want to edit, and then click Edit. This will open the edit menu bar where you can adapt the values of the secret.
To store the changes click the Save changes button.
Please note that the secret and authentication type cannot be changed. To change these you need to create a new secret.
Delete a secret
To delete an existing secret click the ![]() icon on the row corresponding to the secret
you want to edit, and then click Delete. To prevent accidental deletes you are prompted to enter the name of the secret.
Once you have entered the secret name you can click the I understand the consequences, delete secret permanently button
to delete the secret.
icon on the row corresponding to the secret
you want to edit, and then click Delete. To prevent accidental deletes you are prompted to enter the name of the secret.
Once you have entered the secret name you can click the I understand the consequences, delete secret permanently button
to delete the secret.
Interactive login
Some secret types, e.g. interactive generic OAuth2 and other secrets with interactive authentication type, require you to log into your account to acquire a session and refresh token. If you are not logged in, these secrets are marked in the secrets table as Not consumable in the status column.
To log in click the ![]() icon on the row corresponding to the secret you
want to log in, and then click Login. This will open up a new browser window/tab that shows the login page of the
corresponding identity provider, e.g. Google, Microsoft, etc.
icon on the row corresponding to the secret you
want to log in, and then click Login. This will open up a new browser window/tab that shows the login page of the
corresponding identity provider, e.g. Google, Microsoft, etc.
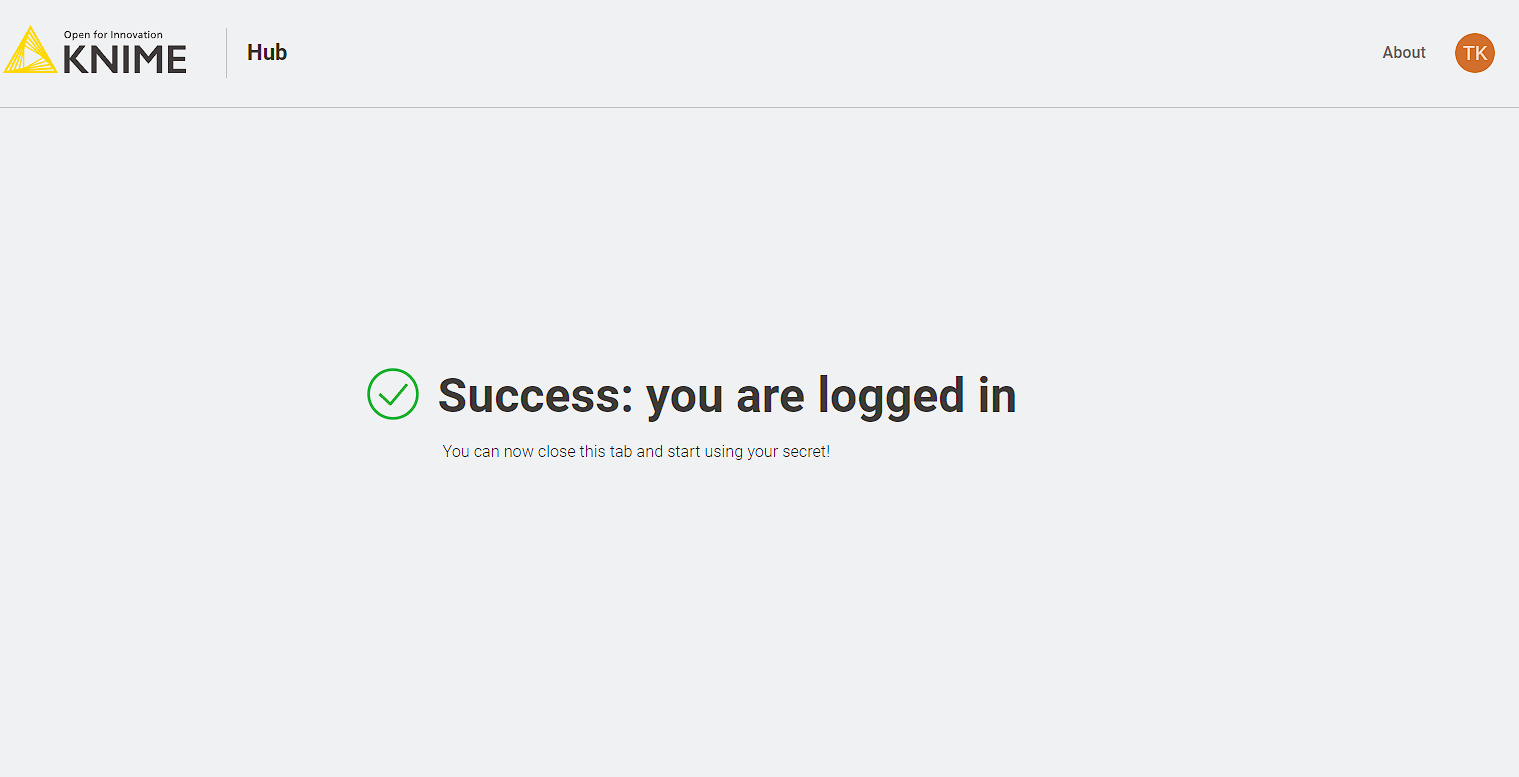
Once you are logged in you are redirected to the success page which you can close.
Manage access to team secrets
For team secrets, you can select Manage access from the menu that opens when clicking the ![]() icon of the secret to share. This opens a side panel where you can type the name of the user or team you want to share
the secret with.
icon of the secret to share. This opens a side panel where you can type the name of the user or team you want to share
the secret with.
It is also possible to share the secret with users that are not members of your team. When sharing a secret, this will be available in the user profile in the Secrets section. For more details see the Using secrets section.
When managing the access you can assign either the Use or Edit right. The use right allows only the use of the secret in a KNIME workflow via the Secrets Retriever node (for more details see the Using secrets section). The edit right instead, also allows the user or team to not only use the secret but also to change its properties or to delete it.
| User secrets cannot be shared with other users or teams for security reasons. |
Using secrets
Secrets can be used in KNIME workflows via the Secrets Retriever node. The node is part of the KNIME Hub Additional Connectivity (Labs) extension and needs to be installed separately. To retrieve the available secrets the Secrets Retriever node requires a connection to a KNIME Business Hub.
This can be done in two ways:
-
If the workflow is located in a space on the KNIME Business Hub, you can simply double click the workflow to open it. This will open the workflow on its location on the KNIME Business Hub for you to use from your local installation of the KNIME Analytics Platform client. By doing so the node will use the existing connection to the Business Hub to retrieve the secrets.
-
If the workflow is not located on the Business Hub e.g. it is stored in a local workspace, you need to use the KNIME Hub Authenticator and connect it to the Secrets Retriever node via its dynamic input port.
Once the node has access to a KNIME Business Hub you can open its dialog. In the dialog you can select any number of secrets that you have access to. Depending on the types of the selected secret the node will have different output ports e.g. a flow variable output port if you select a secret of type credentials. For more details about the supported secret types see the Secret types section.
| For security reasons the retrieved secrets are not stored when the workflow is saved. Therefore, the node needs to be re-executed every time a workflow is opened. |
During execution of a workflow the Secrets Retriever node retrieves the secret from the Business Hub using the rights of the user that executes the workflow. If that user has no right to use the secret the node will fail with a Secret does not exist error message.
| Secrets are referenced from the Secrets Retriever node using their internal identifier and not their name. So changing the name of a secret in the KNIME Hub will not break the connection to it from the Secrets Retriever node. |
Secret types
Secrets can have various types such as credentials, access tokens, OAuth2 session tokens or private key files. Each secret type can have various authentication types e.g. the credentials type can be a Username/Password or Password only authentication type. In the following sections we describe the different secret and authentication types, how they are created and represented in KNIME workflows.
Credentials
Credentials are the most basic types of secrets. They are divided into the two authentication types: Username/Password and Password only. Whereby the Username/Password type stores a username and a password such as a database login and the Password only type stores a password only such as an API key or access token.
Independent of the number of selected credentials secret types the Secrets Retriever node will return a single flow variable output port with a credentials flow variable for each selected credentials secret (for more details see the Using secrets section). To better distinguish the different credentials variables, you can specify the name for each variable in the node dialog.
Credentials variables are supported by a wide range of KNIME nodes where they can be assigned in the node dialog to a username and password or token input field via the corresponding flow variable button.
Generic OAuth2
The generic OAuth2 secret type allows you to connect to OAuth2 compliant authentication providers for which we do not have a dedicated secret type, e.g. Facebook, GitHub, Instagram, LinkedIn, Slack, and others. Depending on your use case and grant type you must select one of the authentication types described in the following sections.
For each of the following generic OAuth2 secret types the Secrets Retriever node will return a Credential output port with the OAuth2 access token (for more details see the Using secrets section). Each selected secret will result in a dedicated Credential output port. This port can be used as input for several nodes such as the REST nodes.
Interactive
This type supports the (interactive) OAuth 2.0 Authorization Code grant flow. The auth code flow is used to obtain an access token via an interactive login. For more details on how to log in see the Interactive login section.
| This authentication type is only available for personal secrets of KNIME Hub users and not for team secrets. |
When you setup the auth code flow with your identity provider you need to use the following redirect URI:
https://api.<base-url>/oauth2-flows/callback where <base-url> is your Business Hub instance URL,
e.g. hub.example.com. Note that the hostname must be prefixed with api. in the redirect URI.
For this secret type you can specify:
-
Authorization endpoint URL: is the authorization endpoint URL of the OAuth service
-
Token endpoint URL: is the token endpoint URL of the OAuth2 service
-
Client/App Type: is the application flow type to use either public or confidential
-
Client/App ID: is the client/application ID sometimes called API key
-
Client/App Secret: is the client/application secret to use (only available for confidential type)
-
Scopes of access: is the list of scopes to request for the access token
-
Token endpoint request method: is the HTTP method to use when requesting the access token from the token endpoint
-
Client/App authentication method: specifies how to transfer Client/App ID and secret to the service endpoints. HTTP Basic Auth is the most common mechanism, but some services expect these values to be part of the form-encoded request body.
-
Use PKCE: if selected a Proof Key Code Exchange is performed which improves the security
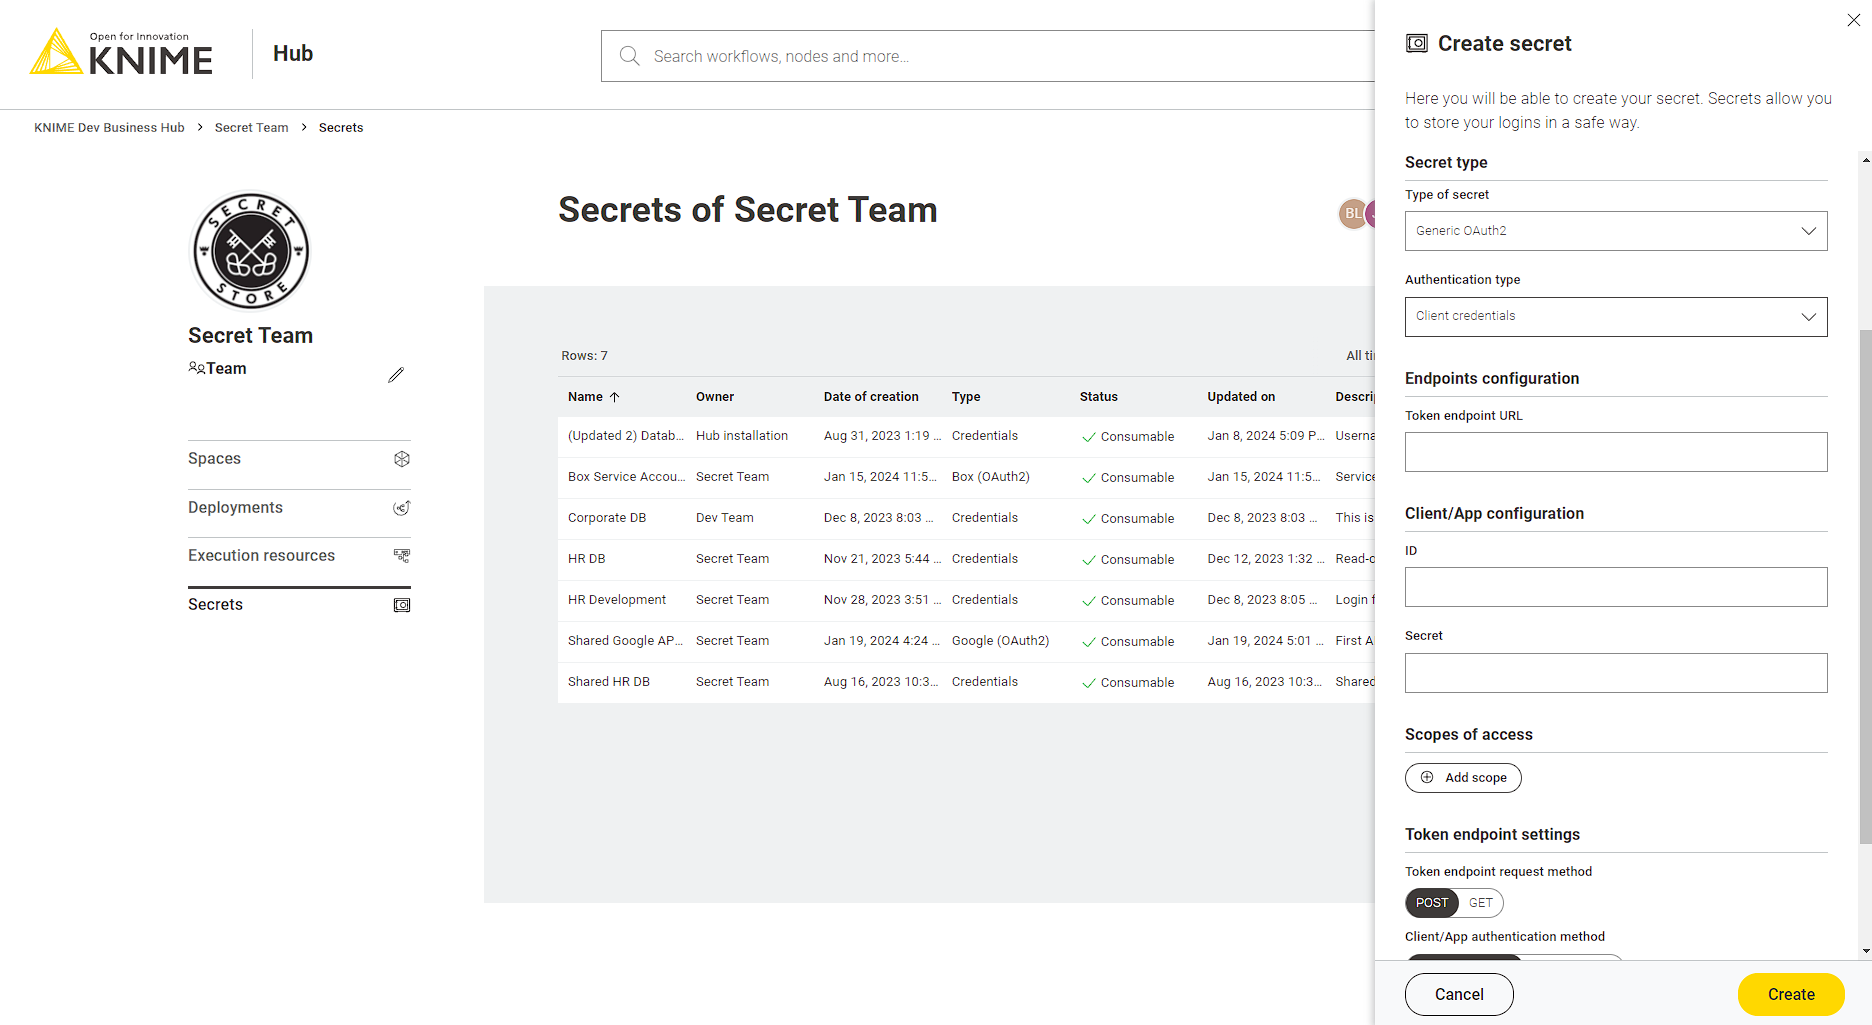
Client credentials
This type supports the client credentials grant flow. The client credentials grant is used to obtain an access token on behalf of an application/client, without having the context of a user.
For this secret type you can specify:
-
Token endpoint URL: is the token endpoint URL of the OAuth2 service
-
Client/App ID: is the client/application ID sometimes called API key
-
Client/App Secret: is the client/application secret to use
-
Scopes of access: is the list of scopes to request for the access token
-
Token endpoint request method: is the HTTP method to use when requesting the access token from the token endpoint
-
Client/App authentication method: specifies how to transfer Client/App ID and secret to the service endpoints. HTTP Basic Auth is the most common mechanism, but some services expect these values to be part of the form-encoded request body.
-
Additional request fields: are any additional request body fields that should be added to the token endpoint request
Username/Password
This type supports the OAuth 2.0 resource owner password credentials (ROPC) grant flow.
| The ROPC grant is considered legacy and does not support 2FA/MFA. Usage of this grant is discouraged and the client credentials grant should be used instead. |
For this secret type you can specify:
-
Token endpoint URL: is the token endpoint URL of the OAuth2 service
-
Username: is the username to use
-
Password: is the secret to use
-
Client/App Type: is the application flow type to use either public or confidential
-
Client/App ID: is the client/application ID sometimes called API key
-
Client/App Secret: is the client/application secret to use (only available for confidential type)
-
Scopes of access: is the list of scopes to request for the access token
-
Token endpoint request method: is the HTTP method to use when requesting the access token from the token endpoint
-
Client/App authentication method: specifies how to transfer Client/App ID and secret to the service endpoints. HTTP Basic Auth is the most common mechanism, but some services expect these values to be part of the form-encoded request body.
Box
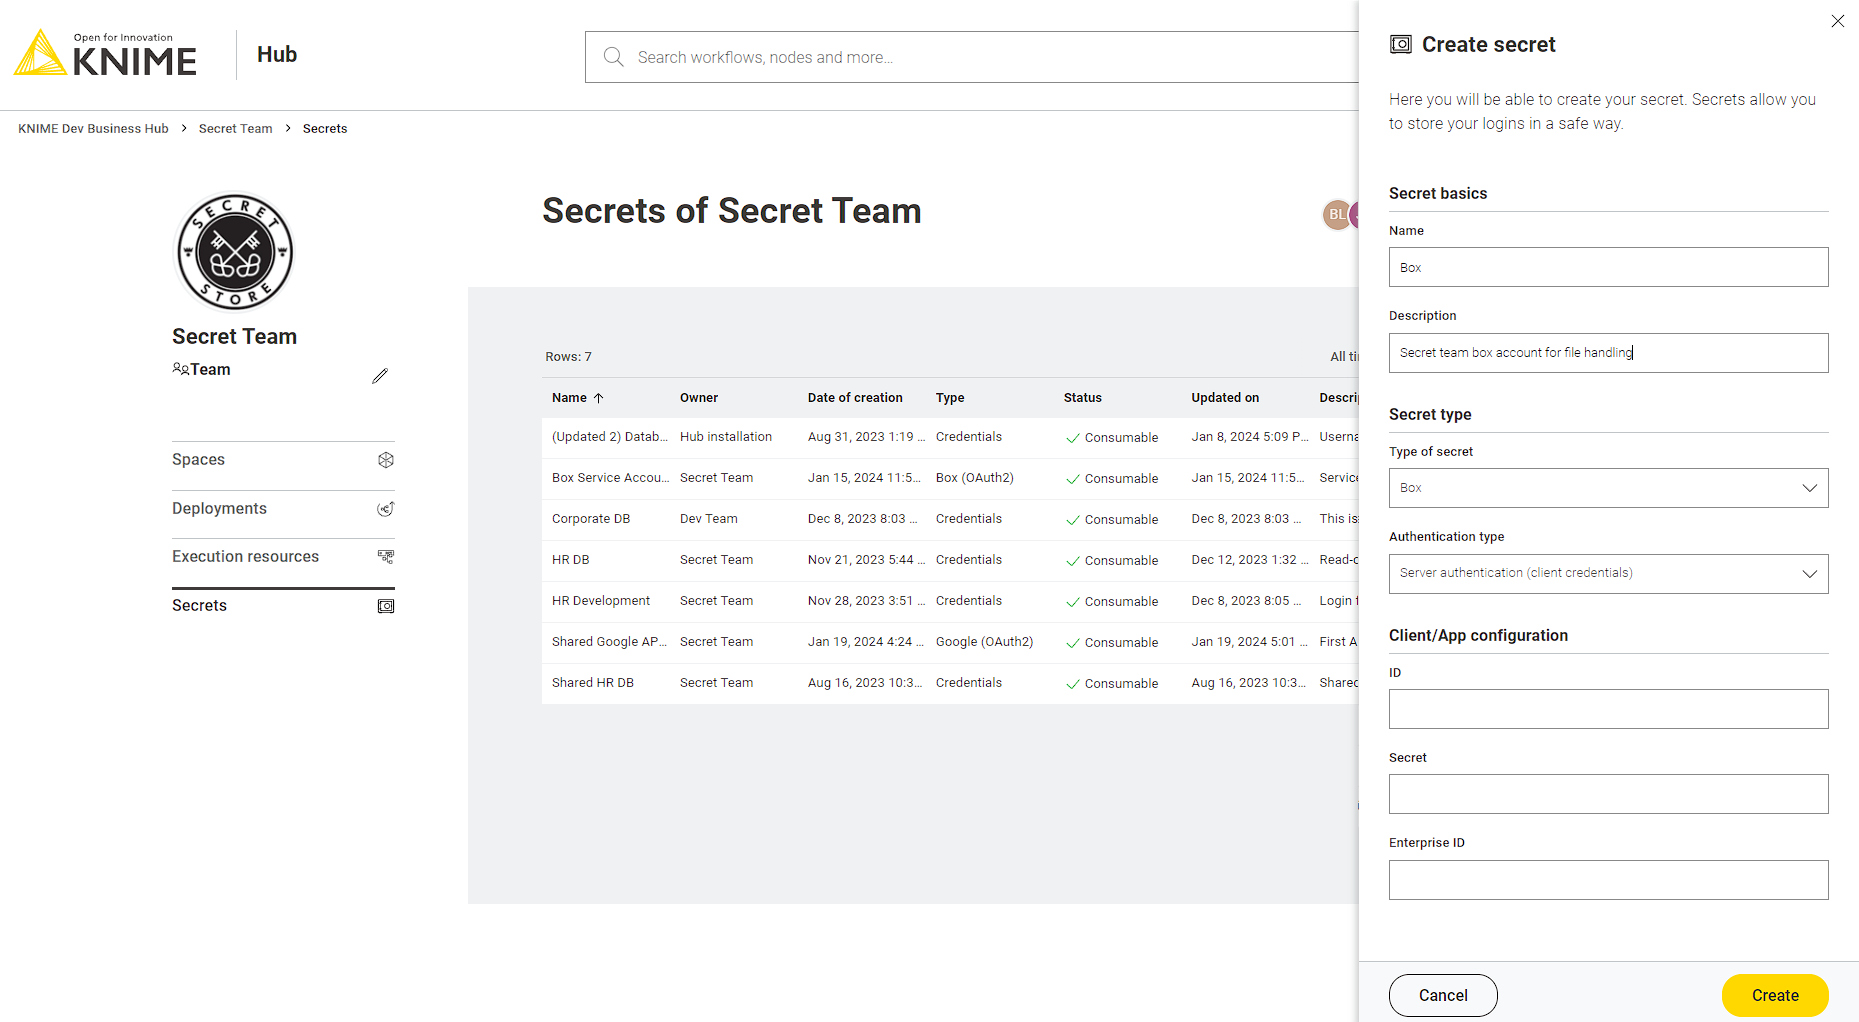
The Box secret type allows you to connect to Box e.g. in order to manage your files using the Box File Handling Extension. Prior creating one of these secret types you need to create a Custom App in Box. Depending on the selected authentication type of your App you must select one of the authentication types described in the following sections.
For each of the following Box secret types the Secrets Retriever node will return a Credential output port with the Box access token (for more details see the Using secrets section). Each selected secret will result in a dedicated Credential output port. This port can be used as input for the Box Connector node which allows you to manage your files in Box.
User authentication
This type is used for the user authentication type in Box which supports OAuth 2.0 based user authentication.
This type requires you to log in to Box to obtain a valid access token prior using the secret. For more details on how to log in see the Interactive login section.
| Since this is a personal login this authentication type is only available for KNIME Hub users. |
When you setup the Box App
you have to add the following
redirect URI to the
OAuth 2.0 Redirect URI section in the Apps Configuration page https://api.<base-url>/oauth2-flows/callback
where <base-url> is your Business Hub instance URL, e.g. hub.example.com. Note that the hostname must be
prefixed with api. in the redirect URI.
For more details on how to setup a User authentication (OAuth 2.0) App see the
Box documentation.
For this secret type you can specify:
-
Client/App ID: is the client ID of the application specified in the OAuth 2.0 Credentials section of your App Configuration
-
Client/App Secret: is the client secret of the application specified in the OAuth 2.0 Credentials section of your App Configuration
Server authentication
This type is used for the server authentication (client credentials grant) which is recommended to use for deployed KNIME workflows. For more details on how to setup an application with Client Credentials Grand in Box click here.
For this secret type you can specify:
-
Client/App ID: is the client ID of the application specified in the OAuth 2.0 Credentials section of your App Configuration
-
Client/App Secret: is the client secret of the application specified in the OAuth 2.0 Credentials section of your App Configuration
-
Enterprise ID: is the Enterprise ID as displayed in the General Settings page of your App
The Google secret type allows you to connect to various Google services e.g. manage your files in Google Drive via the Google Connectors Extension or Google Cloud Storage using the Google Cloud Storage Extension as well as working with your data in Google BigQuery using the BigQuery Extension.
For each of the following Google secret types the Secrets Retriever node will return a Credential output port with the Google access token (for more details see the Using secrets section). Each selected secret will result in a dedicated Credential output port. This port can be used as input for various nodes such as the Google Driver Connector which allows you to manage your files in Google Drive or the Google BigQuery Connector which allows to manage your data in Google BigQuery.
Interactive
This type is used for interactive authentication using your personal Google login.
| This authentication type is only available for personal secrets of KNIME Hub users and not for team secrets. |
Prior creating an interactive secret you need to create an OAuth consent screen and OAuth client ID for a Desktop app. For more details about authentication in general and further details how to setup the OAuth consent screen and client id see the Google documentation.
This type requires you to login to Google to obtain a valid access token prior using the secret. For more details on how to log in see the Interactive login section.
For this secret type you can specify:
-
Client/App ID file: is the OAuth client ID secret file (for an example file click here)
-
Scopes of access: are the scopes to request during login (for more details see the OAuth2 scopes section)
Service account
This type is used for a service account which is recommended to use for deployed KNIME workflows. For more details on how to setup a service account in Google click here.
For this secret type you can specify:
-
Authentication key type: is either JSON (recommended) or P12 format
-
JSON or P12 file: depending on the selected key type please either upload your JSON or P12 key file (See the Google documentation on how to create one)
-
Service account email: is the email address of the service account (only available for P12 type)
-
Scopes of access: are the scopes to request during login (for more details see the OAuth2 scopes section)
Standard OAuth2 scopes for Google services
This section lists the different scopes for most common Google services you can access from within KNIME Analytics Platform.
For more details and a complete list of all the available scopes see the Google documentation. To use one of the common services mentioned below copy the URL next to the service and paste it into the Scopes of access section of the secret.
-
Google Analytics (read-only):
https://www.googleapis.com/auth/analytics.readonly -
Google BigQuery:
https://www.googleapis.com/auth/bigquery -
Google Drive (read-only):
https://www.googleapis.com/auth/drive.readonly -
Google Drive:
https://www.googleapis.com/auth/drive -
Google Sheets (read-only):
https://www.googleapis.com/auth/spreadsheets.readonlyandhttps://www.googleapis.com/auth/drive.readonly -
Google Sheets:
https://www.googleapis.com/auth/spreadsheetsandhttps://www.googleapis.com/auth/drive.readonly
Microsoft
The Microsoft secret types allow you to connect to the Microsoft/Azure cloud platform with nodes from the following extensions:
For each of the following secret types the Secrets Retriever node will return a Credential output port that contains either an OAuth2 access token, or an Azure Storage credential (for more details see the Using secrets section). Each selected secret will result in a dedicated Credential output port. This port can be used as input for nodes from the above extensions.
Interactive
This type supports an interactive login into the Microsoft/Azure cloud with your Microsoft identity.
| This authentication type is only available for personal secrets of KNIME Hub users and not for team secrets. |
Prior to using the secret, you to need to perform an Interactive login to obtain a valid access token. Note that at some point the login will expire and a new login is necessary, hence this secret type is not well-suited for scheduled or otherwise automated workflows on KNIME Hub.
As a prerequisite to configuring the secret, an App in Azure Entra ID (formerly Azure Active Directory) needs to be registered (see How-tos section).
For this secret type you can specify:
-
Client/App configuration: enter the Application ID of the previously registered Azure App
-
Scopes of access: enter a list of scopes, which limit what the resulting secret can be used for, e.g. only to access SharePoint; during the interactive login you may have to consent to the requested scopes (for more details see the OAuth2 scopes section).
-
Authorization endpoint: either use the default URL, or enter a custom one, which allows to sign into a specific Azure tenant
| In technical terms, the login is based on the OAuth 2.0 Authorization Code flow. The interactive login allows KNIME Hub to obtain and store temporary access and refresh tokens on behalf of the user. KNIME Hub refreshes and returns the acquired access token whenever the secret is used in a workflow. The selected scopes correspond to delegated permissions in Microsoft/Azure. Consult the respective how-to for more information on how to correctly set up an Azure App. |
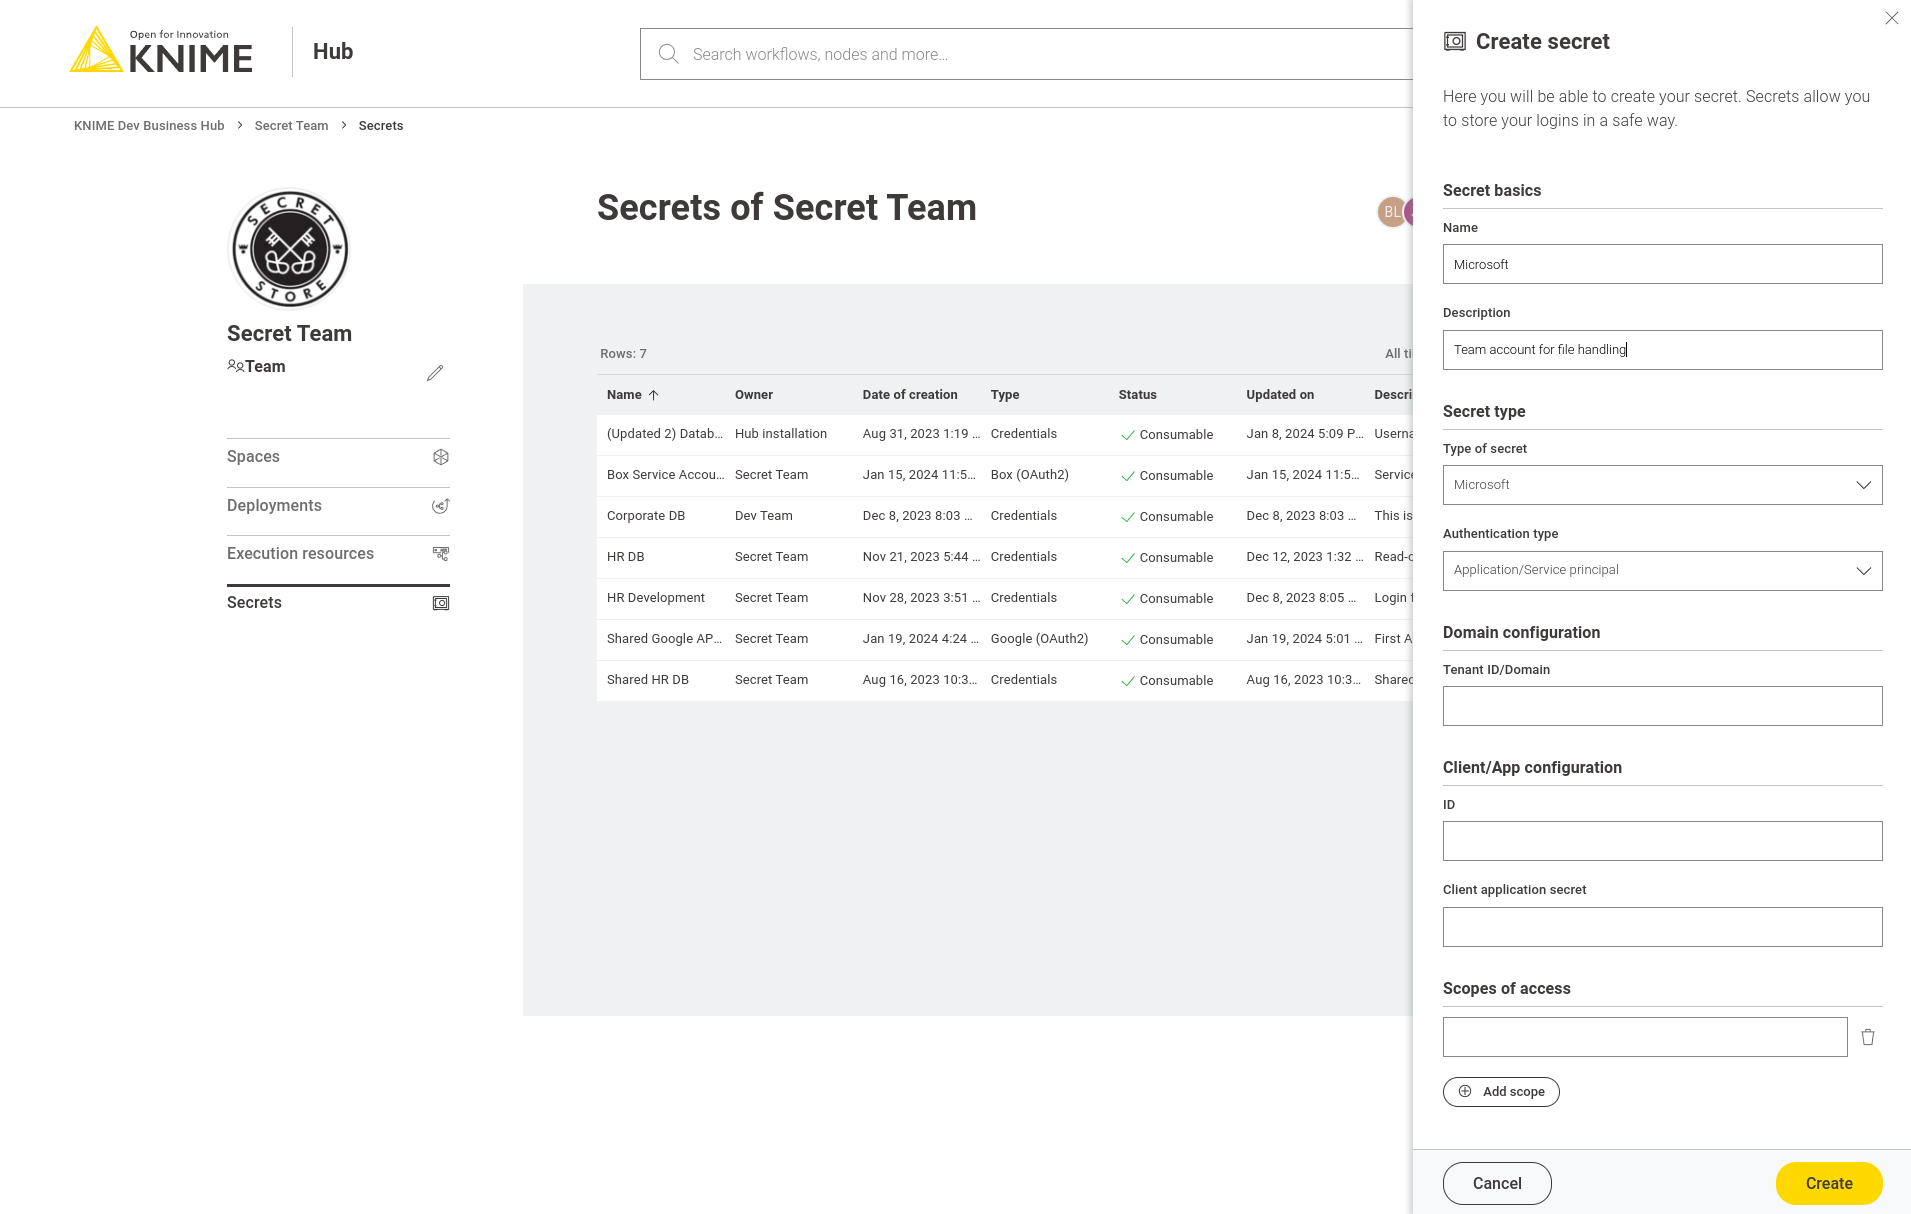
Application/Service principal
This type supports authenticating as an application or service principal in the Microsoft/Azure cloud. This is well-suited for scheduled or otherwise automated workflows on KNIME Hub, where no user is present to interactively login.
As a prerequisite, an App in Azure Entra ID (formerly Azure Active Directory) needs to be registered. Please see the respective how-to.
For this secret type you can specify:
-
Domain configuration: specify the Azure tenant to access, either in ID format, e.g. faa16e7e-a95d-4117-b2c7-06ffc6e68acb, or as a domain name, e.g. contoso.onmicrosoft.com
-
Client ID and secret: enter the client ID and secret of the previously registered Azure App
-
Scopes of access: enter a list of scopes, which limit what the resulting secret can be used for, e.g. only to access SharePoint (for more details see the OAuth2 scopes section)
| In technical terms, the authentication is based on the OAuth 2.0 Client Credentials flow. KNIME Hub requests a new access token whenever the secret is used in a workflow. The selected scopes correspond to application permissions in Microsoft/Azure. Consult the respective how-to for more information on how to correctly set up an Azure App and application permissions. |
Username/Password
This type supports authenticating as a user in the Microsoft/Azure cloud. It can be used for scheduled or otherwise automated workflows on KNIME Hub, where no user is present to interactively login. However, note that this authentication type is discouraged by Microsoft. It does not support accounts 2FA/MFA and has further limitations.
As a prerequisite, an App in Azure Entra ID (formerly Azure Active Directory) needs to be registered. Please see the respective how-to.
For this secret type you can specify:
-
Credentials: specify your Microsoft/azure username and password.
-
Client/App configuration: enter the client ID of the previously registered Azure App
-
Scopes of access: enter a list of scopes to limit what the resulting secret can be used for, e.g. only to access SharePoint (for more details see the OAuth2 scopes section)
-
Authorization endpoint: either use the default URL, or enter a custom one, which allows to sign into a specific Azure tenant
| In technical terms, the authentication is based on the OAuth 2.0 Resource Owner Password Credentials flow. KNIME Hub requests a new access token whenever the secret is used in a workflow. The selected scopes correspond to delegated permissions in Microsoft/Azure. Consult the respective how-to for more information on how to correctly set up an Azure App and delegated permissions. |
Azure Storage shared access signature (SAS)
This type allows to authenticate against Azure Blob Storage/Data Lake Storage Gen2 with a Shared Access Signature (SAS). A SAS grants restricted and time-limited access to an Azure Storage container or objects within. See here for further documentation.
For this secret type you only need to specify a SAS URL. Consult the respective how-to for how to create a SAS URL.
Standard OAuth2 scopes for Azure services
This section lists the different scopes for most common Azure services you can access from within KNIME Analytics Platform. For more details and a complete list of all the available scopes see the Microsoft documentation. To use one of the common services mentioned below copy the scope next to the service and paste it into the Scopes of access section of the secret.
-
Sharepoint files and list items (Read):
Sites.Read.AllThis permission allows the token to be used for reading files and list items stored on SharePoint Online. Note that access to any specific SharePoint site needs to be additionally granted to the user by that site. -
Sharepoint files and list items (Read/Write):
Sites.ReadWrite.AllThis permission allows the token to read and write files as well as list items stored on SharePoint Online. This includes creating and deleting files, but not lists. Note that access to any specific SharePoint site needs to be additionally granted to the user by that site. -
Sharepoint files, lists and list items (Read/Write):
Sites.Manage.AllThis permission allows the token to read and write files, lists as well as list items stored on SharePoint Online. This includes creating and deleting files as well as lists. Note that access to any specific SharePoint site needs to be additionally granted to the user by that site. -
User Groups (Read) (Requires admin consent):
Directory.Read.AllThis permission is required to browse the Office 365 groups that the logged in user is a member of, when selecting a SharePoint team site to connect to. Note that this permission can only be granted by a Entra ID admin. -
User Groups (Read) (Limited):
User.ReadThis permission is required to browse the Office 365 groups that the logged in user is a member of, when selecting a SharePoint team site to connect to. This permission does not require consent by an admin, but cannot access the human-readable names of Office 365 groups, hence only technical IDs will be displayed. -
Azure Blob Storage/Azure Data Lake Storage Gen2: Requests the user_impersonation permission for a specific Azure storage account. This permission allows the token to access data stored in that storage account. Note that access to any specific data in that account needs to be additionally granted to the user, before any access is possible.
-
Azure SQL Database: Requests the user_impersonation permission. This permission allows the token to access the Azure SQL API. Note that access to any specific databases/resources needs to be additionally granted to the user, before any actual access is possible.
-
Power BI:
Dataset.ReadWrite.AllandWorkspace.Read.All.
How-tos
Create Azure App for user authentication
This how-to describes how to set up an Azure App, so that it can be used with secrets of type Microsoft — Interactive and Microsoft — Username/Password.
Prerequisites:
-
Permission to register apps in Azure Entra ID. Azure admins generally have this permission, but it can also be provided through roles such as the Application Administrator or Application Developer (see here).
Steps:
-
Log into the Azure Portal
-
Navigate to Azure Entra ID → App registrations
-
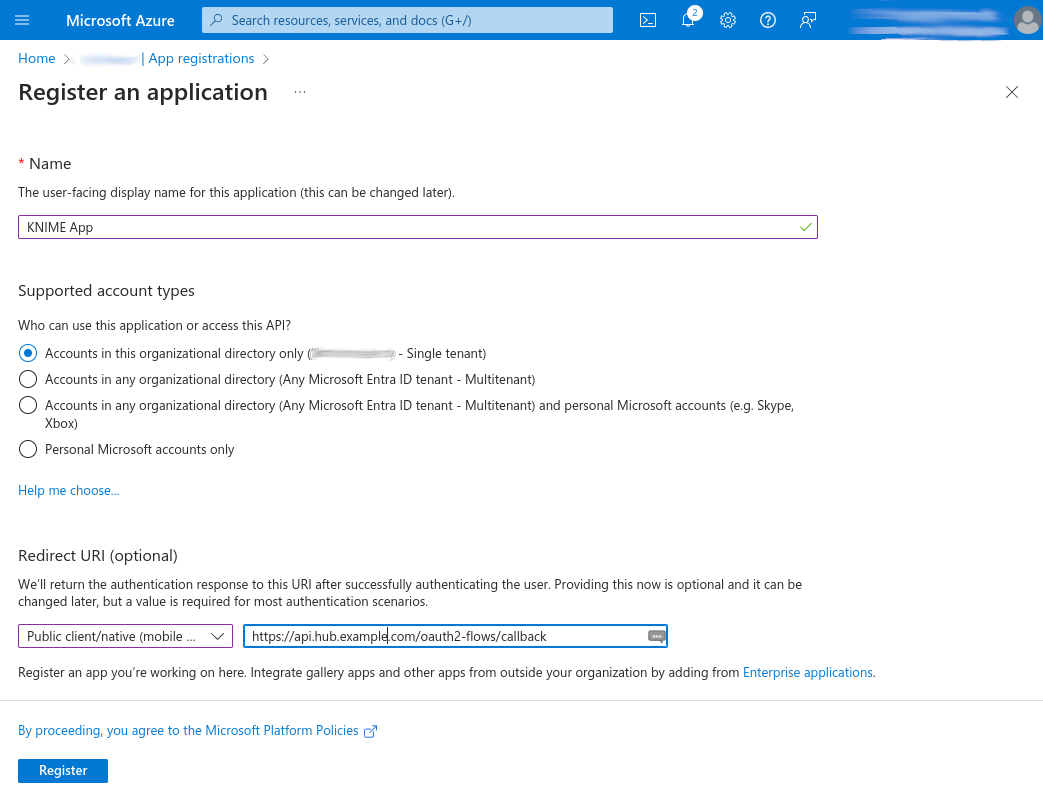
Register a new app:
-
Click New registration
-
Enter a name, and choose the supported account type (Single tenant in most cases)
-
Under Redirect URI:
-
Select the platform called Public client/native (mobile & desktop)
-
Enter
https://api.<base-url>/oauth2-flows/callbackwhere<base-url>is your Business Hub instance URL, e.g.hub.example.com. Note that the hostname must be prefixed withapi.in the redirect URI.
-
-
Click Register
-
-
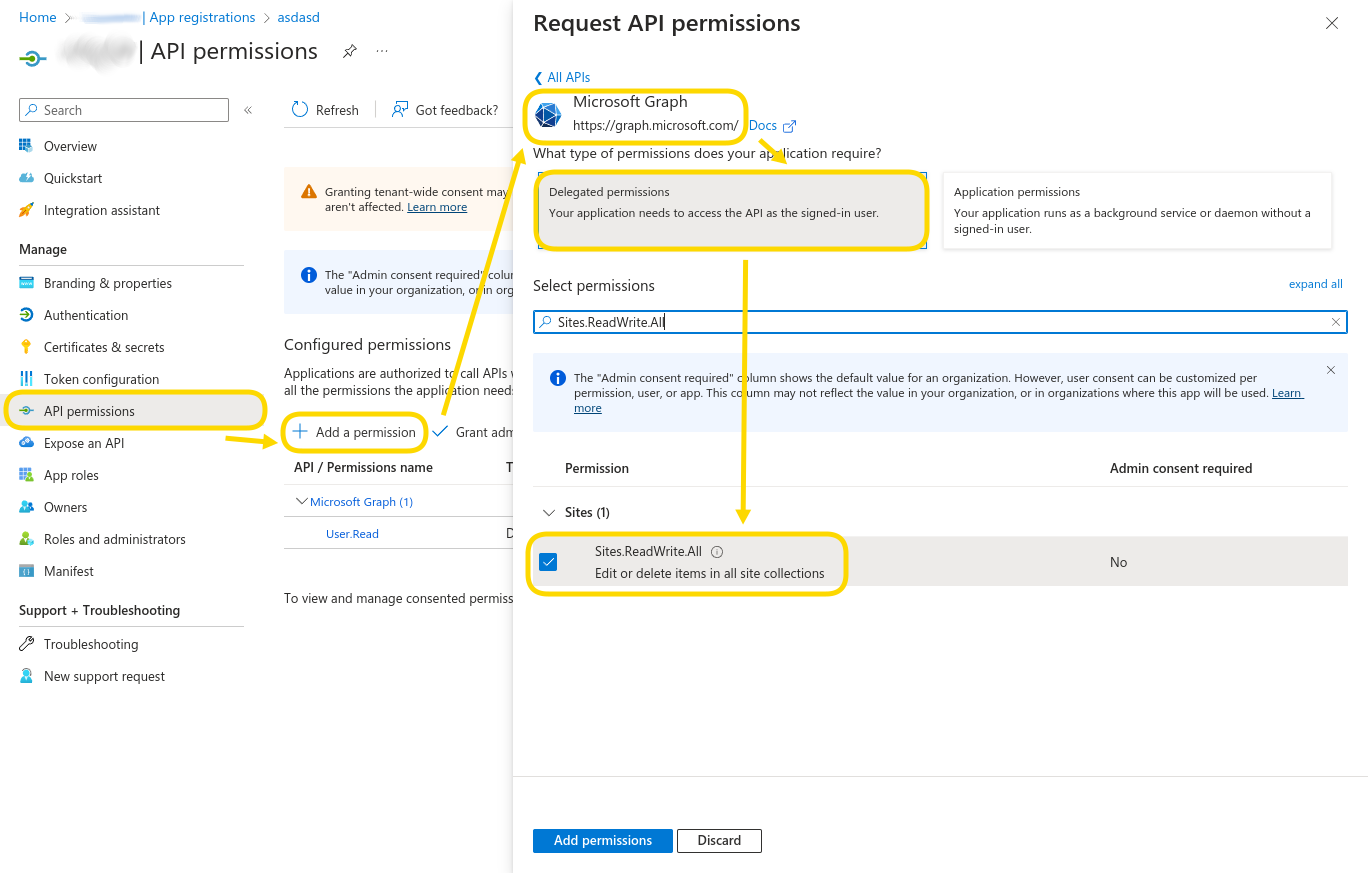
Add delegated permissions:
-
In your app, navigate to API permissions
-
Click Add a permission to add the necessary permissions that the app should have. For example, to allow read/write access to SharePoint choose Microsoft Graph → Delegated permissions → Sites → Sites.ReadWrite.All. The required permissions depend on how you plan to use the app in KNIME workflows (for a list of common scopes see the OAuth2 scopes section).
-
Click Add permissions
-
If shown, click Grant admin consent for … to give admin consent for all added API permissions. In this case users will not be prompted for consent during interactive authentication anymore.
-
-
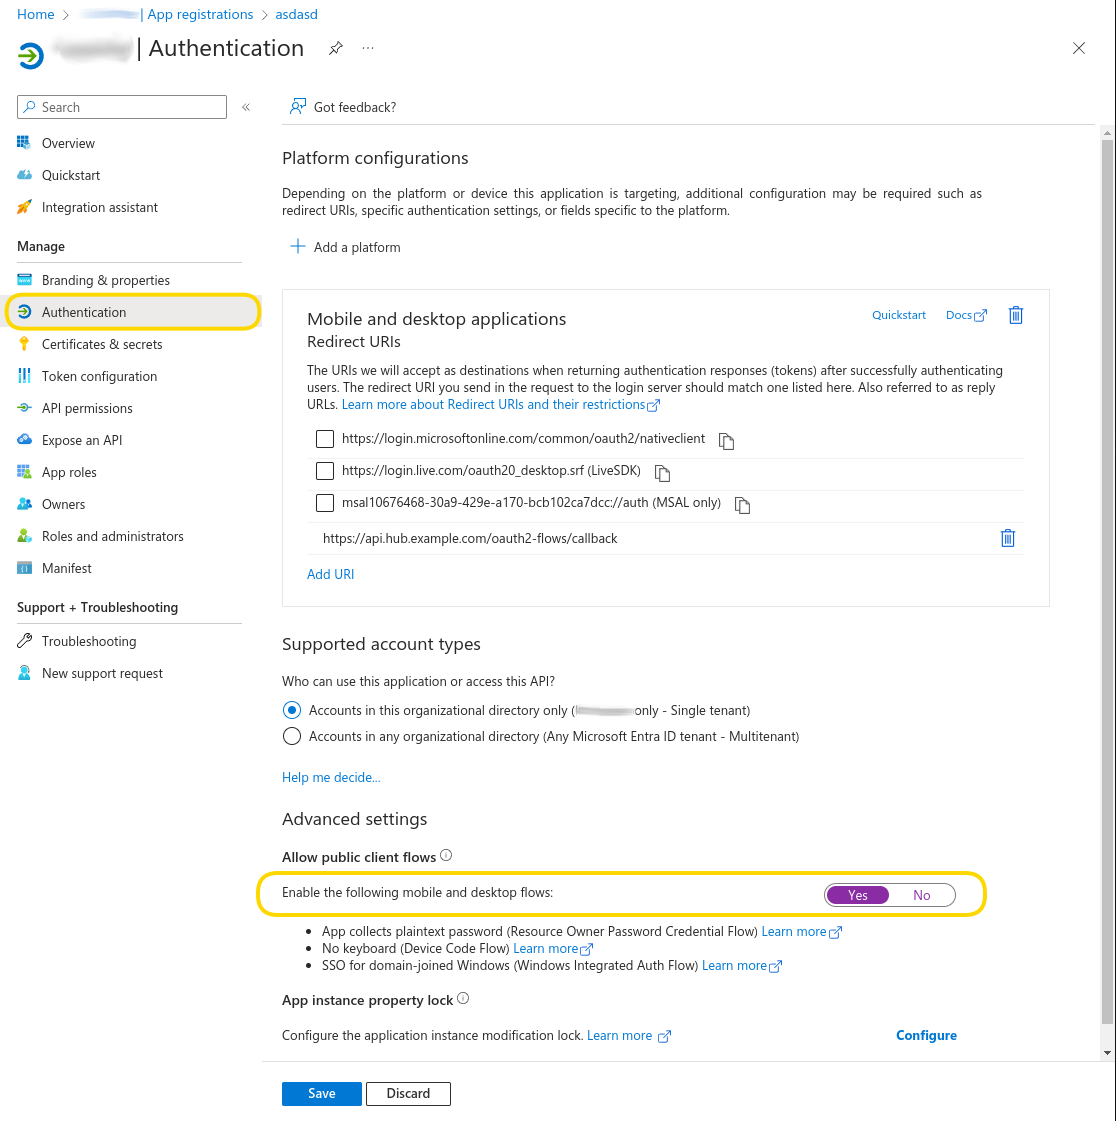
Only if you need to use the app with secrets of type Microsoft — Username/Password (discouraged):
-
In your app, navigate to Authentication → Allow public client flows
-
Set the slider to Yes
-
Click Save
-
Navigate to API permissions, add all required API permissions and consent to them as in step 6 above.
-
-
Retrieve the application ID:
-
In your app, navigate to Overview
-
Copy the Application (client) ID
-
-
In your KNIME Hub secret(s):
-
Paste the application ID into the Client/App ID field
-
| API permissions, also called scopes, act as a upper limit on what can be done with the acquired access token. On top of that, most services in the Microsoft/Azure platform impose additional permission checks based on the user’s roles and groups. Examples are SharePoint permissions or Azure RBAC. |
Create Azure App for application/service principals
This how-to describes how to set up an Azure App, so that it can be used with secrets of type Microsoft — Application/Service principal.
Prerequisites:
-
Permission to register apps in Azure Entra ID. Azure admins generally have this permission, but it can also be provided through roles such as the Application Administrator or Application Developer (see here).
Steps:
-
Log into the Azure Portal
-
Navigate to Azure Entra ID → App registrations
-
Register a new app:
-
Click New registration
-
Enter a name, and choose the supported account type (Single tenant in most cases). A redirect URI is not required.
-
Click Register
-
-
Add application permissions:
-
In your app, navigate to API permissions
-
Click Add a permission to add the necessary permissions that the app should have. For example, to allow read/write access to SharePoint choose Microsoft Graph → Application permissions → Sites → Sites.ReadWrite.All. The required permissions depend on how you plan to use the app in KNIME workflows (for a list of common scopes see the OAuth2 scopes section).
-
Click Add permissions
-
Click Grant admin consent for … to give admin consent for all added API permissions.
-
-
Create an application secret:
-
In your app, navigate to Certificates & secrets → Client secrets
-
Click New client secret_
-
Enter a description and expiry
-
Click Add
-
Copy the Value of the newly created client secret, as it is only shown once after creation.
-
-
Retrieve the application ID:
-
In your app, navigate to Overview
-
Copy the Application (client) ID
-
-
In your KNIME Hub secret(s):
-
Paste the application ID into the Client/App ID field
-
Paste the client secret into the Client/App Secret field
-
| API permissions, also called scopes, act as a upper limit on what can be done with the acquired access token. On top of that, some services in the Microsoft/Azure platform impose additional permission checks based on roles and group memberships of the service principal. An example of this is Azure RBAC. |
Create Azure Storage SAS URL
This how-to describes how to create an Azure Storage SAS URL, so that it can be used with secrets of type Azure Storage shared access signature (SAS). A SAS URL grants restricted and time-limited access to an Azure Storage container or objects inside a container.
Prerequisites:
-
Permission to create SAS URLs, depending on the type of SAS to create. See here for an overview.
To create an Azure Storage SAS URL for a container
-
Log into the Azure Portal
-
Navigate to Storage Accounts → Your Account → Containers → Your Container → Shared access tokens
-
Enter signing method, permissions and expiry information
-
Click Generate SAS token and URL
-
Copy the Blob SAS URL
-
In your KNIME Hub secret(s): Paste the copied Blob SAS URL into the SAS URL field
The steps to create SAS URL for a specific object inside a container are similar. Navigate to the object, click on it and then choose Generate SAS.