
Install Business Hub on Existing Cluster
Introduction
KNIME Business Hub is a customer-managed KNIME Hub instance.
Once you have a license for it and proceed with installation you will have access to Hub resources and will be able to customize specific features, as well as give access to these resources to your employees, organize them into Teams and give them the ability to manage specific resources.
Once you have access to a KNIME Business Hub instance available at your company, you can use KNIME Business Hub to perform a number of tasks such as:
- collaborate with your colleagues,
- test execution of workflows,
- create and share data apps, schedules, and API services
- keep track of changes with versioning.
The following is a guide for installing KNIME Business Hub into an existing cluster.
To administrate a KNIME Business Hub instance please refer instead to the following guide:
Installation planning
KNIME Business Hub supports the following types of installations:
- Installation by downloading container images from public image registries: This type of installation requires an environment with externally accessible networks. This is a standard installation process and is documented in the KNIME Business Hub installation section. Just follow the steps here, after making sure you fulfill the prerequisites in the next section.
- Airgapped installation: This type of installation is required for installing into airgap environments, or into an environment that, even though has a network with external access, is not allowed to download container images from public image registries. If your environment does not have access to external networks you can follow the steps in the airgapped installation section.
Software prerequisites
- kubectl: only required if installing into an existing cluster, or when remotely managing a cluster. When installing the embedded cluster with kURL
kubectlis automatically installed on the host machine. - Helm: only required if uninstalling KNIME Business Hub.
Hardware prerequisites
This guide covers the installation of KNIME Business Hub.
Linux Kernel versions
- Avoid Linux Kernels 6.12-6.14 due to known CPU and memory issues. This affects Ubuntu 24.04 AMIs, RHEL, Amazon Linux, and managed clusters.
- For Amazon Linux 2023 only Linux Kernel 6.1 is supported. Check your kernel version with
uname -rbefore installation.
Note that only x86, x64 and x86_64 processors are supported.
Here are some recurrent terms used in the next sections:
- Hub core: Refers to Hub core services that are responsible for all functionalities of Business Hub besides execution. Including authentication services, UI, database services, etc.
- Hub execution: Refers to executor resources, e.g. executor pod resources.
- Disk: The attached storage size requirement for the persistent components of Business Hub. Used to provide storage to databases, store data files for KNIME workflows, etc.
The CPU and Memory requirement amounts shown in the following chapters of this document refer to the “Total Capacity” of the nodes. Hence not all of these resources are allocatable for Kubernetes workloads, some needs to be available or reserved for system-related-services and should not be allocated, or reserved for Kubernetes related workloads. By default usually only some Memory is reserved from the total capacity, therefore if there are no reservation for CPU vCores, it is advised to either reserve or leave some vCores un-reserved by Kubernetes workloads. The reserved Memory for system-related-services is usually 100 MB by default for Kurl installations.
The "vCore" term used in this guide stands for virtual cores. They are a measure of the processing power allocated to a virtual machine (VM) or a computing instance in cloud computing environments. KNIME makes no representation about how the vCores licensed for execution are correlated or mapped onto the physical system where the software is running. The same principle also extends to the vCores necessary for operating core services.
The CPU must be from 2011 or newer, as older processors may lack required instruction sets such as SSE4.2 (needed by Keycloak) and AVX (needed by the event-dispatcher).
Single-node installation
Here we provide recommended requirements for single-node installations.
KNIME’s advice is to strive to meet the recommended system requirements for better performance and more scalability.
Enterprise Plan
Using an Enterprise license provides the possibility to set the desired amount of vCores.
Recommended
CPU: 28+ vCores total
- Hub Core: 10 vCores
- Hub Execution: 16 vCores
Memory: 64 GB+
- Hub Core: 24 GB
- Hub Execution: 40 GB+ available memory to be allocated for executors
Disk: 500GB+
Networking prerequisites
Network Ports:
- 80 (HTTP)
- 443 (HTTPS)
- 22 (SSH) ADMIN USE ONLY
- 6443 (kubectl) ADMIN USE ONLY
- 8800 (KOTS Admin Console) ADMIN USE ONLY
Security Warnings:
- Ports 22, 6443, and 8800 are vulnerable access points for a KNIME Hub installation. If a malicious actor gained access to any of those ports, they would be able to perform destructive actions on the cluster and/or gain access to sensitive configuration. Access to these ports must be restricted to only the IP address(es) of the machine(s) which will administer the installation.
- Security-Enhanced Linux (SELinux) is not currently supported. If enabled, the installer script will notify the user via a prompt and disable SELinux before proceeding.
The following domains need to be accessible from servers performing online installations:
| Trusted Host | Domain |
|---|---|
| KNIME | *.knime.com |
| Replicated | See the Firewall Openings for Online Installations guide. |
Also, in order to be able to pull Docker images the following Docker registries need to be accessible from servers performing online installations:
docker
docker.elastic.co
docker.io
ghcr.io
quay.io
registry.k8s.io (for this domain image layers are pulled from the domain below)
*.pkg.dev
registry.opensource.zalan.do
proxy.replicated.com
cr.fluentbit.io
Some features in KNIME Business Hub, e.g. the job viewer, use websockets. If an external proxy or load balancer is used it needs to be websocket compatible.
Distribution specific prerequisites
The installation on existing Kubernetes clusters is only available for Enterprise edition licenses.
Supported Kubernetes distributions
- kURL
- AKS
- EKS
- GKE
Linux Kernel versions
- Avoid Linux Kernels 6.12-6.14 due to known CPU and memory issues. This affects Ubuntu 24.04 AMIs, RHEL, Amazon Linux, and managed clusters.
- For Amazon Linux 2023 only Linux Kernel 6.1 is supported. Check your kernel version with
uname -rbefore installation.
Installing KNIME Business Hub on Highly-Available (HA) Clusters
Overview
KNIME Business Hub can be installed on existing Highly Available (HA) Kubernetes clusters, provided the cluster infrastructure is provisioned and maintained by the customer.
KNIME does not provide documentation or support for installing or managing HA Kubernetes clusters or distributed storage backends. Customers are expected to prepare the infrastructure before installing KNIME Business Hub.
This section outlines the prerequisites, supported configurations, and recommendations for deploying KNIME Business Hub components in HA environments.
Understanding High Availability in KNIME Business Hub
KNIME Business Hub supports partial high availability within the boundaries of a Kubernetes-based deployment. Work is ongoing to improve high availability support within KNIME Business Hub.
What HA means in KNIME Business Hub
- An HA Kubernetes control-plane to ensure continuous cluster orchestration
- Automatic pod failover and restarts using Kubernetes' native features (Deployments, StatefulSets)
- Support for horizontal scaling and replica configuration for Business Hub services
- Support for backing up critical data and recovery of data by restoring from backups.
What KNIME Business Hub does not provide
Full redundancy across all services — Certain components still have single points of failure, including:
- MinIO - used for blob storage
- Postgres - relational database for Hub services
- KeyCloak - IAM service, relies on Postgres
- Apache Artemis - messaging system used by Hub execution services
- NATS - messaging system for internal notifications and job events
- ElasticSearch - search index and query system; can be rebuilt on demand
Built-in disaster recovery — External tools and storage must be used for backup, replication, and recovery
KNIME Business Hub is designed to be resilient under typical infrastructure disruptions but does not guarantee zero downtime across all layers of the application stack.
HA-capable components in KNIME Business Hub
Several third-party components within KNIME Business Hub do support HA enabled deployments but are not configured for HA when deployed in Hub. Future KNIME Business Hub releases will support enabling high availability deployments of these components.
- Minio
- Postgres
- KeyCloak
- NATS
- ElasticSearch
Prerequisites
To install KNIME Business Hub in an HA environment, ensure the following are available:
- Kubernetes cluster with ≥3 nodes and an HA control plane
- Access to the KOTS Admin Console
Rook-Ceph is no longer recommended for new installations. If you are already using Rook-Ceph and can manage it independently, KNIME will continue supporting KNIME Business Hub in such environments under limited conditions. KNIME does not provide direct support for Rook-Ceph unless covered by a Professional Services agreement. All new HA deployments must use external or cloud-based storage systems.
Hub services and scaling
All KNIME Business Hub core services support:
- Horizontal scaling via Kubernetes
- Load balancing (via ingress or service mesh)
- Stateful workloads backed by resilient storage
Next steps
- Prepare your cluster infrastructure according to the requirements above
- Proceed with the installation using the KOTS Admin Console
KNIME Business Hub installation
For the commands demonstrated below, replace anything shown in <brackets> with real values.
If your environment does not have access to external networks you can follow the steps in the airgapped installation section.
Before you start:
The following supplemental install instructions assume that:
- The install is performed with access to the internet on an existing Kubernetes cluster (refer to this section to know which versions are supported)
- The Kubernetes cluster needs to have volume provisioner (CSI) installed
Istio can optionally be installed manually. Refer to the Istio section of this guide for installation instructions.
Additionally, the following steps also assume that namespaces, DNS entries and related TLS certificates are provisioned before proceeding with the install.
If you need to create namespaces manually please refer to the Create namespaces manually section.
If you want to use an existing Ingress controller, follow the instructions in the Use existing Ingress controller section.
Installing KOTS
The KOTS admin UI can be installed by running the following from a host machine where kubectl has already been configured to access the Kubernetes cluster
bash
curl https://kots.io/install/<version> | bash -s -- kubectl kots install knime-hubINFO
The currently supported <version> of KOTS is 1.125.2
When prompted, specify the desire namespace (i.e. kots, default, etc.) where you prefer the KOTS stack to run.
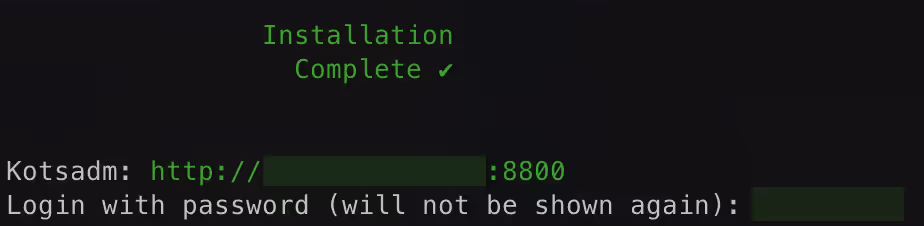
Once installation completes, a port-forward tunnel will be automatically opened to allow the browser to connect to the KOTS UI on https://localhost:8800.
When installing KOTS into an existing Kubernetes cluster, a tunnel will need to be opened anytime the KOTS UI needs to be accessed for security reasons.
The KOTS UI tunnel can be re-established by running:
kubectl kots admin-console -n kots(-n defines the namespace where KOTS is running and needs to be updated accordingly)
Alternatively, you can directly establish the port-forward tunnel to kots via:
kubectl -n kots port-forward service/kotsadm 8800:3000In case you need a Minimal RBAC Install you can find more information here.
Next steps in the installation
Once the following supplemental steps above have been completed, you should be able to proceed with the remainder of the install.
The high-level remaining steps include:
Uploading the Replicated license which will fetch the latest release of Business Hub
Enter appropriate configuration parameters in the KOTS Admin Console
- Specifically, note that there is a Networking section which may need updated. Please also note that many/most networking settings do not display unless the "View Advanced Settings" setting is enabled.
- Ensure the option is checked for "Enable TLS" if TLS is configured either at the Istio Ingress Gateway or at an external load balancer in front of the cluster.
- If Istio was manually installed prior to the installation, then Business Hub will need to be configured to not deploy Istio. This can be done by clicking the "Show Advanced Istio Configuration" option under Networking, then de-selecting the "Enable Istio" option in the Networking: Istio section that follows.
Save the changes, allow the pre-flight checks to run, then click Deploy and Wait for the installation to complete.
Access the KOTS Admin Console
Navigate to the KOTS Admin Console URL and take note of the password.
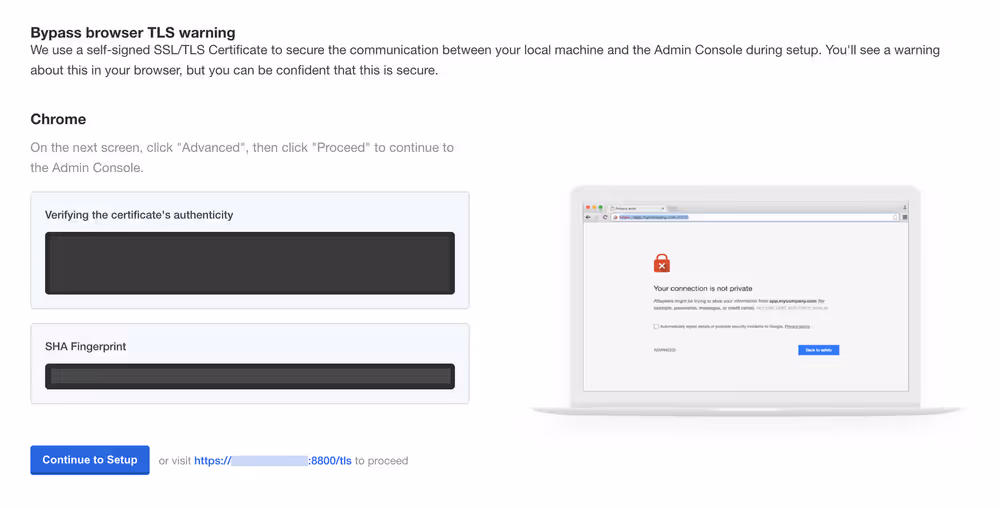
The first page that will display is a warning regarding Transport Layer Security (TLS) configuration. Follow the on-screen instructions to proceed.
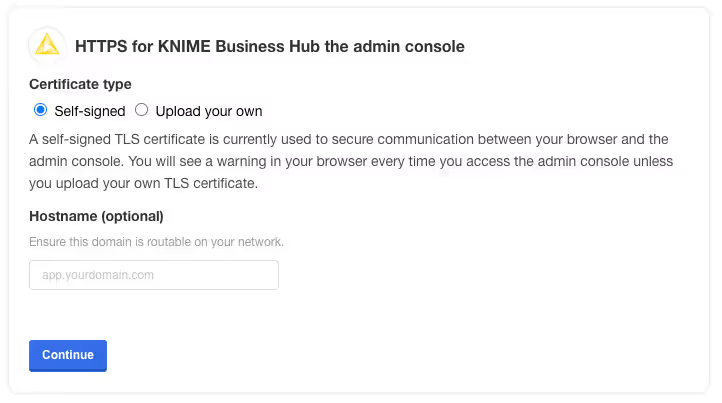
You will then be prompted to provide your own TLS cert to secure traffic to the admin console.
WARNING
Enable TLS to run KNIME Business Hub securely and to ensure all features work as expected. Without TLS, some HTTPS-only browser features are not available (for example, copying generated application passwords). Running without TLS can be useful for proof-of-concept or testing purposes, but avoid it in production. See Configure TLS for details.
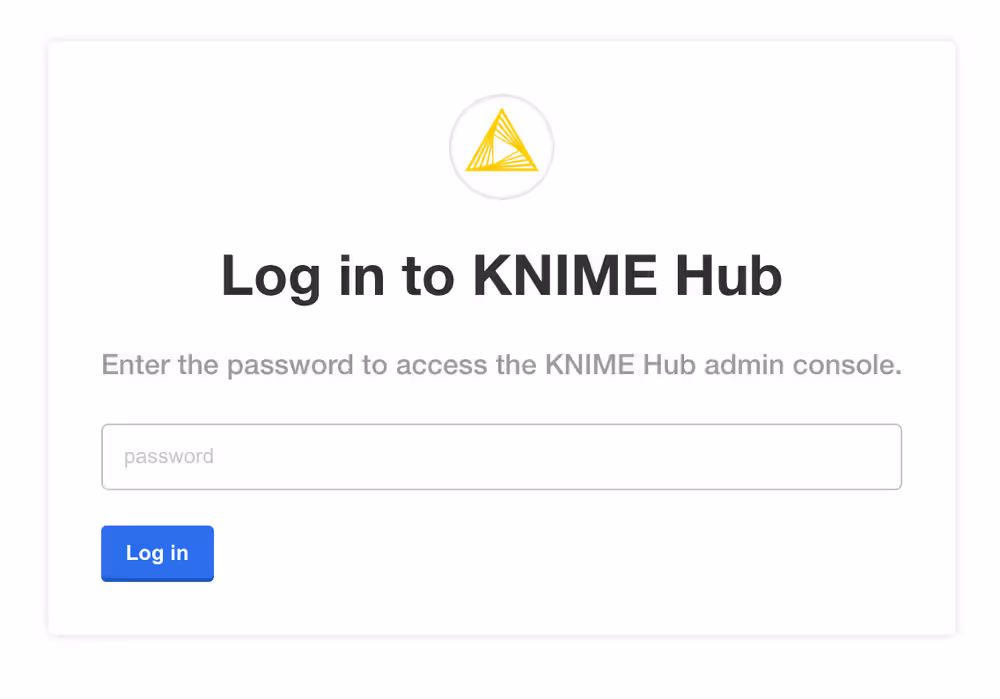
You should then see a prompt for a password. Enter the admin console password to proceed (this password can be changed later).
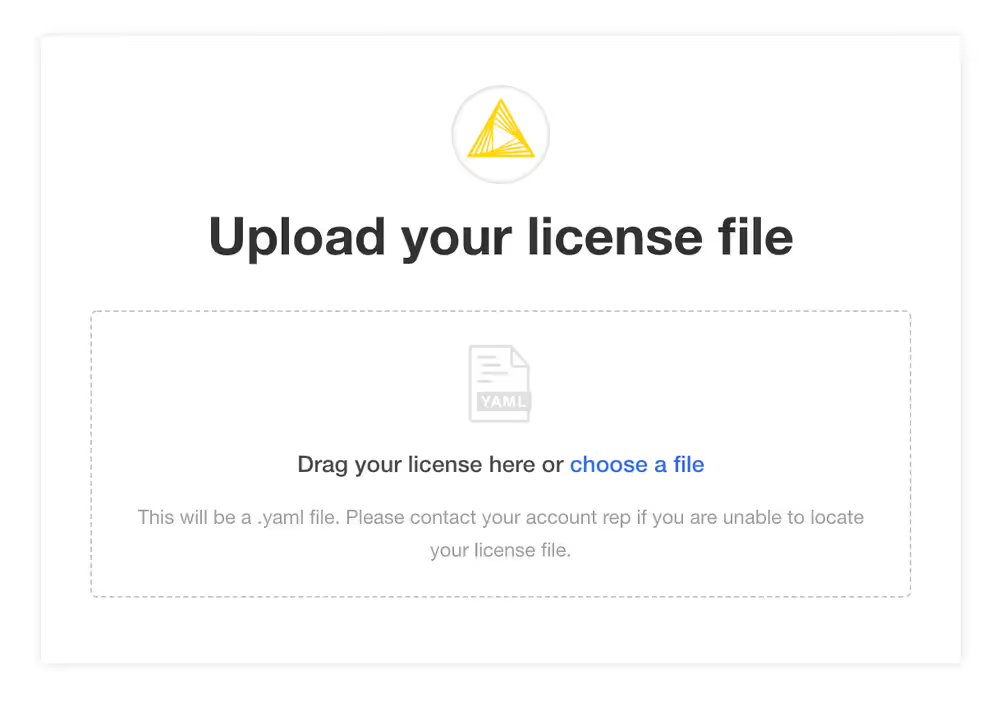
Provide a Replicated .yaml license file
After logging in, you should be prompted for a license file. This is the Replicated license file that your KNIME customer care representative has provided to you and has a .yaml extension. Please contact your customer care representative if you need assistance with your license.
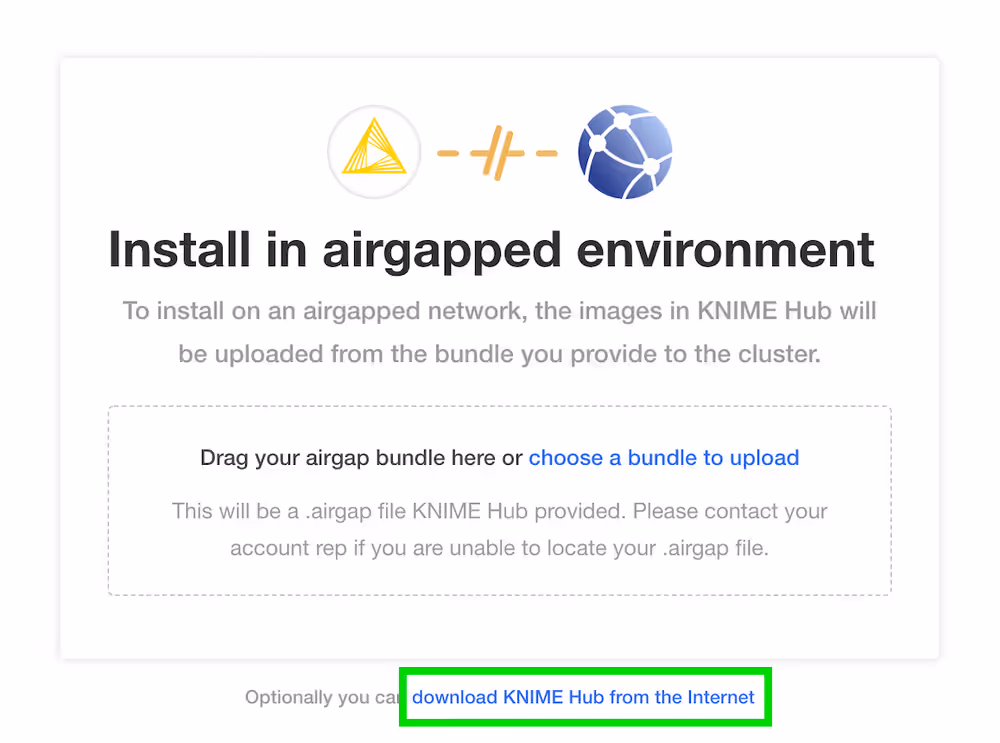
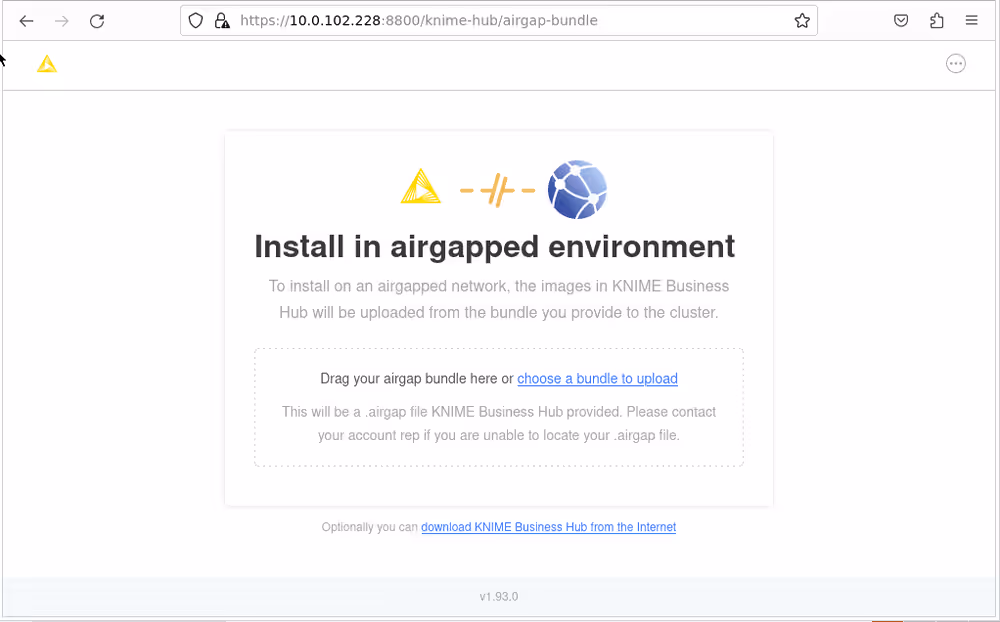
You may be prompted to install KNIME Business Hub into an “airgapped environment” if airgap installations are enabled on your license. This feature is particularly useful for installing KNIME Hub onto a machine that has no outbound internet access. Follow the instructions in the KNIME Business Hub airgapped installation section.
In most cases, it is fine to click the Download KNIME Hub from the Internet button if this prompt appears.
Configure the installation
If all prior steps were successful, you should now be prompted to configure your KNIME Business Hub installation. A number of settings will display for you to customize. Please note that all configuration settings in this view can be changed post-installation, except for the settings under “Initialization of KNIME Business Hub”.
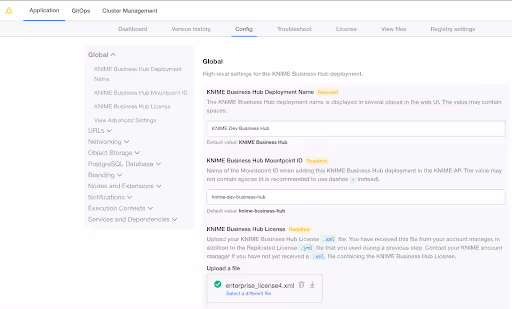
Global overview
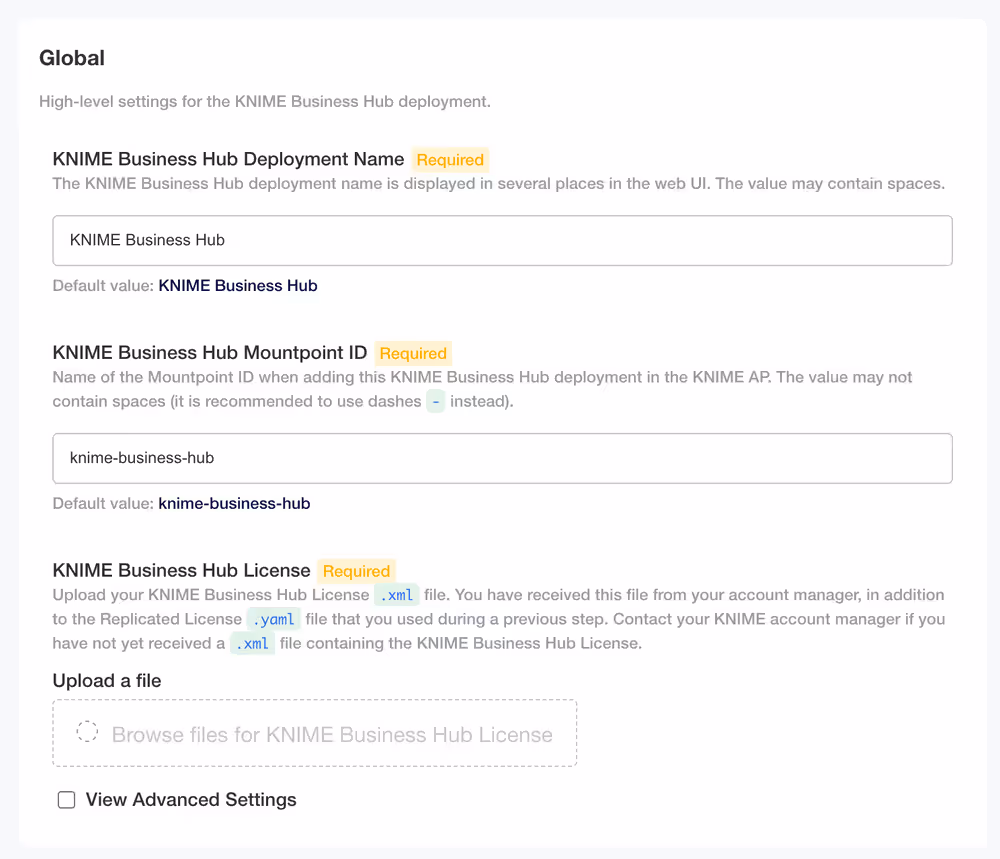
- KNIME Business Hub Deployment Name - This will be the name of your deployment for KNIME Business Hub
- KNIME Business Hub Mountpoint ID - This is where your KNIME Business Hub Mountpoint will be.
- KNIME Business Hub License - You should have received this from your account manager. This is a different file than the Replicated
.yamllicense file. The KNIME Business Hub license file is a.xmlfile that contains information needed for your installation. Upload it here by clicking Browse files for KNIME Business Hub License and navigating to the file on your local machine. - (OPTIONAL) select View Advanced Settings: - This will add additional fields underneath the Notifications section. This are explained in the Advanced options section.
Initialization of KNIME Business Hub
During the very first installation of KNIME Business Hub a number of one-time initializations are made, like creating an admin user, team, space, and execution context. Changing fields in this section after installation won’t have any effect on the deployed application. The admin user can change these after the installation in the browser.
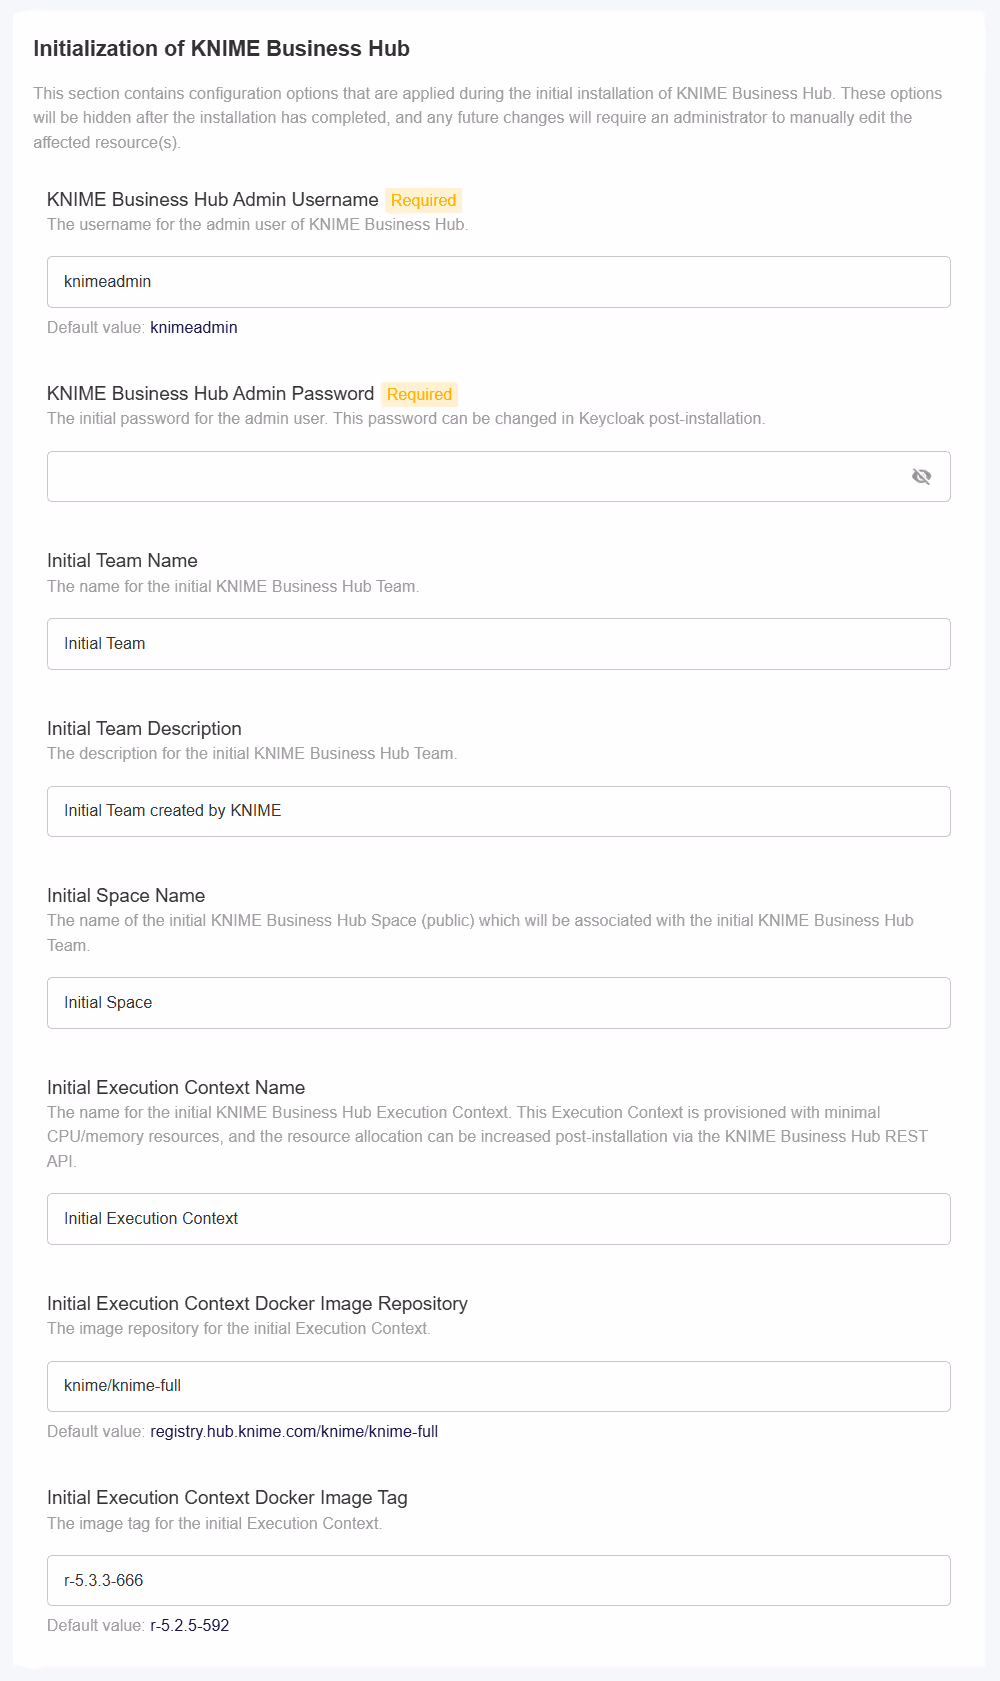
- KNIME Business Hub Admin Username - Choose a username for the KNIME Business Hub
- KNIME Business Hub Admin Password - Choose a password for the KNIME Business Hub
- Initial Team name - Choose a name for the initial team that KNIME Business Hub will create
- Initial Team description - Give a brief description of the Initial Team name
- Initial Space Name - This will be a public facing space name associated with the Initial Team Name
- Initial Execution Context Name - The name for the initial KNIME Execution Context Name
- Initial Execution Context Docker Image Repository - This is where the docker image link will go
- Initial Execution Context Docker Image Tag - This is where the initial Execution Context will go
There has been a change in the KNIME repository. In case it is pointing to registry.hub.knime.com/knime/knime-lts-full, shorten it to knime/knime-lts-full as shown in the screenshot. For a list of images and their tags from the KNIME repository, check the KNIME Business Hub Admin Guide.
The execution context has minimal resources (1CPU, 2GB memory) and a default executor provided by KNIME, to enable basic execution. For any production use of execution you should configure the execution context and assign more resources or use a different executor docker image.
Configure KNIME Business Hub URLs
URLs for KNIME Business Hub need to have the structure of:
Base URL
<base-url>(e.g.hub.example.com).The URL scheme (
http://orhttps://) should not be included in the Base URL.The
<base-url>must include the top-level domain (e.g..com), and cannot be an IP address.This is the URL you use to view the KNIME Business Hub in your browser.
Valid examples:
hub.example.comexample.com
Invalid examples:
https://hub.example.com/example.com/hubmyhub12.34.56.78
Subdomains
apps.<base-url>api.<base-url>ws.<base-url>auth.<base-url>storage.<base-url>registry.<base-url>
The Base URL is the only URL that can be customized. The rest of the URLs are generated automatically.
- Webapp URL - The URL to the KNIME Business Hub webapp
- DataApps URL - The URL for the KNIME Business Hub DataApps
- API URL - The URL to the KNIME Business Hub API
- Websocket URL - The URL to the KNIME Business Hub Websocket
- Authentication URL - The URL to the KNIME Business Hub authentication endpoint
- Storage URL - The URL to the KNIME Business Hub persistent storage endpoint
- Registry URL - The URL to the KNIME Business Hub Embedded registry endpoint
If you are testing KNIME Business Hub without DNS configured, it is recommended to create /etc/hosts entries on your local machine pointing to the public IPv4 address of the instance running the cluster. This will redirect traffic from your local machine to the appropriate IPv4 address when you enter URLs such as http://hub.example.com/ into your browser.
Notice that the values in /etc/hosts below are for hub.example.com. The values must match the config in the URLs section of the Config tab in the KOTS Admin Console, as demonstrated above. You can always use hub.example.com as the Base URL for local test installations.
<public ip> hub.example.com
<public ip> api.hub.example.com
<public ip> auth.hub.example.com
<public ip> storage.hub.example.com
<public ip> apps.hub.example.com
<public ip> registry.hub.example.com
<public ip> ws.hub.example.com
On Windows machines you can find the /etc/hosts file in <windows dir>\system32\drivers\etc\hosts.
Branding
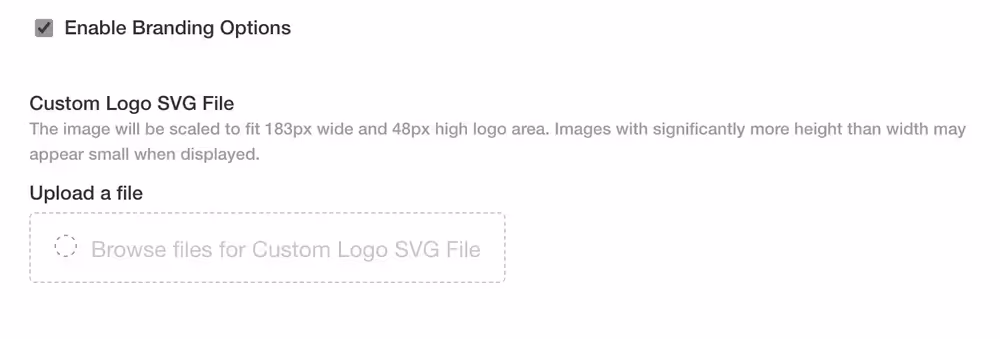
If you would like to have branding options enabled check the Enable Branding Options box.
You will now be able to upload your own logo. Click Browse files for Custom Logo SVG File and navigate to select the file from you local machine.
If customizing the logo, the file being uploaded must be an .svg file in XML format such as the one below.
example.svg
xml
<?xml version="1.0" encoding="UTF-8" standalone="no"?>
<!DOCTYPE svg PUBLIC "-//W3C//DTD SVG 1.1//EN" "http://www.w3.org/Graphics/SVG/1.1/DTD/svg11.dtd">
<svg width="100%" height="100%" viewBox="0 0 183 48" version="1.1" xmlns="http://www.w3.org/2000/svg" xmlns:xlink="http://www.w3.org/1999/xlink" xml:space="preserve"
xmlns:serif="http://www.serif.com/" style="clip-rule:evenodd;fill-rule:evenodd;stroke-linejoin:round;stroke-miterlimit:2;">
    <g transform="matrix(0.673983,0,0,0.673983,-2.4399,8.02946)">
        <text x="6.739px" y="43.245px" style="font-family:'Arial-BoldMT', 'Arial', sans-serif;font-size:54.619px;font-weight:700;">EXAMPLE</text>
    </g>
</svg>
Execution Image Builder
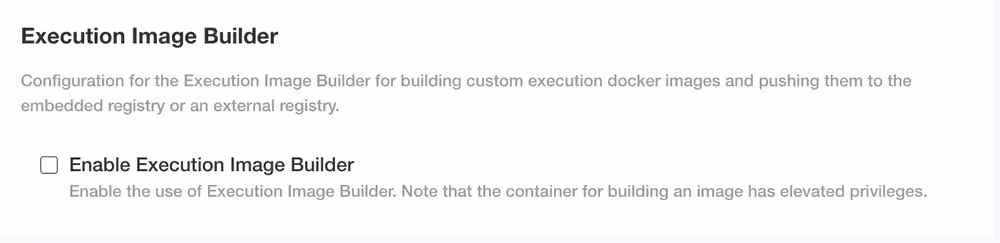
Here you can configure the Execution Image Builder to build custom execution Docker images and push them to the embedded registry or to an external registry.
If you check the Enable Execution Image Builder box, two additional fields will appear.
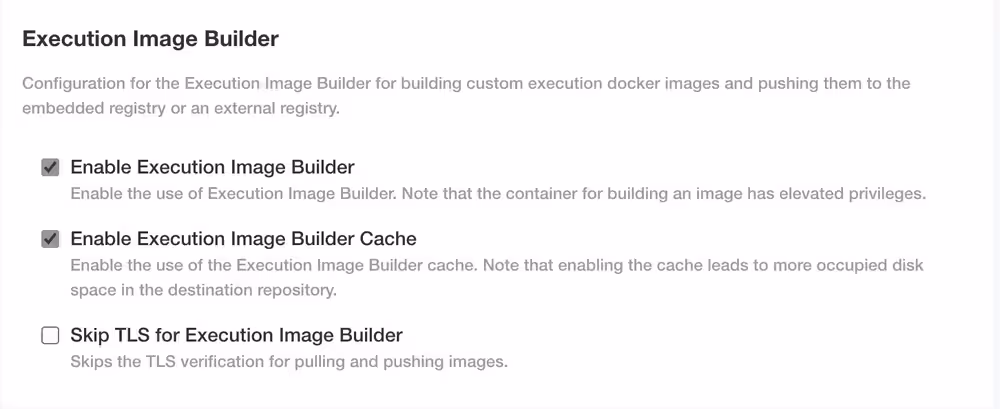
By default Enable Execution Image Builder Cache will be selected. The option Skip TLS for Execution Image Builder skips the TLS verification for pulling and pushing images to the registry.
Execution Contexts
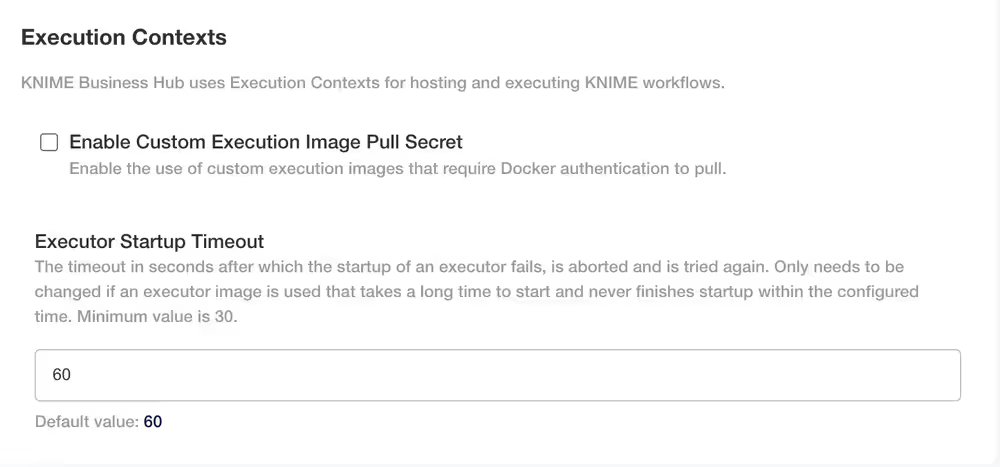
By default Enable Custom Execution Image Pull Secret is unchecked. By checking it you will get another option that will appear:
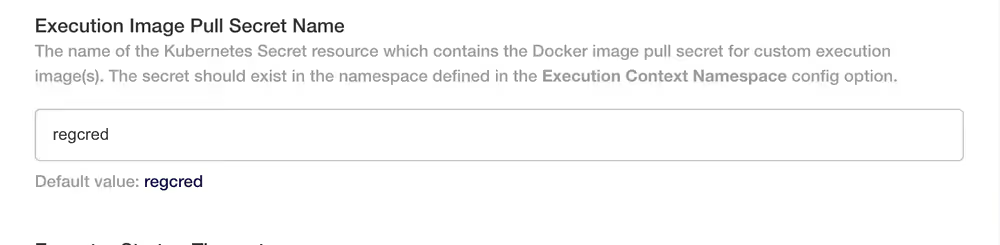
- Execution Image Pull Secret Name - The name of the Kubernetes Secret resource which contains the Docker image pull secret for custom execution image(s).
- Executor Startup Timeout - The timeout in seconds after which the startup of an executor fails, is aborted and is tried again
Job Instrumentation Data
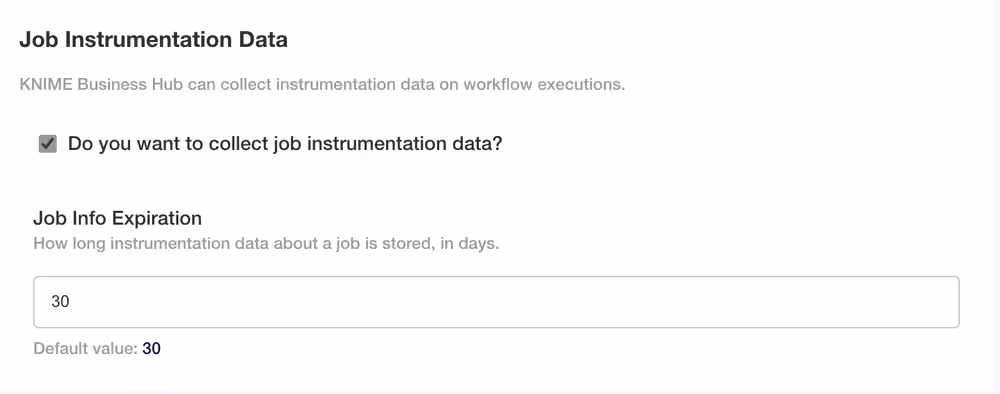
- Select the box Do you want to collect job instrumentation data? to allow the KNIME Business Hub instance to collect data about workflows execution.
- Job Info Expiration - This number reflects how long the instrumentation data about a job is stored in days
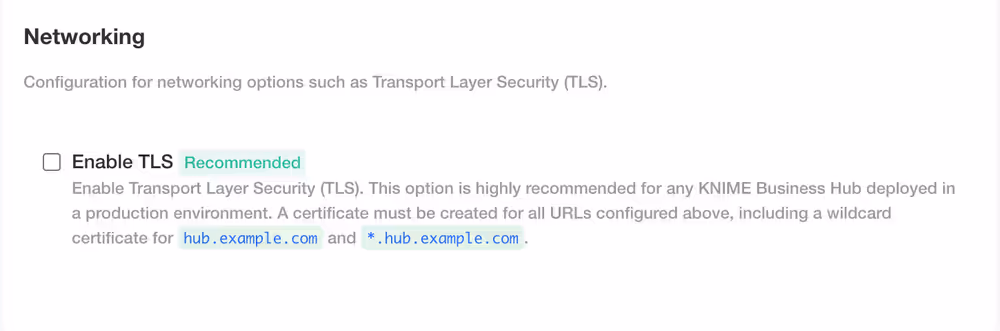
Configure networking
In the section Networking of the Admin Console you can deploy an external load balancer and enable and configure the Transport Layer Security (TLS).
It is anyways possible to configure this section in a second step.
To have more information on how to configure the networking section read the KNIME Business Hub Advanced Admin Guide.
Notifications
In this section you can configure the notification service, which notifies for various events.
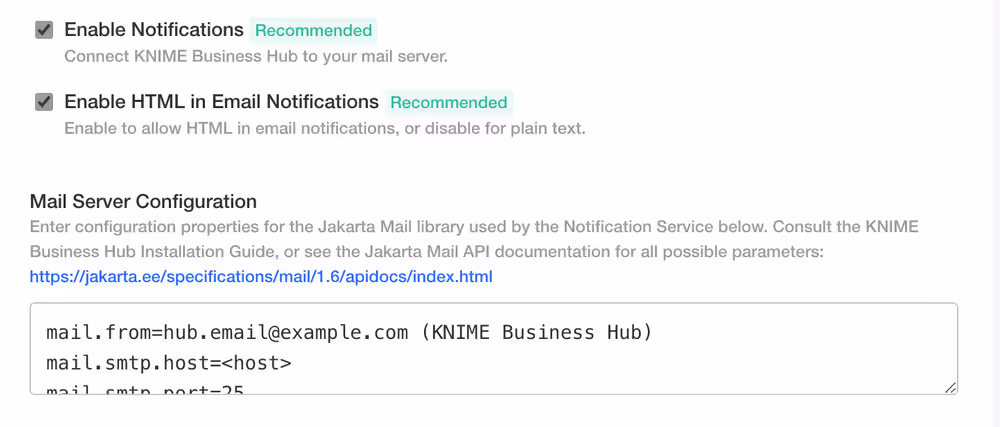
By enabling the Enable Notifications box you get a new option that is checked by default.
Enable HTML in Email Notifications - allows HTML in email notifications, or disable this option for plain text
Mail Server Configuration - Enter configuration properties for the Jakarta Mail library
You can consult the Jakarta Mail API documentation for all possible parameters in the Jakarta Mail API documentation.
The default code value is as follows:
| Name | Value | Description |
|---|---|---|
mail.from | hub.email@example.com | Address from which all mails are sent, required |
mail.smtp.host | <host> | SMTP server host address |
mail.smtp.port | 25 | SMTP port, default 25 |
mail.smtp.auth | true | Set to true if the mail server requires authentication |
mail.smtp.user | <user> | Username for SMTP authentication; optional |
mail.password | <password> | Password for authentication; optional |
mail.smtp.starttls.enable | false | If true, enables the use of the STARTTLS command (if supported by the server) to switch the connection to a TLS-protected connection before issuing any login commands. |
mail.smtp.ssl.enable | false | If set to true, use SSL to connect and use the SSL port by default. |
Preflight checks
The final step before installing is the preflight checks, which is a set of automated tests to help identify if KNIME Business Hub is ready for installation. It will check the Kubernetes distribution, Kubernetes version, resources available to the cluster, and other mission-critical settings.
It is highly recommended to never skip the pre-flight checks during installation or upgrades.
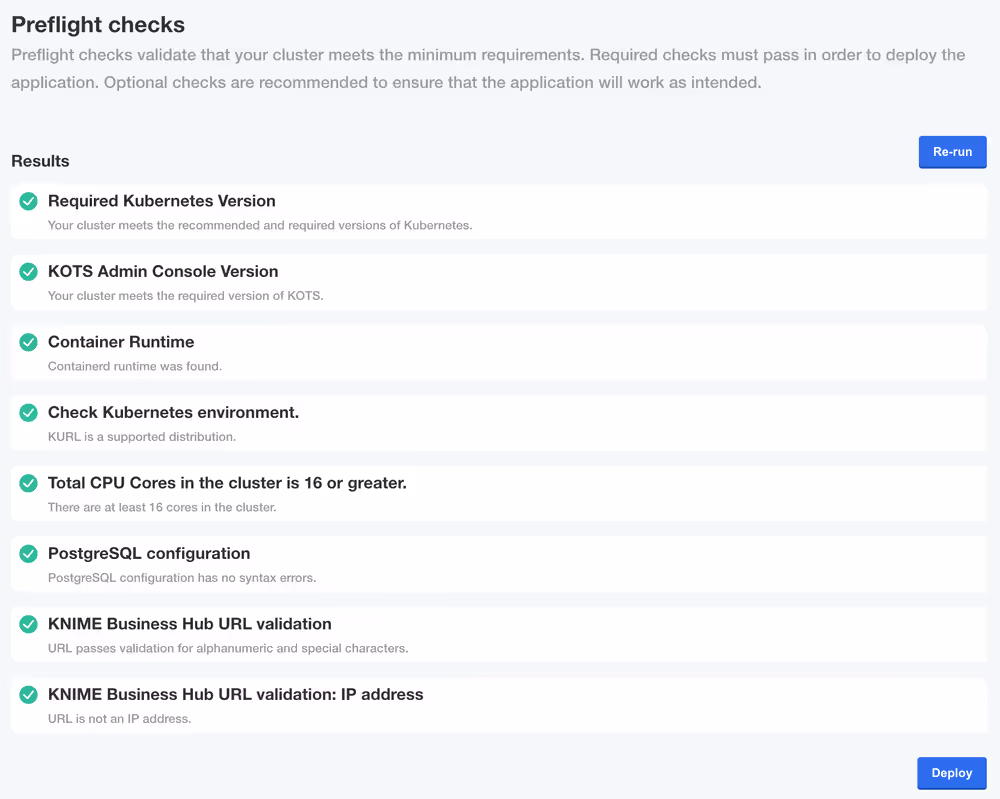
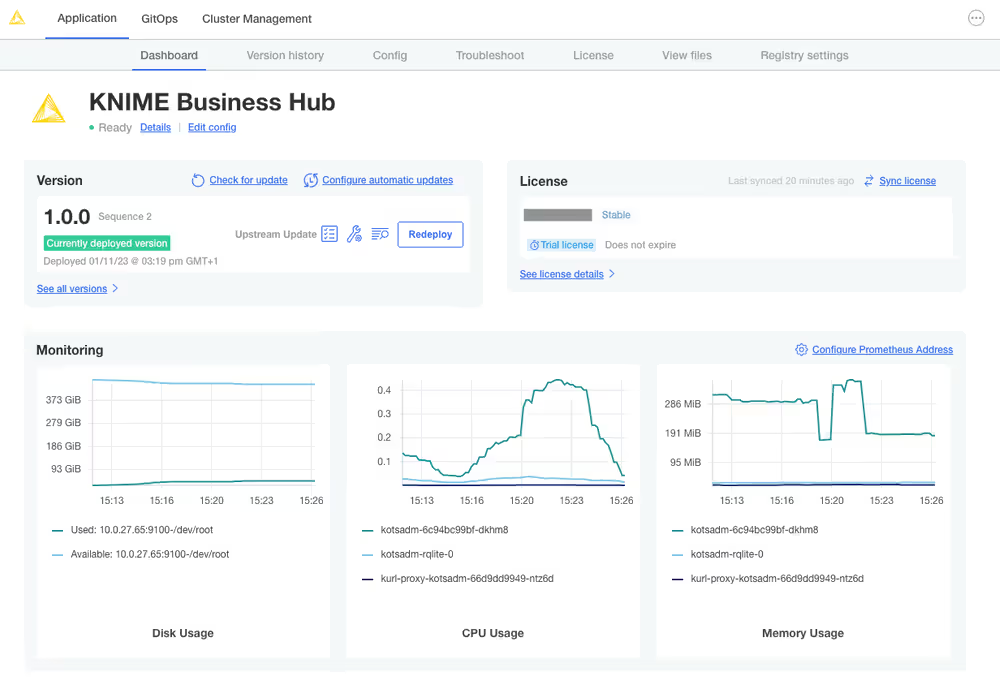
Wait for the installation to complete
If the preflight checks all passed and you opted to continue, the only thing left to do is wait for a few minutes until KNIME Hub finishes installing! You should see the installation turn the Ready status (top left) to green after 15-20 minutes.
If you cannot access the KNIME Business Hub Webapp URL after the Ready status has turned green, the first troubleshooting step would be to check the Config tab in the KOTS Admin Console and ensure the URLs are configured properly.
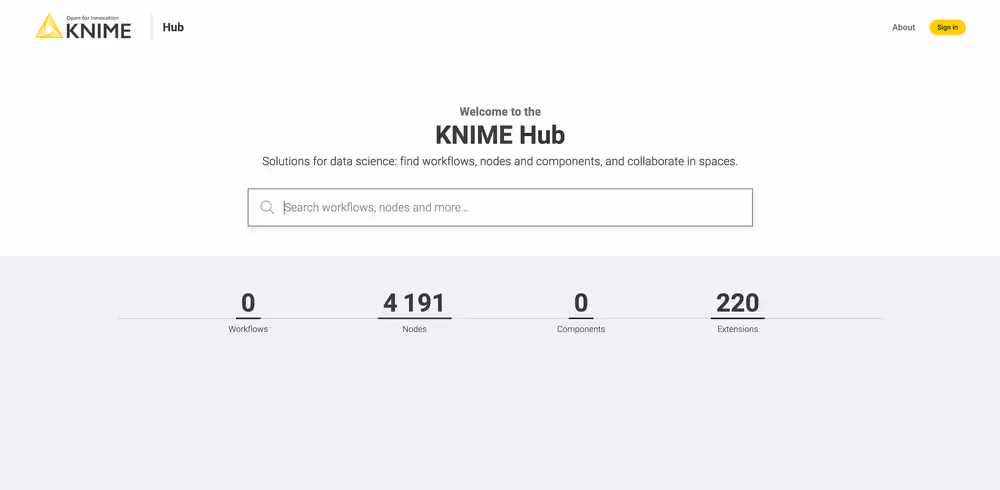
Navigating to the Webapp URL should display the KNIME Business Hub landing page.
KNIME Business Hub airgapped installation
Airgapped install
The term airgapped is used to indicate a computer network environment that has no external network access. This type of networking environment is useful for securing sensitive data, applications, and computing resources.
An airgapped environment may be completely isolated or have a firewall between it and other networks with wider access. That wider access may be to the external world or within the wider organization.
Installing modern software in an airgapped environment can be challenging. Containerization and public registries for container images work on the assumption that all software installs have access to the public internet. To get around this challenge, software installs have to package all the required artifacts and images into a bundle that can be copied to portable media for transport into the airgapped environment.
The KNIME Business Hub supports installation into environments with externally accessible networks and into airgapped environments. Of course airgapped environments require an airgapped install approach. But even networks with external access may require airgapped installations. For instance, many organizations do not allow downloading container images from public image registries. In this instance, an airgapped install will be required.
Getting started
To get started with an airgapped install you will need the link to the Download Portal of Replicated and a password that you will receive from your KNIME customer care representative.
Enter the Download Portal from a machine that has access to the internet and has also access to the installation machine.
Here, you need to select the type of installation that you need to perform.
Select "Bring my own cluster" option for existing cluster installation of the KNIME Business Hub.
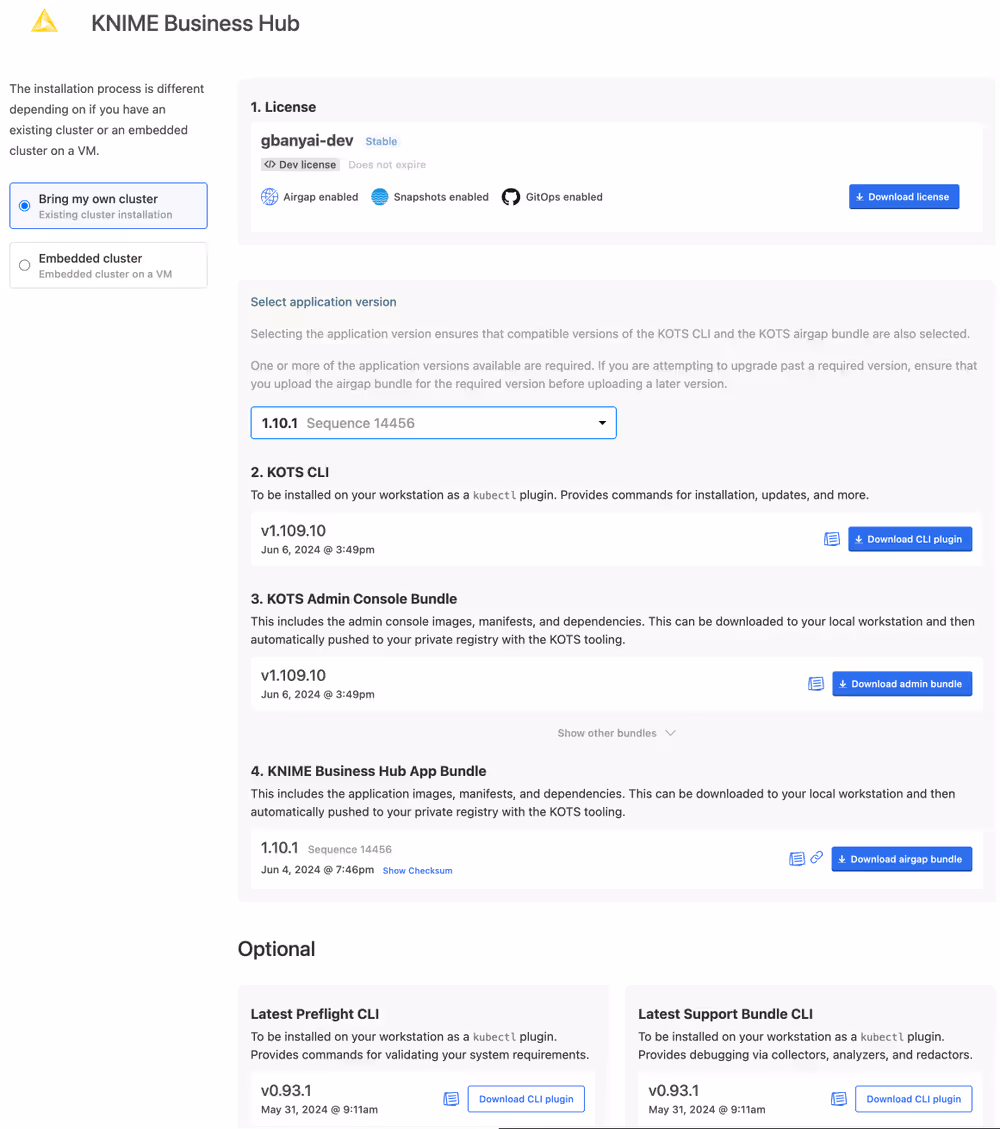
From the download page you need to download:
- The Replicated license file (
.yaml) with airgapped install enabled. - The airgap bundle for the KNIME Business Hub (knime-hub Airgap Bundle).
Getting Kubernetes ready
Next step is to install the new Kubernetes cluster.
You will need to install the KNIME Business Hub instance into an existing Kubernetes cluster.
Installing into an existing cluster with airgap
Before installing KNIME Business Hub into an existing cluster, the KOTS extension for Kubernetes must be installed into your Kubernetes cluster. See the above section on how to download artifacts from the KNIME Business Hub download site.
For airgapped installs, download the “KOTS Airgap Bundle” which can be found in the “Bring my own cluster” section of the download site.
Installing KNIME Business Hub
Once your Kubernetes cluster is configured with the KOTS extension, you are ready to install the KNIME Business Hub.
Now you need to proceed with the airgap install on a machine that:
- Hosts the web browser used for the install and has access to the internet
- Has access to the machine into which you are installing your KNIME Business Hub instance
On the machine that can access the installation machine, you can open the KOTS Admin Console URL and enter the kotsadm password. Follow the instructions for installing the KNIME Business via a browser. You will first need to upload the license and then the airgap bundle you downloaded from the Download Portal.
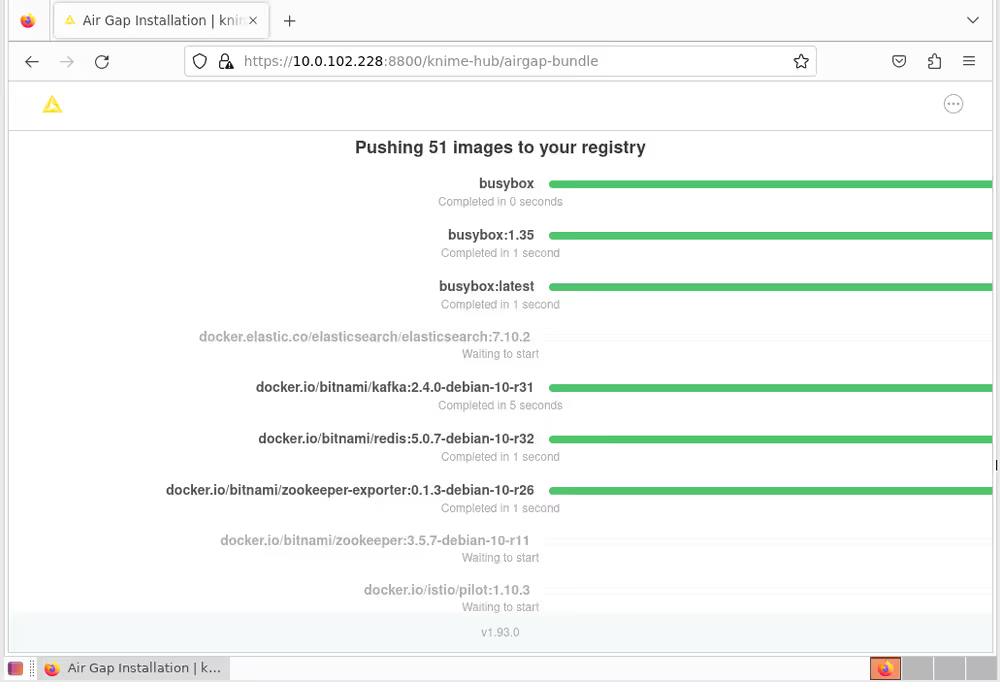
Once you select the KNIME Business Hub airgap bundle to use, the bundle will be uploaded to the install computer. The bundle is large and will take some time to upload.
Once the bundle has completed loading, the installer will extract all the required images from the bundle and store them in a local image registry. Again this will take some time. In your browser, you will see the progress of the extraction and load process. It will look like the screen shot below. Once the load into the registry is complete, the configuration page will be shown. Proceed as normal with the install at this point.
If all prior steps were successful, you should now be prompted to configure your KNIME Business Hub installation.
To do so follow the steps in the Configure the installation section.
Advanced settings
The following section explains you how to set up advanced settings for your KNIME Business Hub instancve. These settings are only visible if you checked the View Advanced Settings box under the Global tab.
You can skip to the Initialization of KNIME Business Hub section if you do not need any of the following settings.
Browser Security
Here, you can change the settings for browser security:
Enable Context Security Policy for Data Apps - this box is checked by default and gives you access to the following options:
Content Security Policy for Data Apps - this specifies a custom Content Security Policy for Data App execution.
For more information on how to write your own CSP statement, refer to the Content-Security-Policy documentation.
To embed data apps in an iframe, configure the
frame-ancestorsdirective in the CSP statement. Ensure that no other part of the infrastructure sets a CSPframe-ancestorsrule, or make sure it includes the embedding website.Whitelist URLs for Executions REST API - Sets additional URLs as allowed origins for the CORS policy and the CSRF filter
Kubernetes Cluster Management
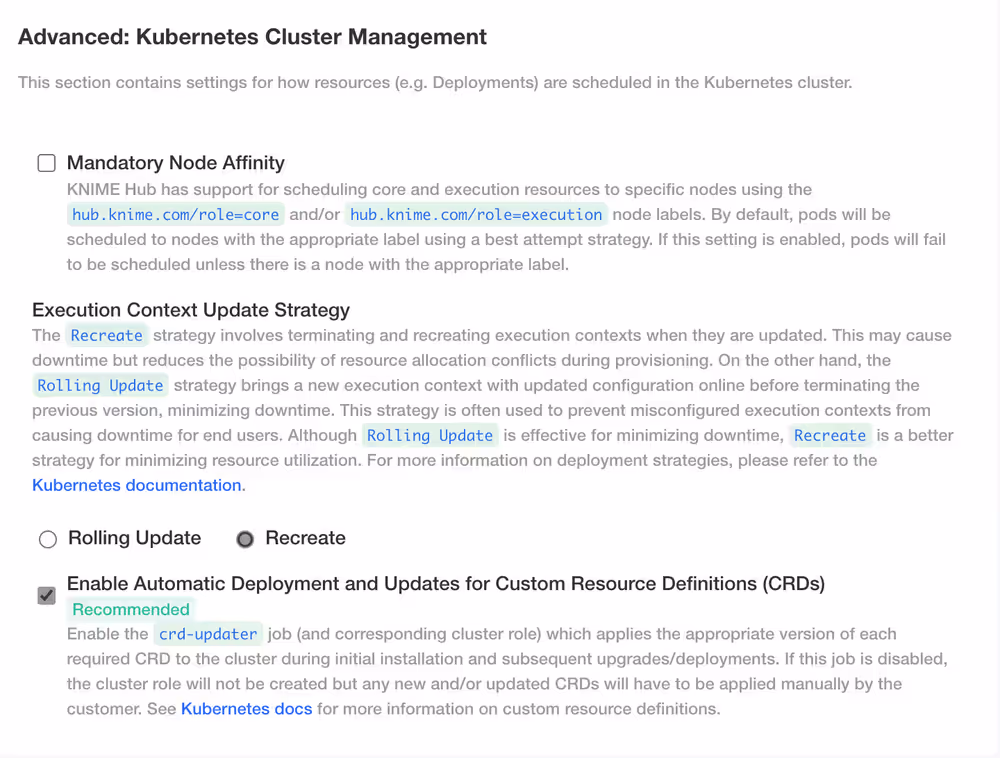
- Mandatory Node Affinity - by default this box is unchecked. KNIME Hub has support for scheduling core and execution resources to specific nodes using
hub.knime.com/role=coreand/orhub.knime.com/role=executionnode labels. - Execution Context Update Strategy - The Recreate strategy involves terminating and recreating execution contexts when they are updated. The Rolling Update strategy brings a new execution context with updated configuration online before terminating the previous version, minimizing downtime
Nodes and Extensions
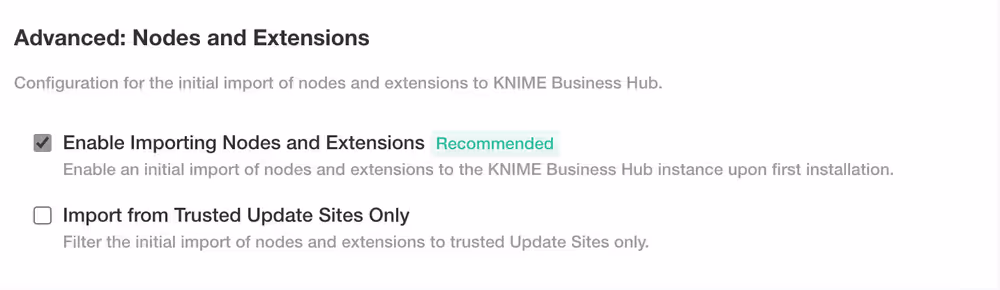
- Enable Importing Nodes and Extensions - this option is checked by default. It will enable an initial import of nodes and extensions to the KNIME Business Hub instance upon first installation
- Import from Trusted Update Sites Only - this option is unchecked by default. It allows you to filter the initial import of nodes and extensions to trusted Update Sites only
PostgreSQL Database
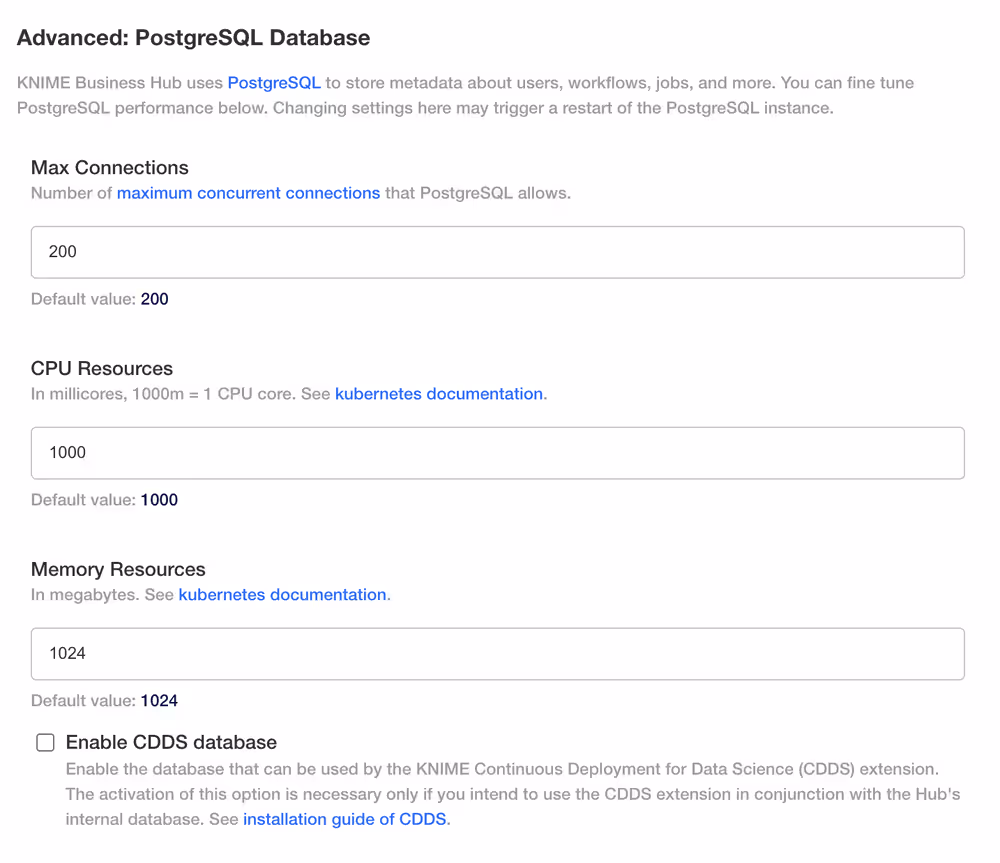
- Max Connections - this number represents the number on maximum concurrent connections that PostgreSQL will allow
- CPU Resources - this number shows the CPU Resources in milicores (1000m = 1 CPU core).
- Memory Resources - this number shows the Memory Resources in megabytes
- Enable CDDS database - this value is unchecked by default. This option allows you to enable the database that can be used by the KNIME Continuous Development for Data Science (CDDS) extension
DNS Entries and TLS Certificates
KNIME Business Hub will be accessed via a base URL, with a number of subdomains also configured for more targeted purposes. The following will use hub.example.com as an example base address to highlight how the base address and subdomains are to be configured.
DNS entries will need to be created for the following endpoints:
hub.example.com- root URL also used for the Business Hub UIapps.hub.example.com- used for exposing workflow-defined Data Appsapi.hub.example.com- exposed the Business Hub APIws.hub.example.com- used for websocket communication between Browser/AP and Business Hub- Currently used for exposing KNIME AI service available in Business Hub Standard or Enterprise 1.8.0 and higher
- If an external load balancer is deployed, it must support Layer-4/TCP/TLS (i.e. AWS Application Load Balancer or Network Load Balancer, etc.)
auth.hub.example.com- used for exposing the embedded Keycloak user storestorage.hub.example.com- used for exposing the embedded MinIO object store where workflows and data files are locatedregistry.hub.example.com- used for exposing the embedded KNIME Hub registry
Additionally, a TLS cert will need to be provisioned either directly or via adding relevant Certificate resources and settings to the Ingress rules below if using an automated Certificate provisioner like Cert-Manager.
If creating the cert explicitly, it is typically recommended to create a cert with the common name hub.example.com, and listing all domains above as subject alternative names, or using a wildcard for the subject alternative name (i.e. *.hub.example.com)
Istio
When required Istio Service Mesh can be manually installed and configured in the target cluster if cluster security configurations or cluster types disallow Business Hub from creating the mesh itself.
Detailed instruction for installing Istio as well as sample configuration can be found here.
If installing Istio manually, then the option to include Istio in the KOTs Configuration Dialog (when configuring the Hub release) will need to be disabled. If the Configuration Dialog specified that Istio is enabled (the default value), then the KNIME Business Hub release process will attempt to install Istio and its related Custom Resource Definitions (CRDs).
The following instructions are only necessary if you have a highly restricted environment. The Hub installer will provide all of the needed pieces by default.
Create namespaces manually
During the installation of the Business Hub namespaces are created automatically. However, in case you have restrictions and you need to create namespaces manually you can follow these instructions.
Namespaces:
The following namespaces need to be initially created:
kots- namespace where the KOTS Admin UI is deployed to (This namespace is specified when running the KOTS install shell script to deploy KOTS as it will act as the deployment administration tool for the Business Hub release. This can alternatively bedefaultor any other namespace the admin prefers to use.)istio-system- the namespace where the Istio service mesh controller will run. This namespace may already exist if Istio was deployed previously during the above steps.<business-hub-namespace>- namespace where Hub persistence layers, microservices and KNIME executors run.
Use existing Ingress controller
If you are using an existing Kubernetes Ingress controller, route all external traffic for KNIME Business Hub (hub.example.com and *.hub.example.com) through the Istio Ingress Gateway.
KNIME Business Hub relies on the Istio Ingress Gateway as the integration point for all inbound traffic.
Traffic Routing Requirements
Your existing Ingress controller must forward traffic for KNIME Business Hub (hub.example.com and *.hub.example.com) to:
- Service:
istio-ingressgateway.<istio-namespace>.svc.cluster.local - Port:
443 - Protocol: Either
HTTPorHTTPSdepending on whether TLS is terminated at an external load balancer or at the Istio Ingress Gateway.
This ensures all external requests are processed by Istio before reaching application services.
Ingress / Gateway Configuration
Ingress and/or Istio Gateway resources should be created manually prior to installation. Reference templates are available in the Networking section of the supplemental installation resources.
Post-installation steps
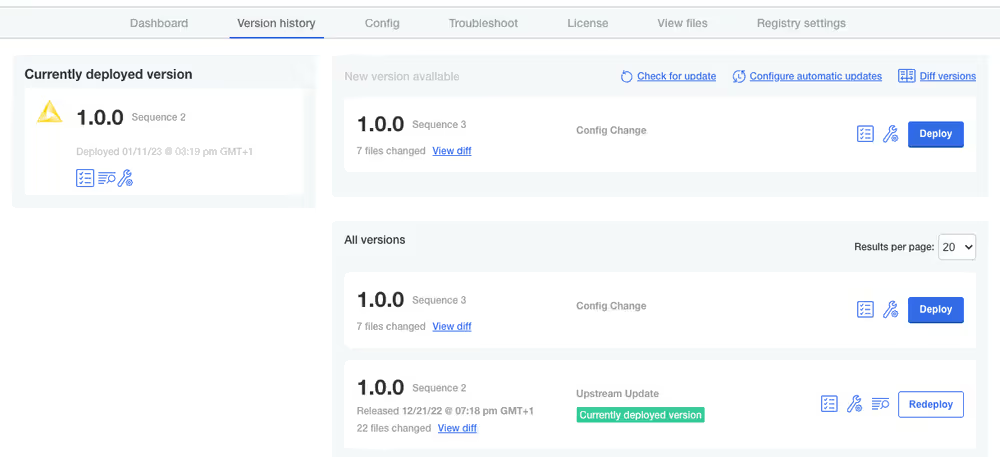
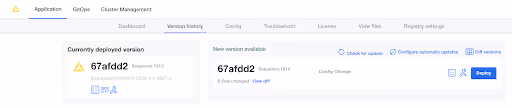
Version updates
If you save any changes in the Config tab of the KNIME Business Hub Admin Console, or check for updates and see a new version that you can upgrade to, then the new version will be visible in the Version history tab. New versions of KNIME Business Hub will not be deployed automatically unless automatic updates have been configured. Preflight checks will execute prior to deployment and the deployment itself can be triggered by clicking the Deploy button.
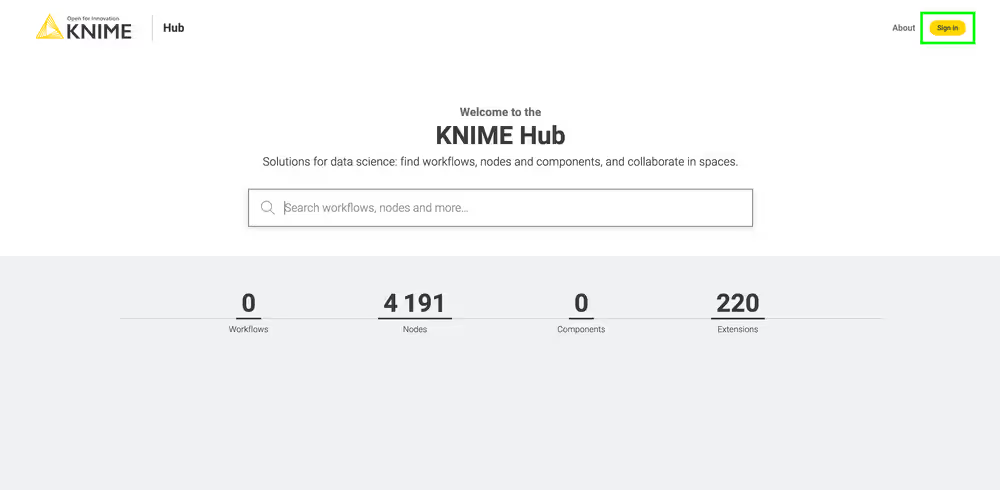
User registration
After initial installation, start the process of creating the first user by clicking the Sign In button.
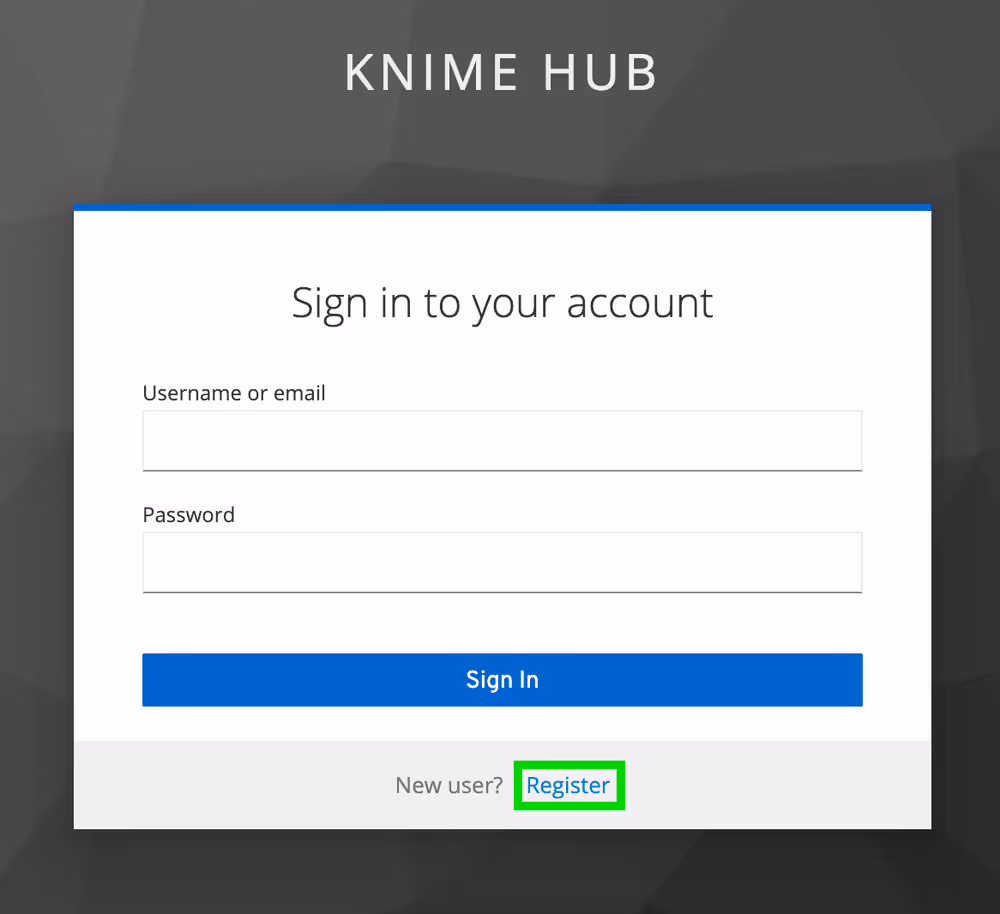
Next, click the Register button to proceed with creating a new account. You will be prompted for user information and will be logged in automatically.
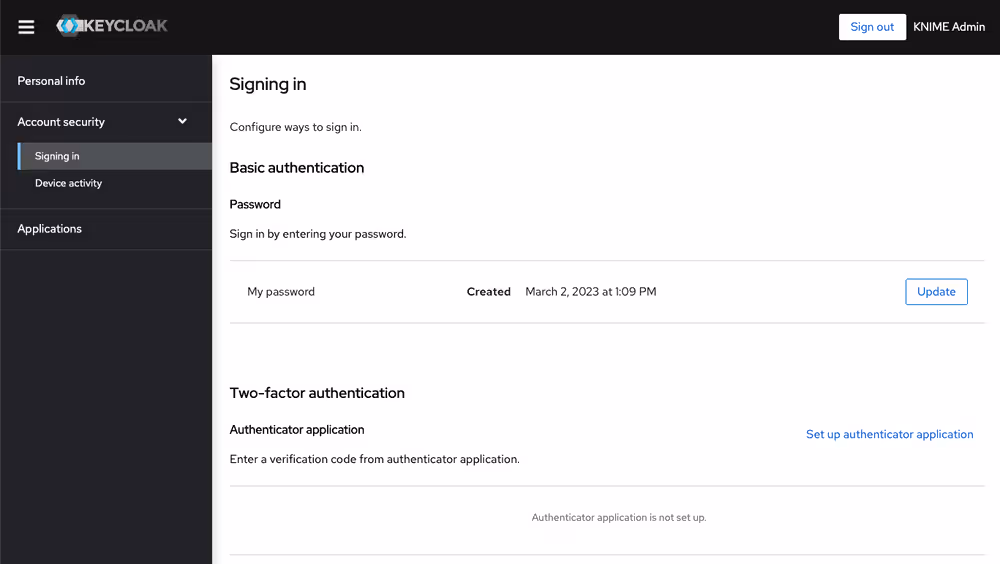
Users can change their password by going to auth.<base-url>/auth/realms/knime/account (e.g. http://auth.hub.example.com/auth/realms/knime/account) and navigating to Account Security → Signing In.
Keycloak setup
Keycloak is an open source software product that KNIME Business Hub leverages for authenticating users with Single-Sign On. Keycloak offers Identity Brokering and User Federation to external Identity Providers.
You can manage your Keycloak setup by going to auth.<base-url>/auth/ (e.g. http://auth.hub.example.com/auth/), clicking Administration Console and logging in with the Keycloak admin credentials. These credentials are stored in a kubernetes secret called credential-knime-keycloak in the <business-hub-namespace> namespace.
You can perform the steps here to retrieve the Keycloak credentials at any time.
When you first log in to the Keycloak Administration Console you are shown the
masterrealm. However, all KNIME Business Hub related configurations are in theknimerealm. You can select the realm via the dropdown menu in the top left corner.
For configuring your Keycloak setup, e.g.for adding User Federation or an external Identity Providers, consult the Keycloak Server Administration Guide.
Integrating an external Identity Provider (IdP)
While Keycloak itself can be used as the user base, KNIME Business Hub can also federate to an external IdP. To do this the external IdP needs to support a protocol known to Keycloak, such as SAML v2.0, OpenID Connect v1.0, or OAuth v2.0. For configuring Keycloak to use an external IdP please see the Integrating identity providers section in Keycloaks own documentation on this topic.
If you are using Microsoft Entra ID as external Identity Provider you can restrict who can register to your KNIME Business Hub instance by deactivating the option "Assignment required?" in Microsoft Entra ID to Yes and then allowing only a subset of users or groups to access the KNIME Business Hub instance as explained in the Microsoft Entra ID documentation.
Requirements
Keycloak and KNIME Business Hub have the following requirements for a user or external Identity Provider:
Usernames can only include letters and numbers as first character. Letters, numbers, underscore, and @ as last character. Letters, numbers, space, dot, underscore, hyphen, and @ for remaining characters. The minimum length is 3 characters, the maximum is 64. Special characters like umlauts (äöü) are not allowed.
- KNIME Business Hub uses this regex to validate usernames:
^[a-zA-Z0-9][a-zA-Z0-9-_.@ ]{1,62}[a-zA-Z0-9_@]$.
- KNIME Business Hub uses this regex to validate usernames:
When a new user is added to keycloak, it needs to have values for the Username, Email, First name and Last name fields. If any of those are not filled in automatically you need to create a mapper for it in the Identity Provider settings. Otherwise the user will be prompted to fill in details themselves when they log in for the first time.
Each user needs to have an email address, even if notifications are not configured in KNIME Business Hub.
Identity Provider Mapper
After adding an external IdP to your Keycloak instance you can create Identity Provider Mappers. These mappers can be used to fill in attributes if they are not getting automatically added, like Email. See the Mapping claims and assertions section in Keycloaks documentation.
In Keycloak, in the knime realm, go to the Identity Providers section, click your provider and go to the Mappers tab. Click the Add Mapper button and configure the mapper. Some useful Mapper types:
Username Template Importer: you can use this mapper to generate a username from multiple claims if a username claim is not available. Example template:
${CLAIM. given_name}.${CLAIM.family_name}.given_nameandfamily_nameare the given claims here. Nesting is possible with e.g.${CLAIM.user_info.given_name}.- There are three transformers you can use here:
lowercase,uppercase, andlocalpart.
- There are three transformers you can use here:
Attribute Importer: map an Identity Provider claim to a Keycloak attribute. Useful target attributes:
email(Email),given_name(First name), andfamily_name(Last name). The Claim field is not a template like above, but accepts the claim name directly, e.g.family_name.Use the Hardcoded Attribute mapper if an attribute can’t be constructed from a claim.
For finding available claims see the section below.
Tips for debugging Keycloak when integrating an external IdP
To create appropiate mappers in the IdP configuration one needs to know what the external IdP is actually returning to Keycloak in the token. This can be done by increasing the loglevel of the org.keycloak.social.user_profile_dump keycloak logger to debug. To do so you need to modify an instance of the keycloaks.k8s.keycloak.org CustomResource. You can get the current yaml definition of it by executing:
kubectl get keycloaks.k8s.keycloak.org -n knime knime-keycloak -o yamlYou can either save this output to a file, modify the file, and apply the changes to the cluster with:
kubectl apply -f <file>Or you can edit it directly in the cluster using kubectl edit. This will open the default editor in your current shell. Make the modification, save and exit the editor, and it will automatically be applied to the cluster:
kubectl edit keycloaks.k8s.keycloak.org -n knime knime-keycloakThe modification that needs to be done is adding an additonal configuration option under spec.additionalOptions:
spec:
  additionalOptions:
    - name: log-level
      value: INFO,org.keycloak.social.user_profile_dump:debug
Do not remove or change any of the other lines.
After this modification has been applied the keycloak-operator will automatically reconcile the knime-keycloak-0 pod in the <business-hub-namespace> namespace. After the pod is ready again attempt a login with the configured external IdP in the KNIME Business Hub UI (e.g.http://hub.example.com) and look at the log output of the knime-keycloak-0 pod. The interesting lines contain org.keycloak.social.user_profile_dump with the full JSON that was received from the external IdP:
2024-05-23 08:45:21,103 DEBUG [org.keycloak.social.user_profile_dump] (executor-thread-2) User Profile JSON Data for provider oidc: {"sub":"02aebee3-aaba-4e96-86a7-1d12531e8fb2","email":"admin@example.com","email_verified":false,"name":"Admin Admin","preferred_username":"admin","zoneinfo":"Europe/Berlin"}To turn the debug logging off again in Keycloak, remove the additionalOptions item that you added in the earlier step.
Update your KNIME Business Hub license
In order to deploy a new Business Hub license, please go to the Replicated console. There, navigate to the Config tab and find your current license file.
Click “select a different file”, and choose the .xml file provided by your KNIME customer care representative. Afterwards, scroll all the way to the bottom to confirm the configuration change. Click “go to updated version” next. This brings you to the “version history”, where you need to click on “deploy” to switch to the new license.
Uninstalling KNIME Business Hub
Uninstalling KNIME Business Hub is a highly destructive action that can have permanent implications. Please ensure you are connected to the right cluster and 100% sure you want to uninstall all resources related to KNIME Business Hub before proceeding. Please ensure you have retrieved all data or backups from the cluster that you want to preserve.
To completely remove a KNIME Business Hub instance, the following commands can be run from a terminal which has kubectl access to the cluster running KNIME Business Hub.
- Use the namespace where KNIME Business Hub was installed in place of
<business-hub-namespace> - Make sure both kubectl and Helm are installed to successfully run the commands
- Confirm that the proper Kubernetes context is set before executing
bash
# Remove the KNIME Business Hub app from the KOTS Admin Console.
kubectl kots remove knime-hub -n default --force

# List all helm releases that will be deleted in a later step. This does not delete anything yet.
# Ensure there are no helm releases that you deployed yourself.
helm ls -a -n <business-hub-namespace>

# Delete all helm releases in the hub namespace.
helm ls -a -n <business-hub-namespace> | awk 'NR > 1 { print  "-n "$2, $1}' | xargs -L1 helm delete;

# Delete the knime-hub-keycloak helm release, and wait 10seconds to give the knime-keycloak-operator time to reconcile.
helm delete -n <business-hub-namespace> knime-hub-keycloak; kubectl delete keycloakrealms.legacy.k8s.keycloak.org knime-realm -n <business-hub-namespace>; sleep 10;

# Delete all helm releases in the `<business-hub-namespace>` namespace.
helm ls -a -n <business-hub-namespace> | awk 'NR > 1 { print  "-n "$2, $1}' | xargs -L1 helm delete;

# Remove finalizer in Keycloak realm resource
kubectl patch keycloakrealms.keycloak.org -n <business-hub-namespace> knime-realm  -p '{"metadata":{"finalizers":null}}' --type=merge

# Finally, delete all namespaces that were created by KNIME Business Hub.
kubectl delete namespace istio-system <business-hub-namespace>
If the commands above run successfully, all KNIME Business Hub resources will be removed from the cluster. You could then re-install KNIME Business Hub into the same cluster by navigating to the KOTS Admin Console in a browser and following this installation guide again.