
Prompt a model
Use the LLM Prompter node to send a single text prompt to a large language model.
Build a prompting workflow
Prerequisites
Before you start, make sure that you have:
- installed the KNIME AI Extension (see Install the KNIME AI Extension).
- configured credentials for a supported provider (see LLM Providers).
Prompting a model in KNIME consists of three steps:
- Authenticate with a provider
- Select a model
- Send the prompt
1. Authenticate with a provider
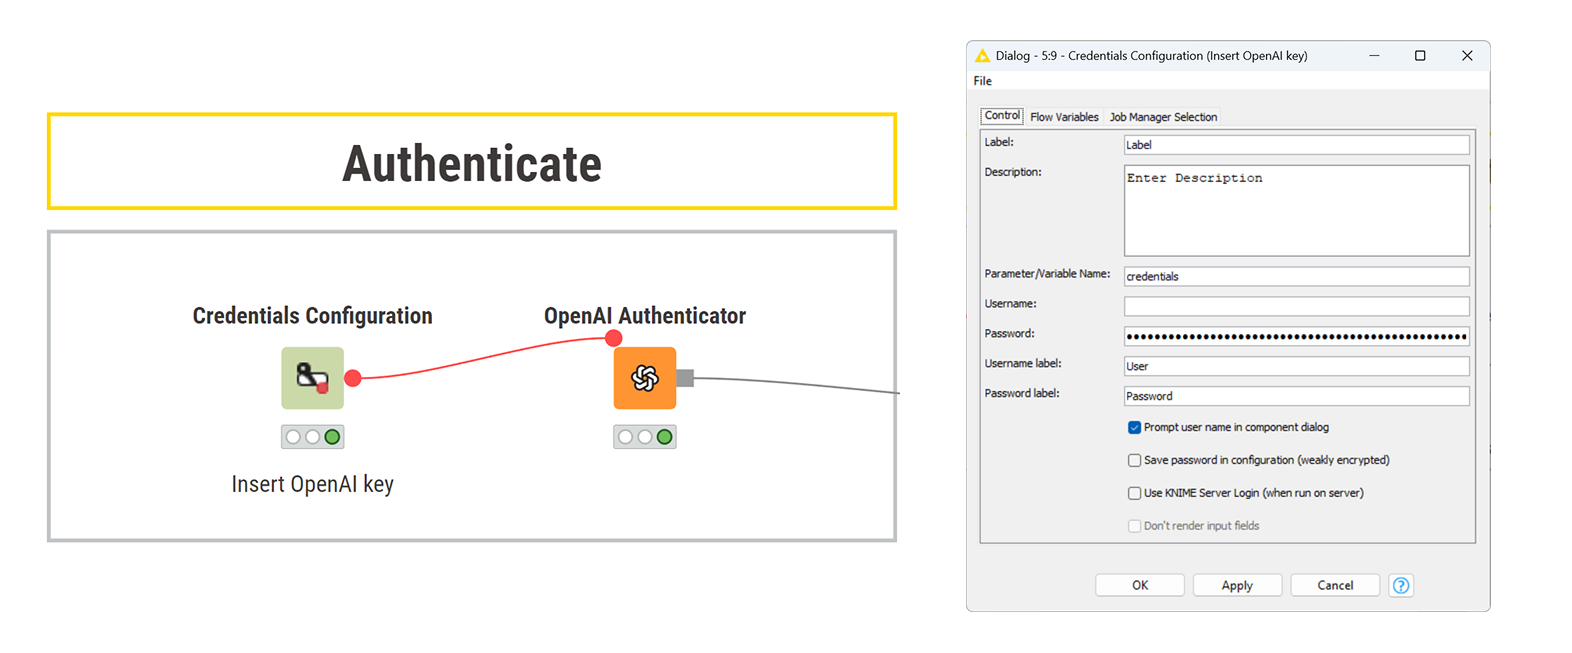
To authenticate with a model provider, you need to supply an API key and connect it to the corresponding authenticator node.
Follow these steps:
- Store your API key using a Credentials Configuration or Credentials Widget node.
- Connect the credentials node to the corresponding authenticator node (for example, the OpenAI Authenticator node).
- In the authenticator node, select the Credentials flow variable provided by the credentials node.
If the authenticator node traffic light turns green, the connection is successful.
Credential handling
If you plan to share this workflow, consider whether others should use your API key or provide their own. You can control this using the Save password in configuration (weakly encrypted) option in the credentials node. When unchecked, each user must enter their own key when opening the workflow.
2. Select a model
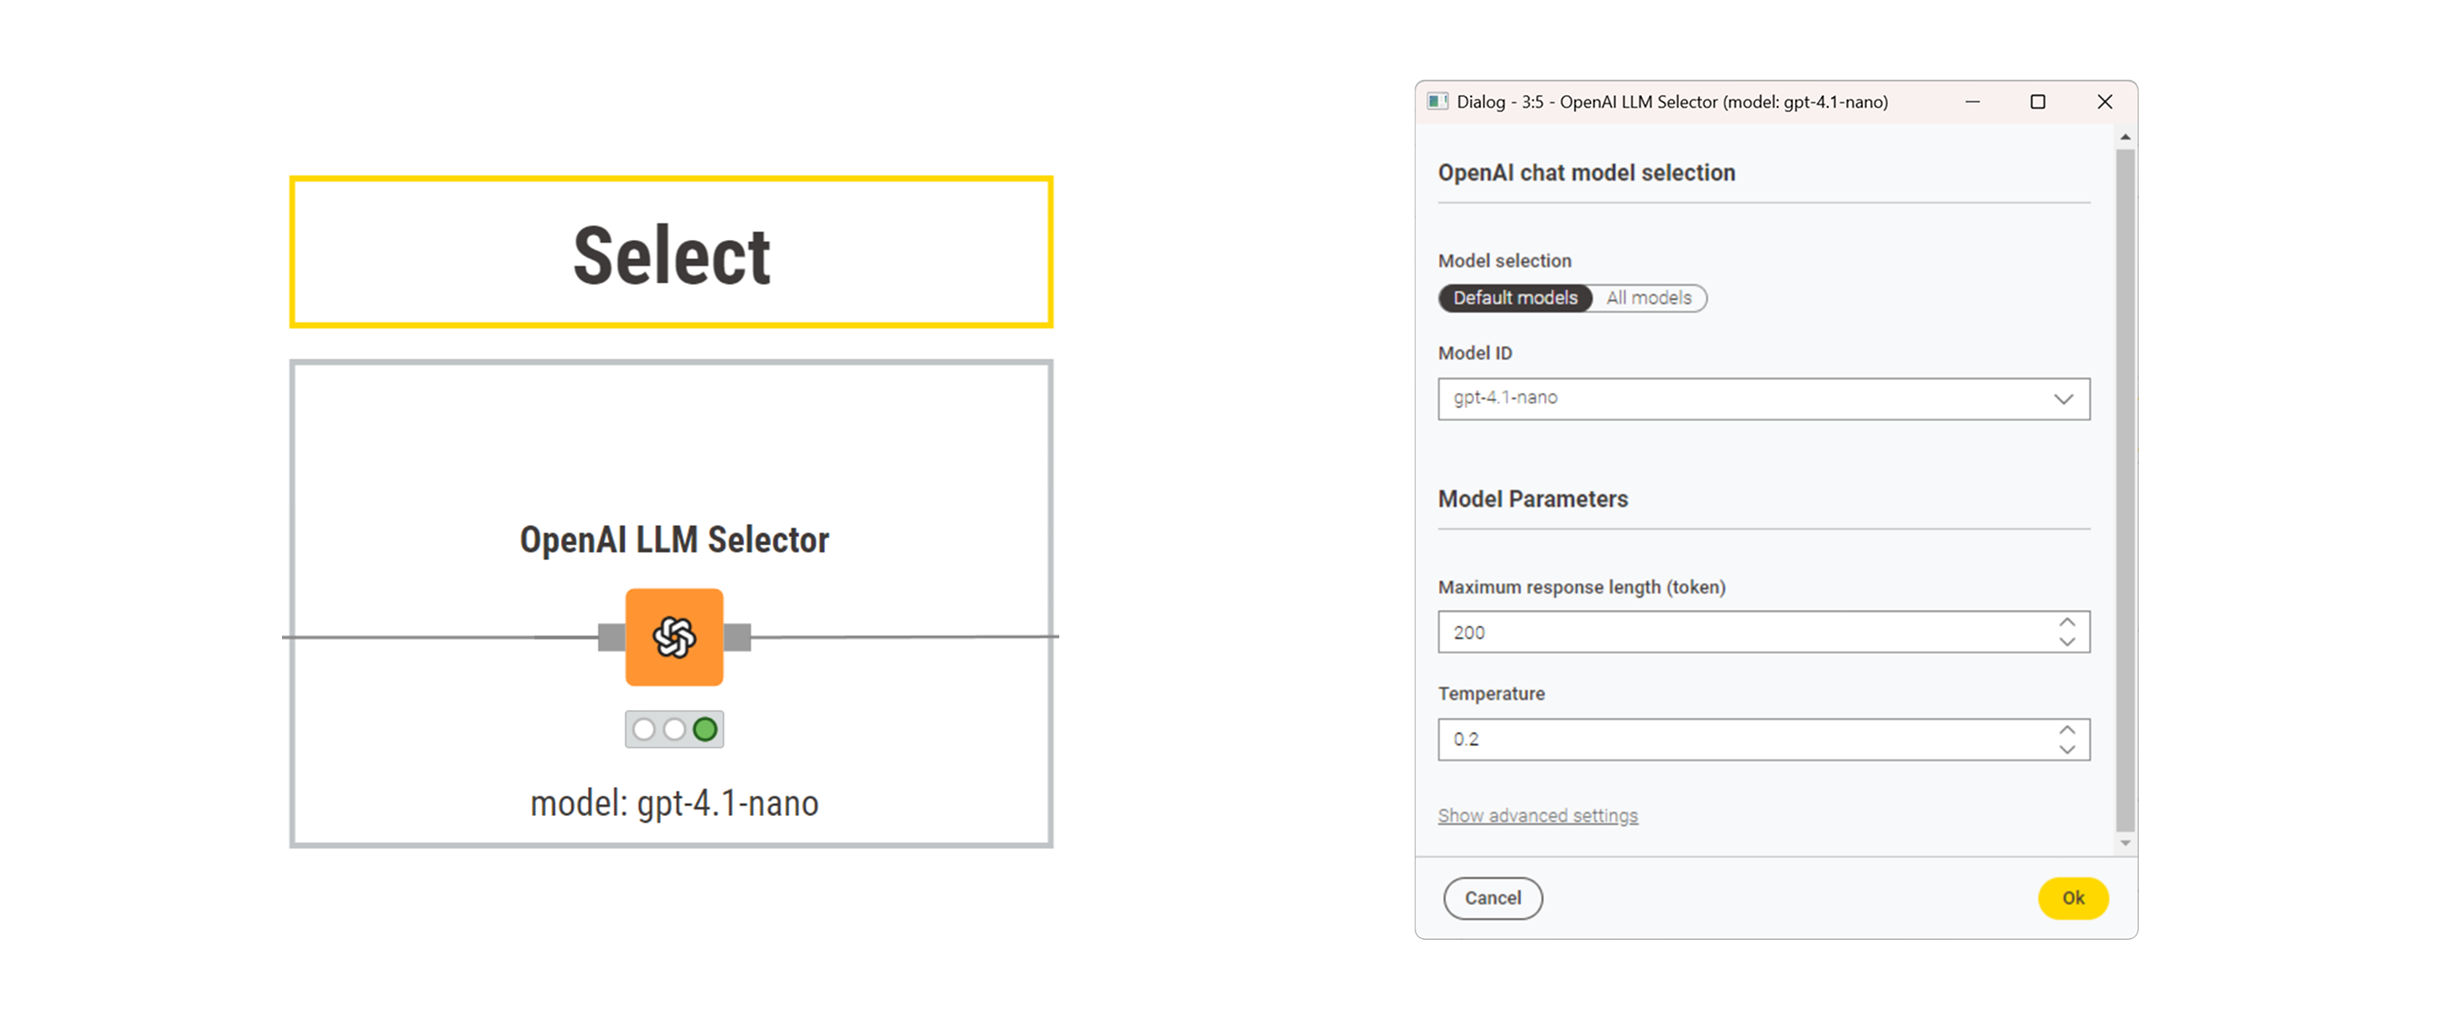
Connect the authenticator node to the corresponding LLM Selector node to choose the model you want to prompt. This node allows you to configure model selection parameters.
Common parameters include:
- maximum response length
- temperature (controls randomness)
- advanced sampling options
3. Send the prompt
Prompts are plain text strings that are passed to the model as input. You can create them dynamically using nodes such as:
The LLM Prompter receives two inputs:
- the selected model configuration (from an LLM Selector)
- a string column containing the prompt to send to the model
In the node configuration, select the column that contains the prompt text. Each input row is processed independently, resulting in one prompt execution per row.
Result
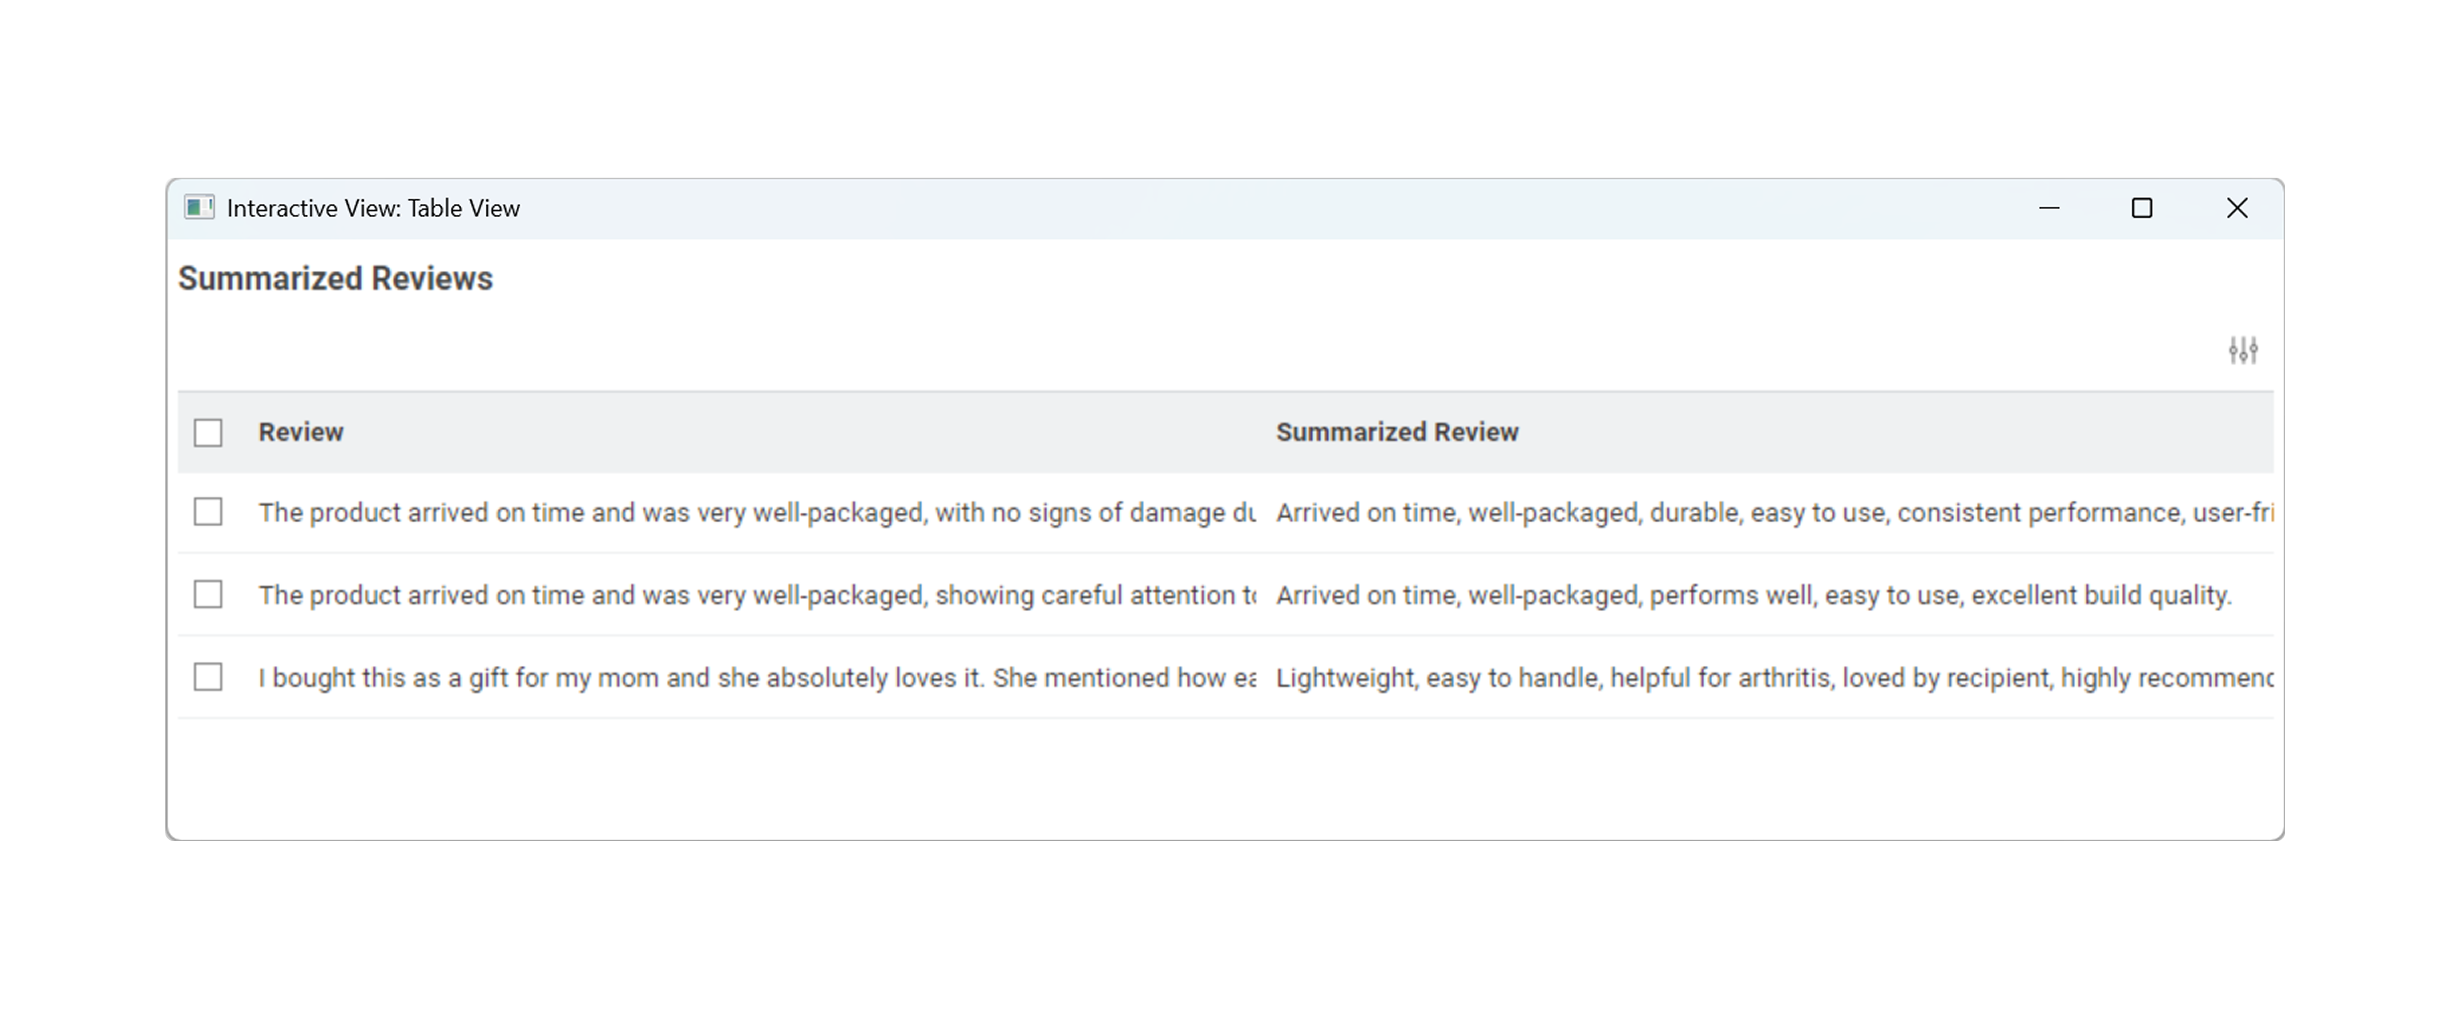
The model response is returned as a new column in the output table. Each row contains the model's response to the corresponding input prompt.
In this example, the model generates a summary for each input text:
Next steps
- Follow a tutorial: Summarize product reviews
- Constrain and validate output: Prompt with structured output
- Add external context and knowledge: Inject context into a prompt
- Run models locally for privacy or offline use: Prompt a local model