
Your first deployment
While you build a workflow, you usually execute one node at a time. This lets you check each node's output before you add the next one. Once the workflow is built, you run it as a whole, from the first node to the last. You can run the whole workflow whenever you need the results, or deploy it to run automatically on a schedule, for example every morning. In this tutorial, you save a version of your workflow, schedule it to run, and then monitor its runs.
Before you begin
To follow this tutorial, you need:
- A Knime account with a space to keep your work in. To learn how to create a space, see the first login tutorial.
- An environment available in your space. An environment provides the computing resources that run your workflow. To learn more about environments, see the Running workflows page.
- A simple workflow saved in your space. Use the workflow you built in Your first workflow, or bring a simple workflow of your own.
Step 1: Run the workflow manually
A manual run executes your whole workflow once, from the first node to the last. You start it yourself, without opening the workflow editor.
First, log in to your Knime account and open your space. Your space lists the workflow you want to run, for example Knime_project from Your first workflow.

Double-click Knime_project to open the workflow page. Unlike the workflow editor, this page shows a preview of the workflow on the left. On the right, it shows the Deployments and Recent runs panels. Both panels are empty for now.
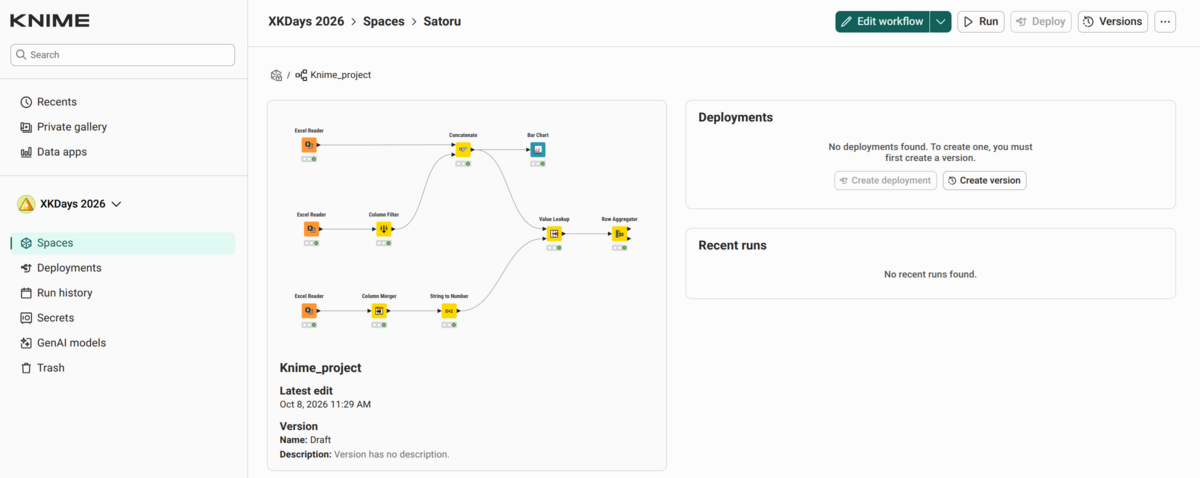
To run the workflow:
- Click Run in the upper-right corner. The Create manual run dialog opens.
- Keep the default settings for Version, Environment, and Compute class.
- Click Create.
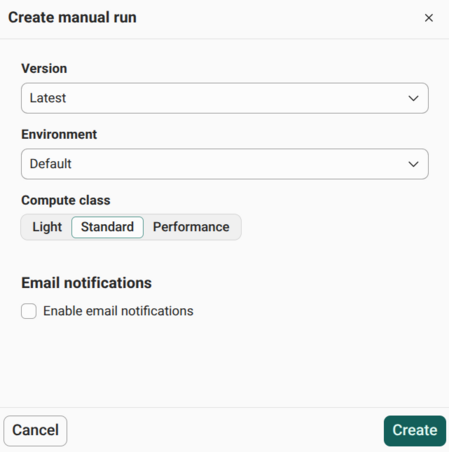
The manual run starts right away. When it finishes, it appears in the Recent runs panel with the status Finished.
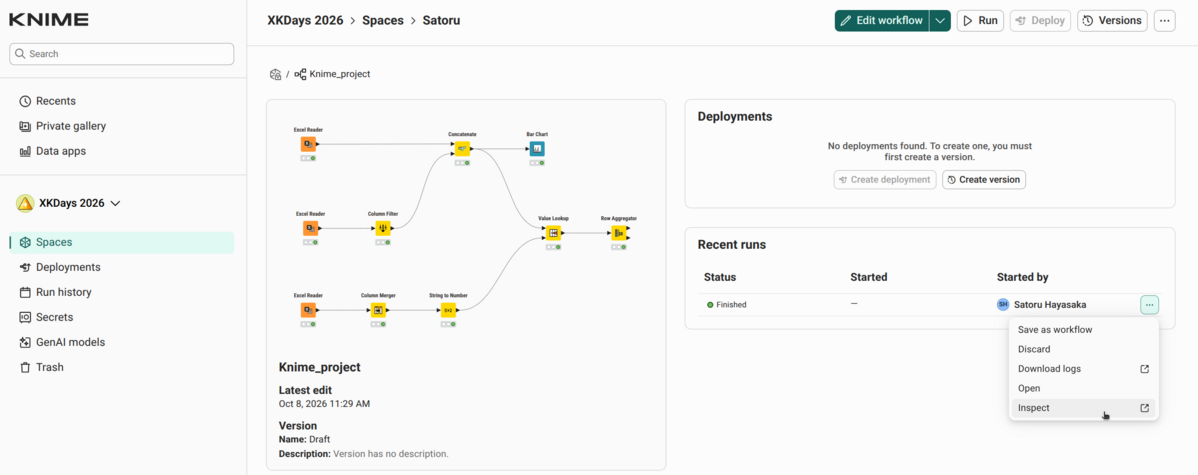
To look at the results, click the ... menu next to the run and select Inspect. The executed workflow opens in the workflow editor. Select any node to see its configuration in the panel on the right and its output in the node monitor below.
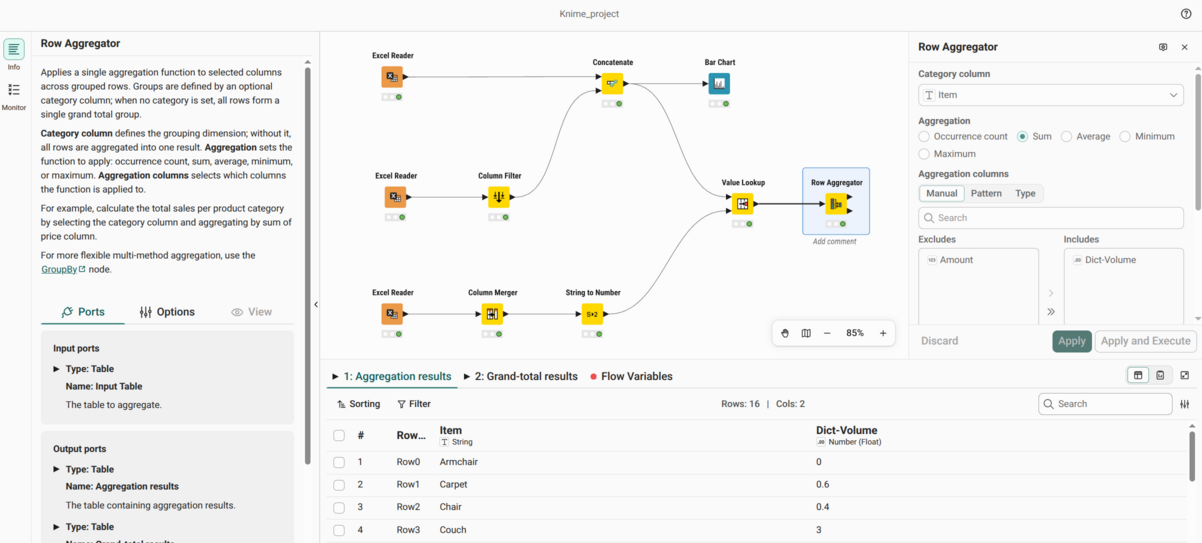
When you inspect a run, the workflow is read-only. The buttons in the configuration panel are grayed out, so you can't change any settings. You also can't execute nodes. You can only explore the workflow and the outputs from this run.
To change the workflow, go back to the workflow page in your space and click Edit workflow.
Step 2: Create a version
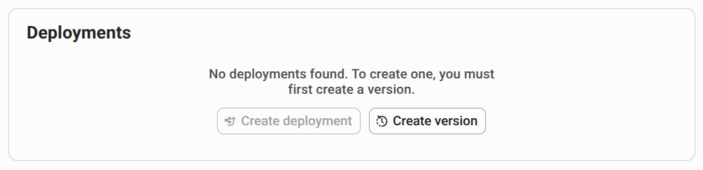
To deploy a workflow, you first need a version of it. On the workflow page, the Deployments panel on the right says that no deployments exist yet. It also says that you must create a version before you can create one.
A version is a snapshot of your workflow at a specific point in time. You or your team members may keep updating the workflow. A version keeps the workflow exactly as it was when you created it, so your deployment always runs the same workflow.
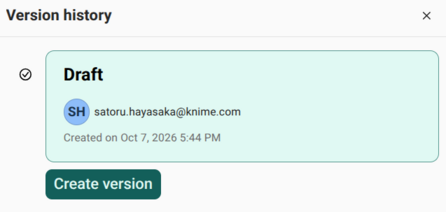
In the Deployments panel, click Create version. The Version history panel opens. For now, it lists only the Draft, which is the copy of the workflow you edit.
To create a version:
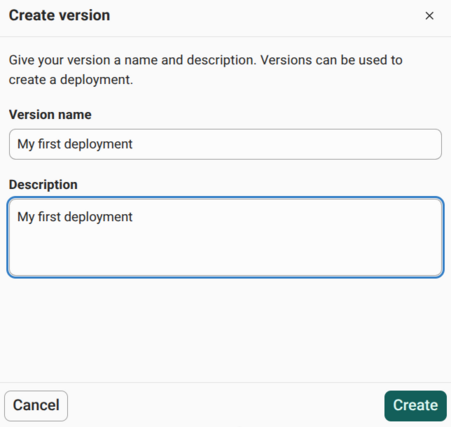
- Click Create version under the Draft. The Create version dialog opens.
- Under Version name, enter a name for your version, for example My first deployment.
- Under Description, describe what this version contains.
- Click Create.
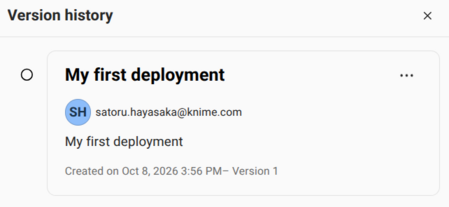
The Version history panel now lists the version you created. You're ready to create a deployment.
Step 3: Create a schedule deployment
With a version in place, you can deploy your workflow. The Deployments panel on the workflow page still lists no deployments, but it now offers a button to create one.
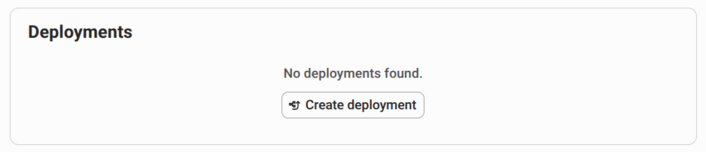
Click Create deployment. The Deploy dialog opens and lists the deployment types: Data app, Schedule, Trigger, and Service. In this tutorial, you create a schedule, which runs your workflow automatically at the times you choose. To learn about the other deployment types, see Deployment types.
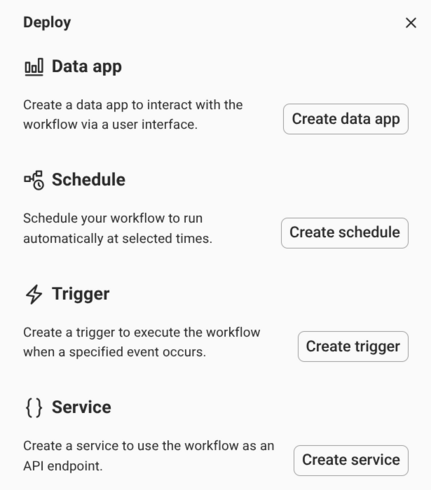
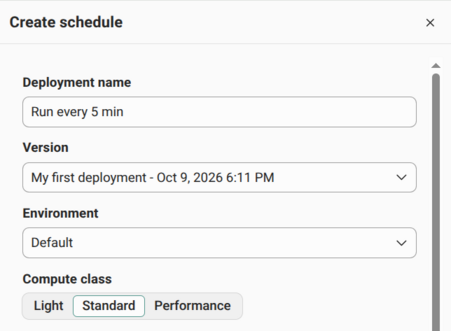
Under Schedule, click Create schedule. A scheduled deployment runs your workflow automatically on a set schedule, so you don't have to start each run yourself. The Create schedule panel opens. In the first part of the panel, you describe the deployment:
- Under Deployment name, enter a name for your deployment, for example Run every 5 min.
- Under Version, check that the version you created in the previous step is selected.
- Keep the default settings for Environment and Compute class.
Scroll down to Schedule options. Here, you set when the workflow runs. Set the schedule to run every 5 minutes, starting a few minutes from now:
- Under Initial execution, select today's date and enter a time a few minutes from now. Check that the time zone is correct.
- Select Repeat execution.
- Select Every, enter 5, and select Minutes from the menu.
- Under Schedule ends date, select Date and choose a date and time so that the workflow runs a few times. For example, set the end time 20 minutes after the initial execution.
To get an email about your deployment's runs, select Enable email notifications. This tutorial leaves the option unchecked.
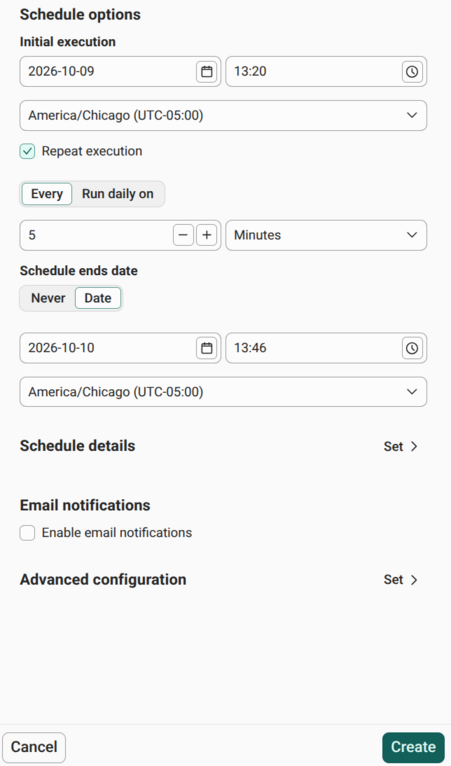
Next, keep the finished runs so that you can inspect them later. Click Advanced configuration to open additional settings for the deployment. Under Run Settings > Keep finished runs for inspection, select After success.
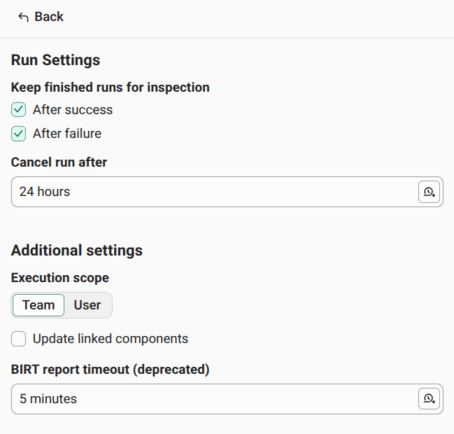
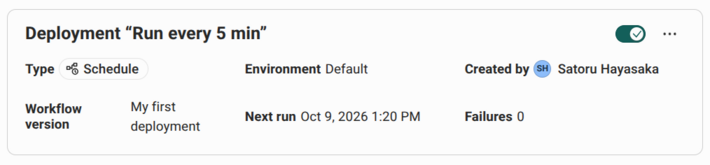
Click Back to return to the Create schedule panel, then click Create. The Deployments panel now lists your scheduled deployment, along with its workflow version and the time of its next run.
To learn about all the schedule options, such as daily runs at specific times, see Scheduling.
Step 4: Monitor the scheduled runs
Your scheduled deployment now runs the workflow every 5 minutes, without any action from you. Each run appears in the Recent runs panel on the workflow page, along with the time it started.
After the initial execution time passes, return to the workflow page. The Recent runs panel lists a new run for every 5 minutes, in addition to the manual run from Step 1.
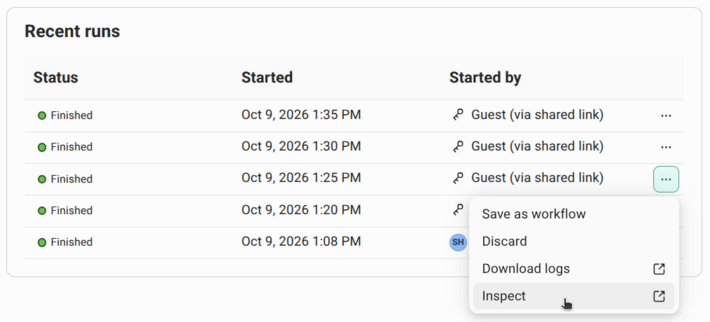
Inspect any of these runs the same way you inspected the manual run. Click the ... menu next to the run and select Inspect. The executed workflow opens in read-only mode, so you can explore each node's configuration and output from that run.
Summary
In this tutorial, you:
- Ran your workflow manually and inspected the results of the run
- Created a version, a snapshot of your workflow that a deployment runs
- Created a scheduled deployment that runs the workflow every 5 minutes
- Monitored the scheduled runs in the Recent runs panel and inspected their results
You now know two ways to run a workflow: on demand with a manual run, or automatically on a schedule with a scheduled deployment.
Next steps
- Deploy your first data app: turn a workflow into an interactive app that others can use
- Trigger deployments: run a workflow automatically when an event occurs
- Service deployments: let other applications call your workflow
- Deployment troubleshooting: fix a deployment or run that doesn't work as expected