
External groups from OIDC or LDAP
If you cannot use SCIM provisioning, you have two other ways to bring external groups into your Knime instance. As a global admin, you can configure groups provided via an external identity provider to be exposed inside your Knime instance.
Two possible sources for your external groups are:
- Groups provided within the access token of your OIDC provider.
- Groups imported from LDAP by federating the login.
External OIDC provider
Assume your identity provider provides groups through a groups claim in the access token:
json
{
  ...,
  "groups": [
    "finance",
    "marketing",
    "data"
  ]
}
Configure Keycloak to map these groups to a user attribute, then add a mapper that maps this user attribute into Keycloak's tokens. Set up your third-party identity provider first, then configure Keycloak as follows.
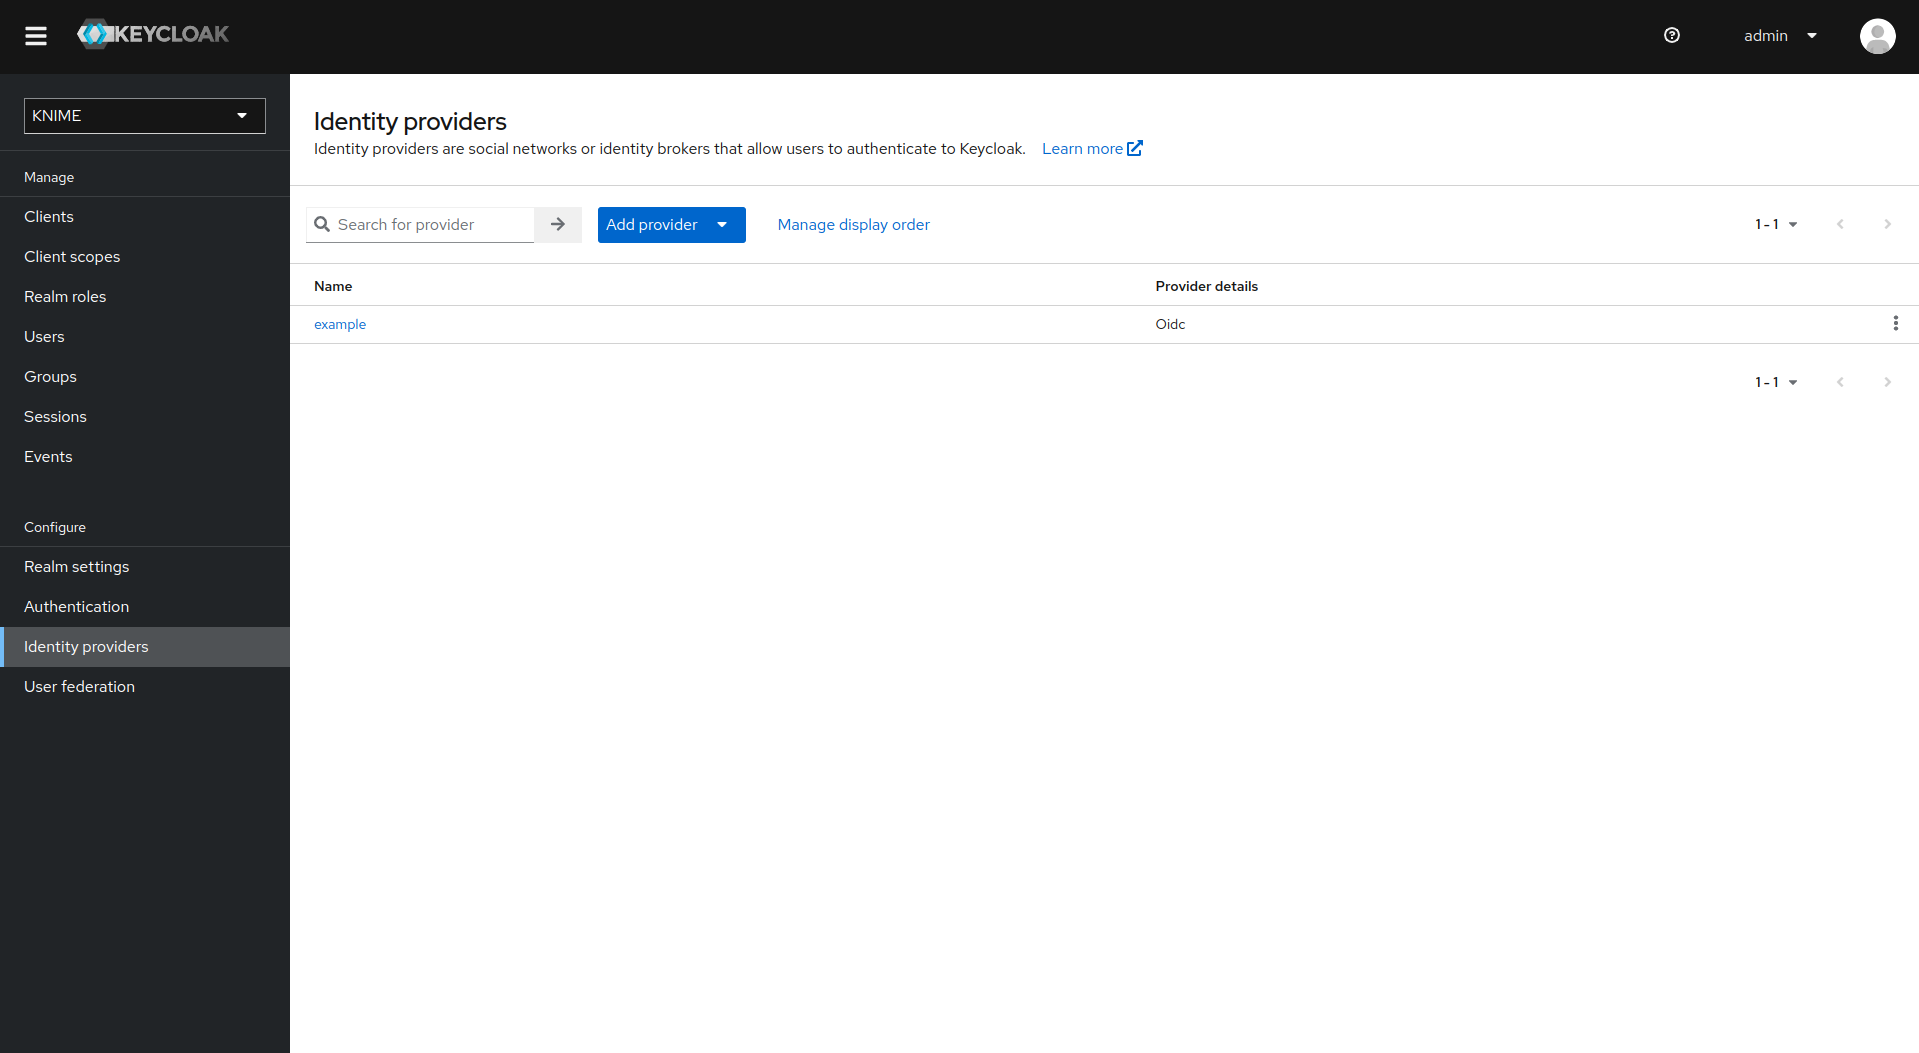
Add an attribute importer mapper
- In Keycloak, select realm Knime in the top left dropdown menu.
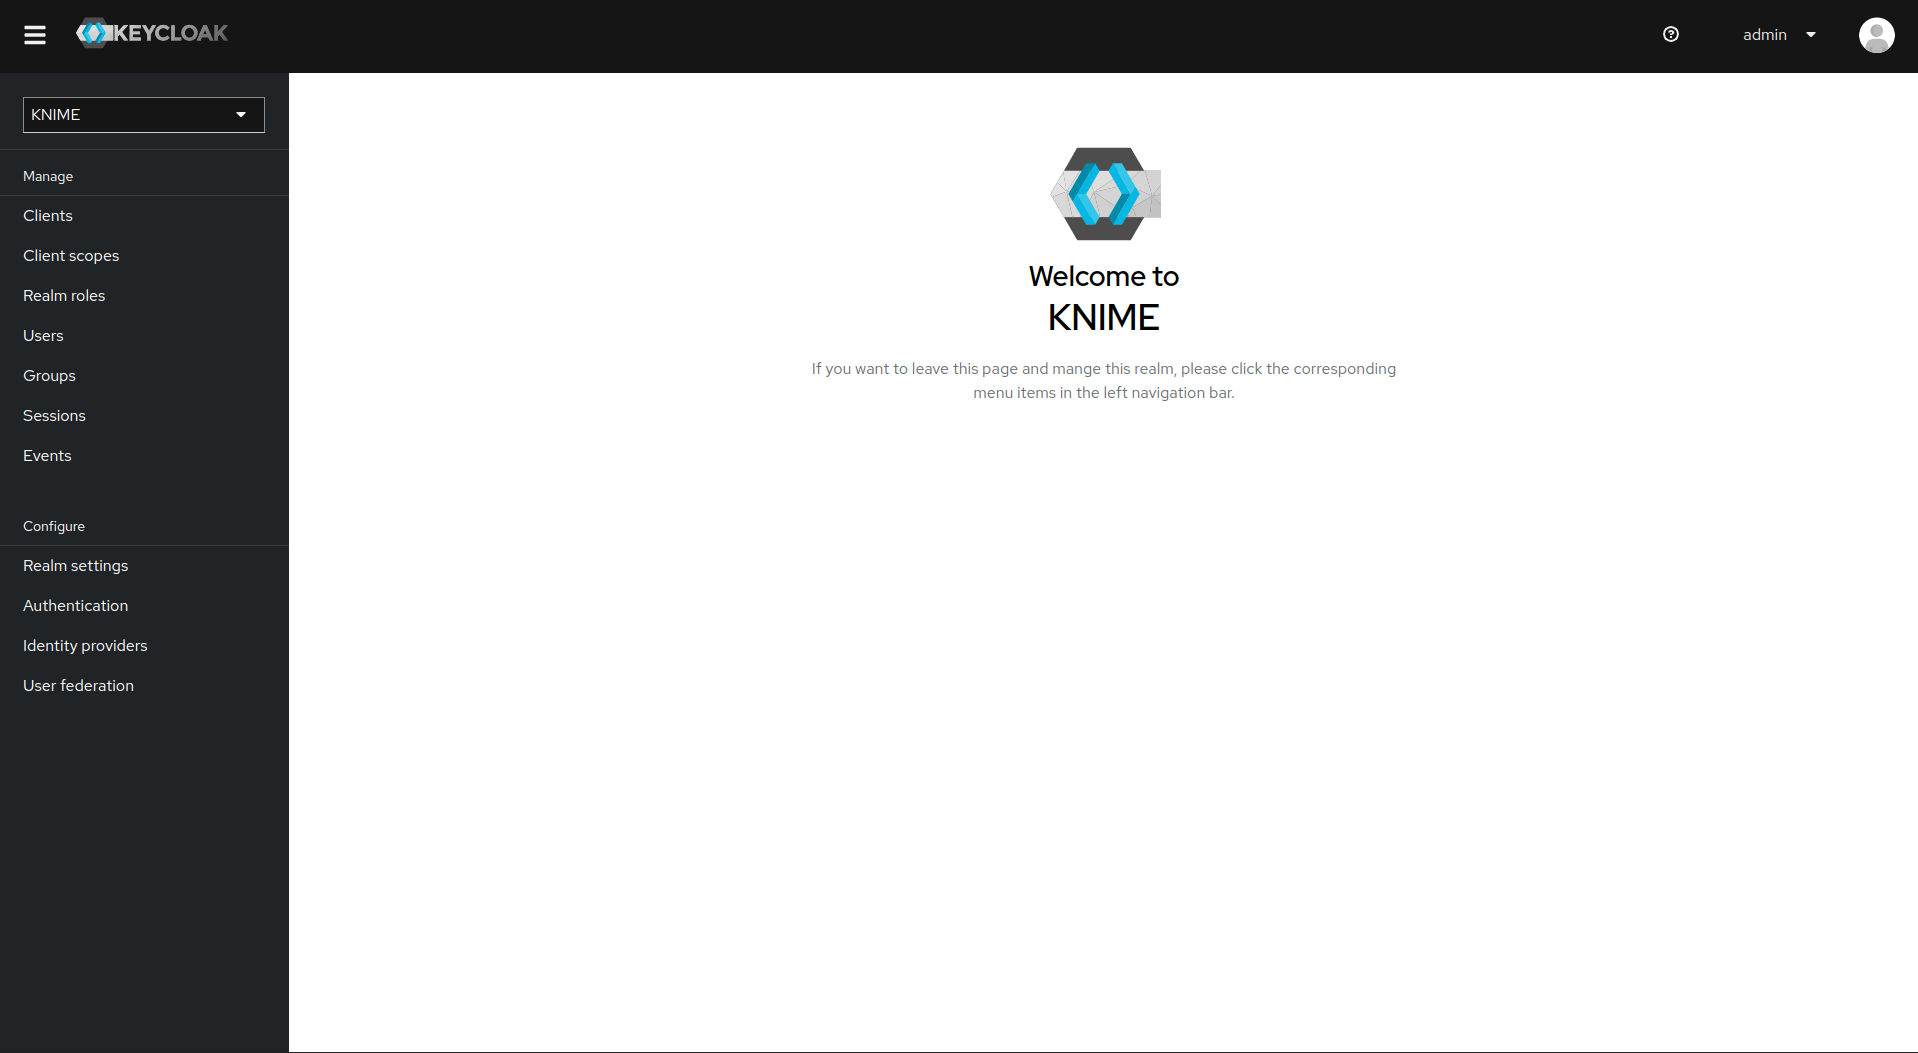
- On the left tab, select Identity Providers.
- Select your third-party provider.
- Switch to the Mappers tab and click Add mapper.
- Provide a name for the mapper and set Sync mode override to Force, so the user's group memberships update on every login.
- Set Mapper type to Attribute importer.
- Enter the claim that contains the external groups in the original token (in this example,
groups). - In the User Attribute Name field, enter
external_groups. - Click Save.
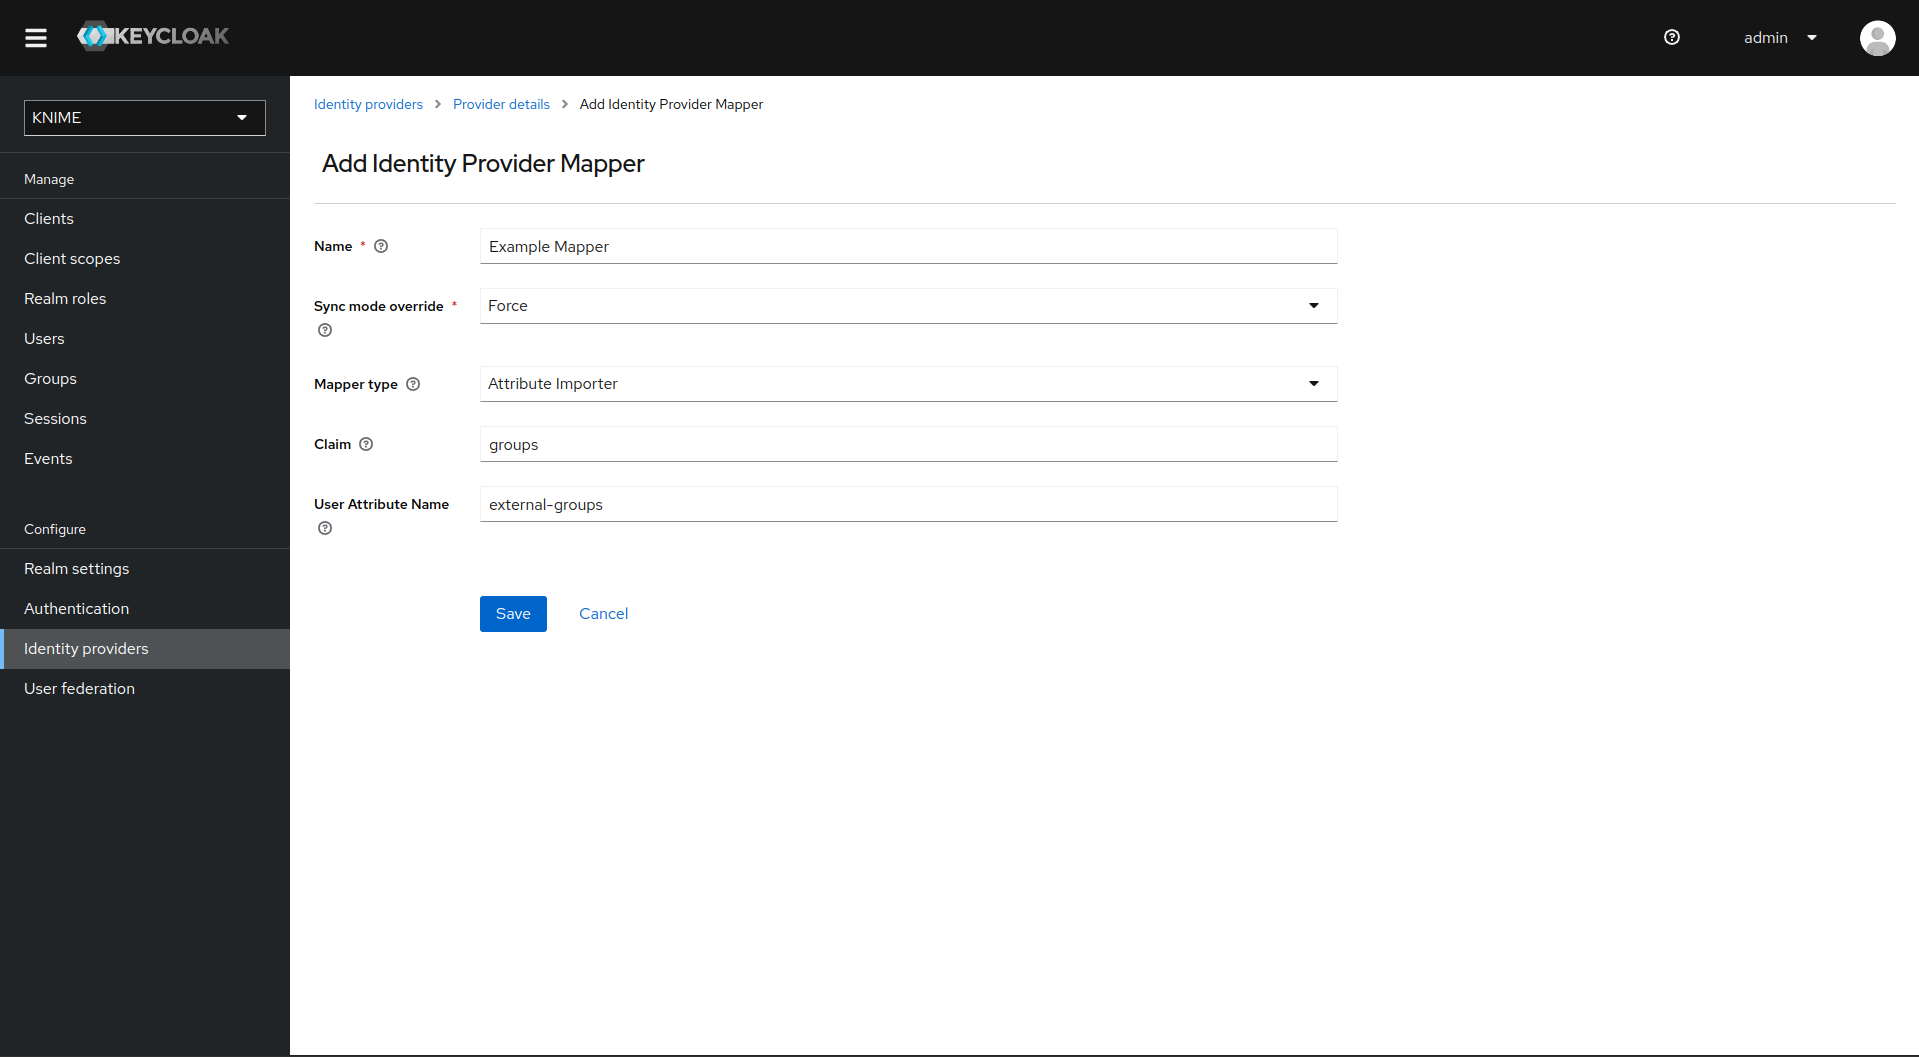
Every user in Keycloak who logs in after you add the mapper has an external_groups attribute, as shown below.
Map the attribute to a token claim
Keycloak now knows the external groups, but Knime needs them mapped into the access tokens Keycloak issues. Add a client scope that includes a mapper for the user attribute.
- On the left tab, select Client scopes.
- Select groups.
- Switch to the Mappers tab.
- Click Add mapper > By configuration and select User Attribute from the list.
- Provide a name, for example
external-groups-attribute-mapper. - Set both User Attribute and Token Claim Name to
external_groups. - Ensure Add to ID token, Add to access token, and Aggregate attribute values are turned off.
- Ensure Add to userinfo and Multivalued are turned on.
- Click Save.
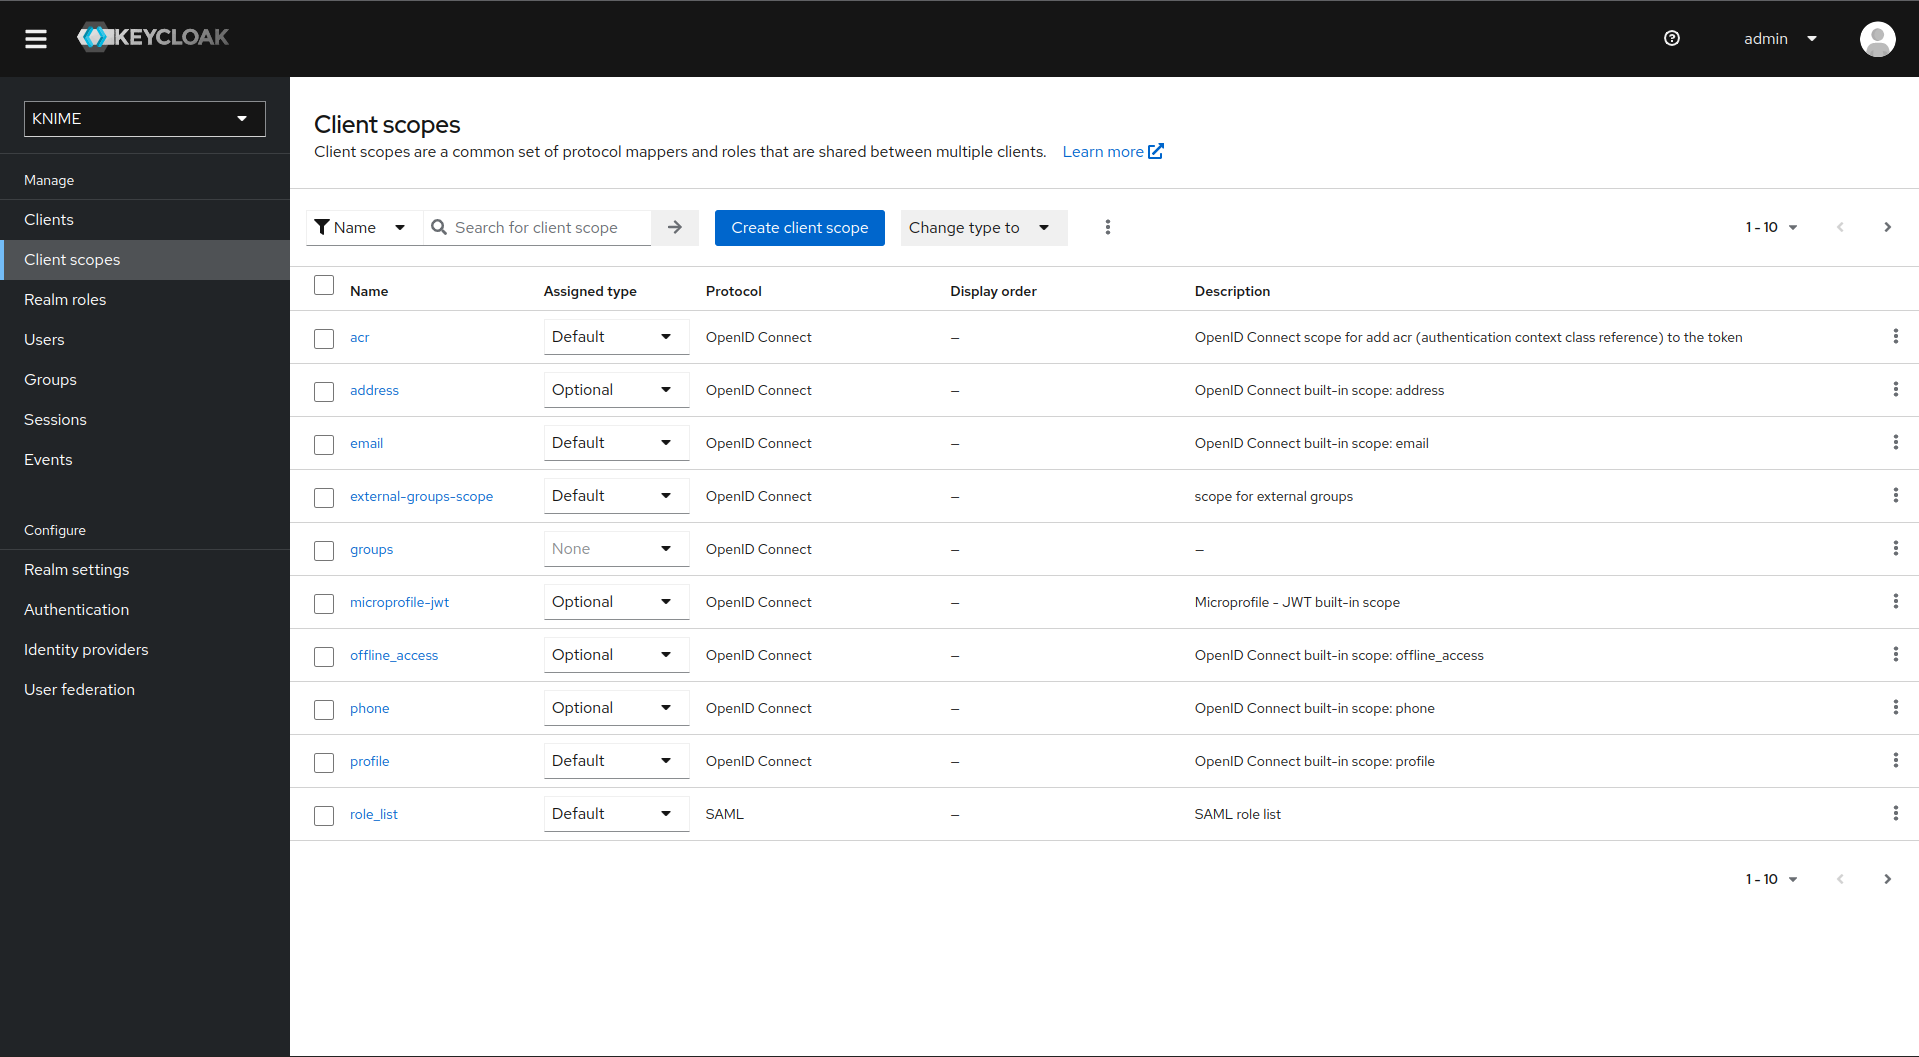
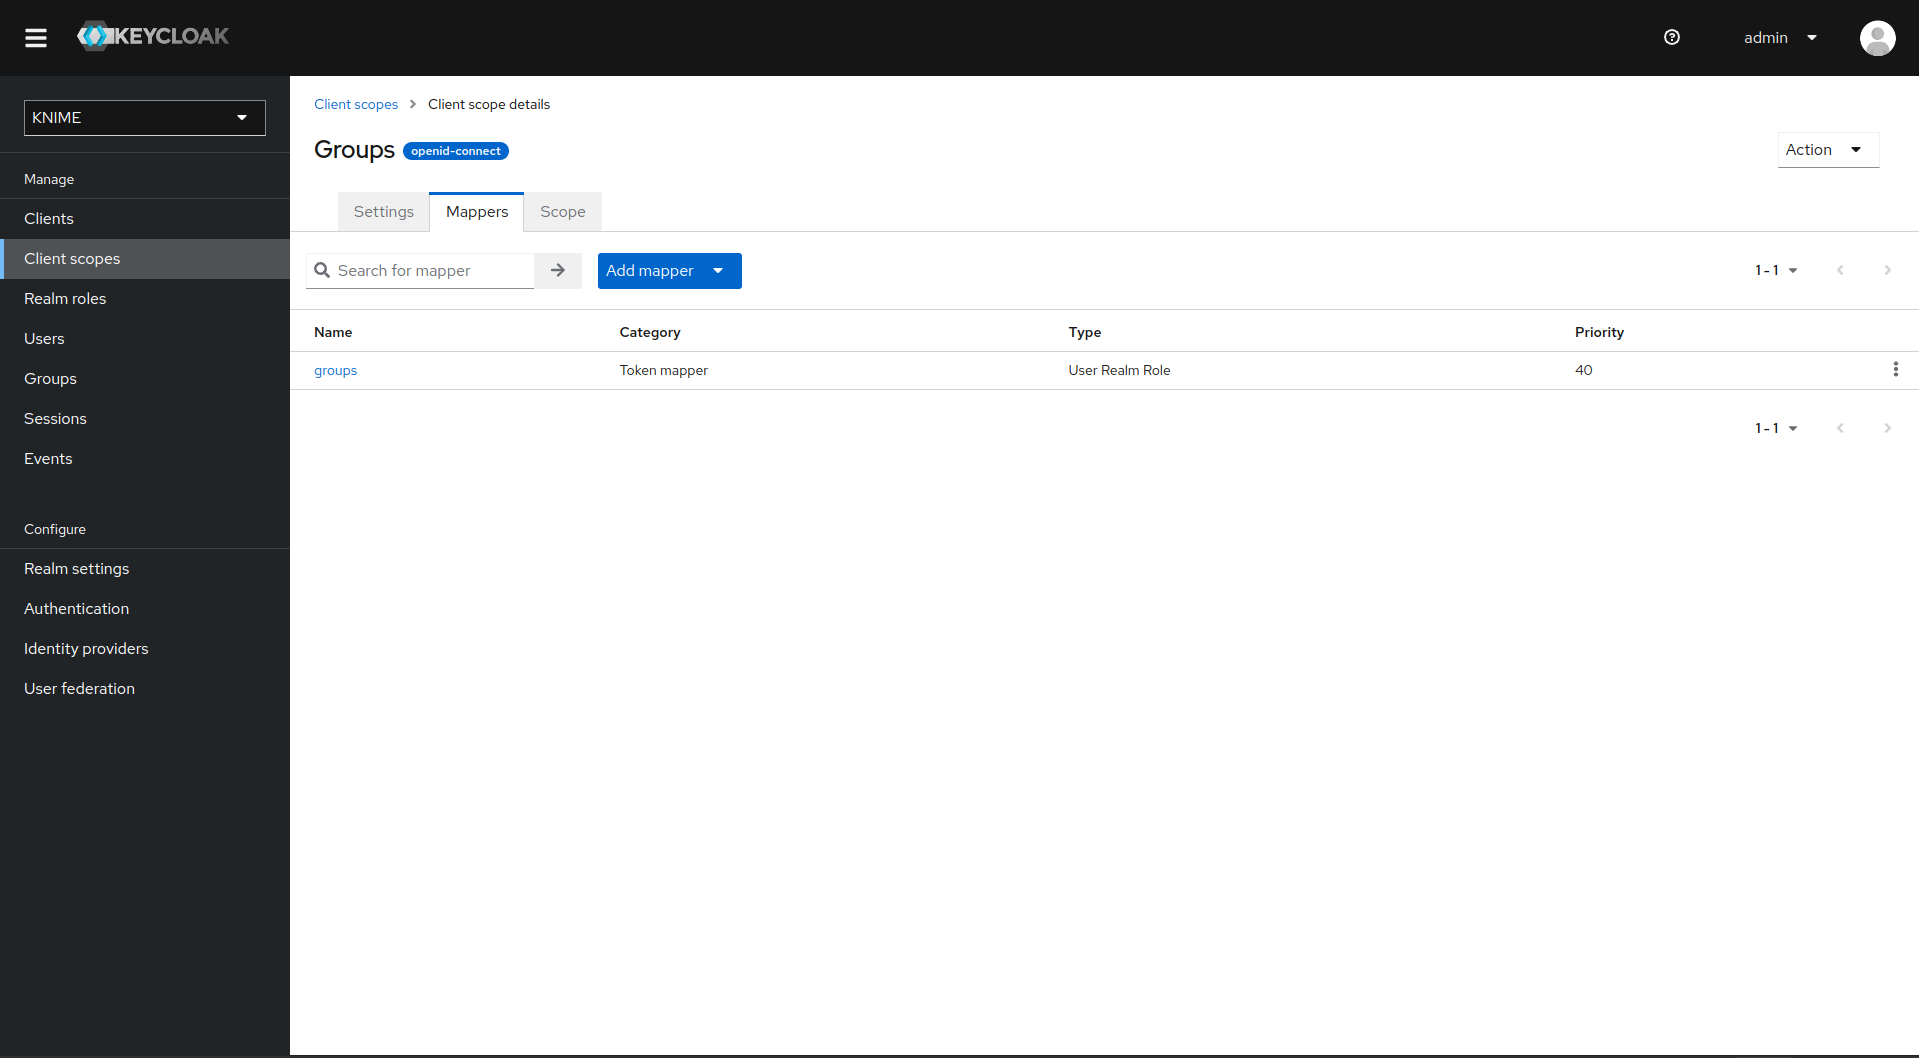
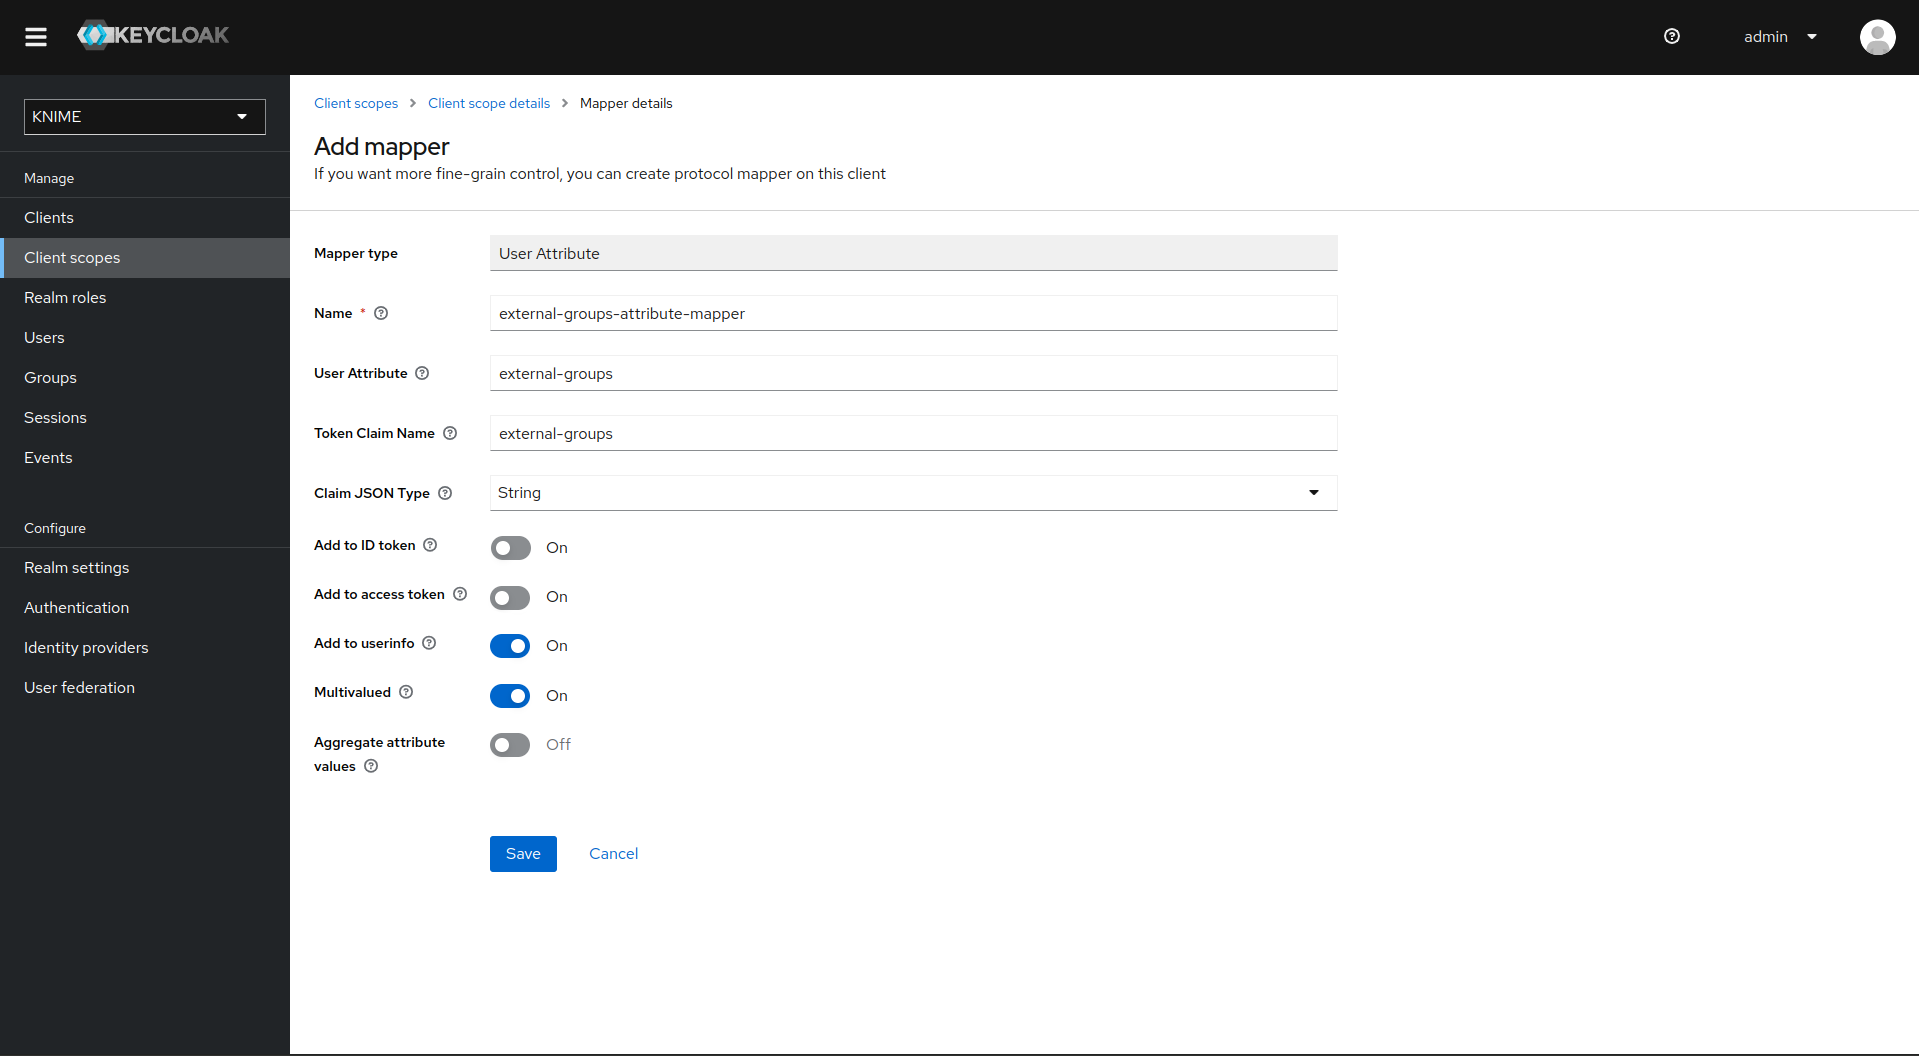
With both mappers in place, the external groups become part of the userinfo response Keycloak returns, and are exposed in Knime. To use external groups for permissions and access management, configure them separately through the admin REST API as described in Enable external groups.
LDAP federation
Before proceeding, configure a user federation for an LDAP instance that also supplies external group names.
Once user federation is configured, add mappers that map these groups into the access tokens used inside your Knime instance. To keep Keycloak groups and LDAP groups from mixing, treat external groups as realm roles.
First, create a dummy client for which you create roles based on the LDAP groups. This keeps future changes compatible with the Knime client in Keycloak.
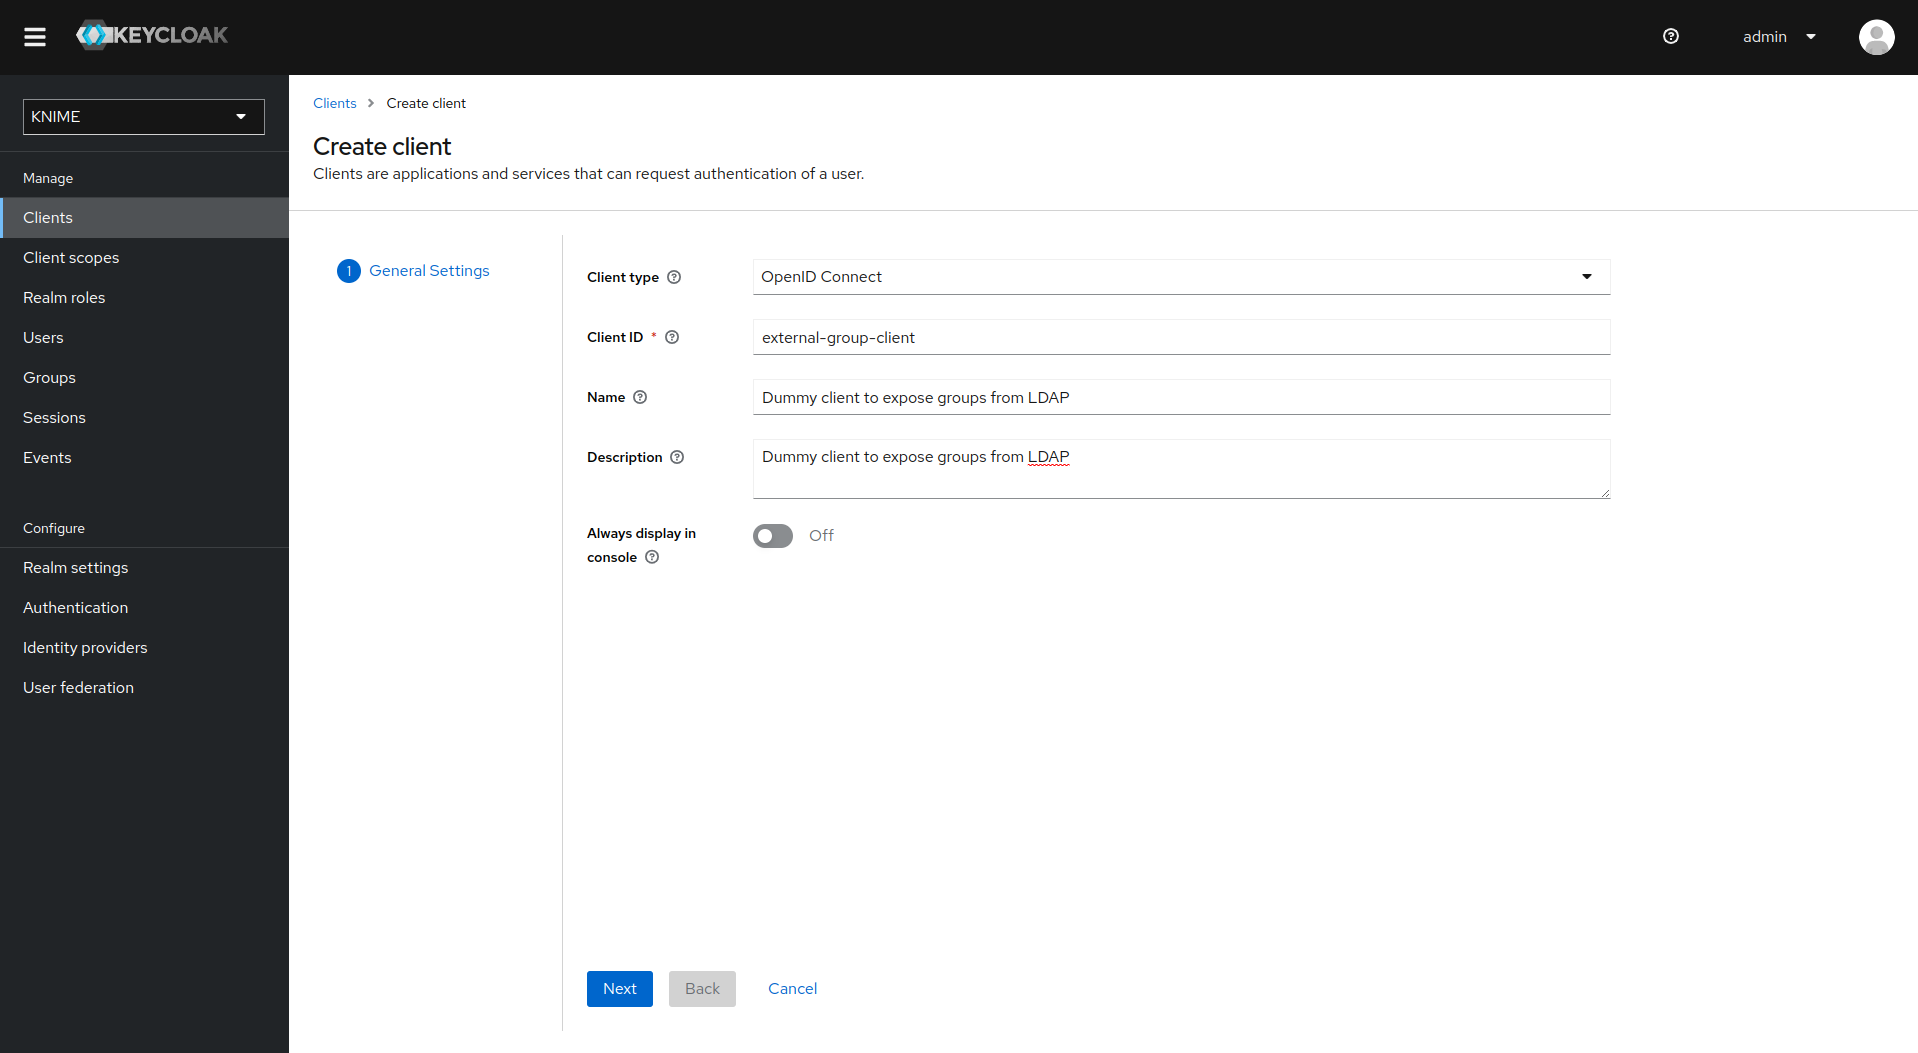
Create the dummy client
In Keycloak, select realm Knime in the top left dropdown menu.
On the left tab, select Clients and click Create client.
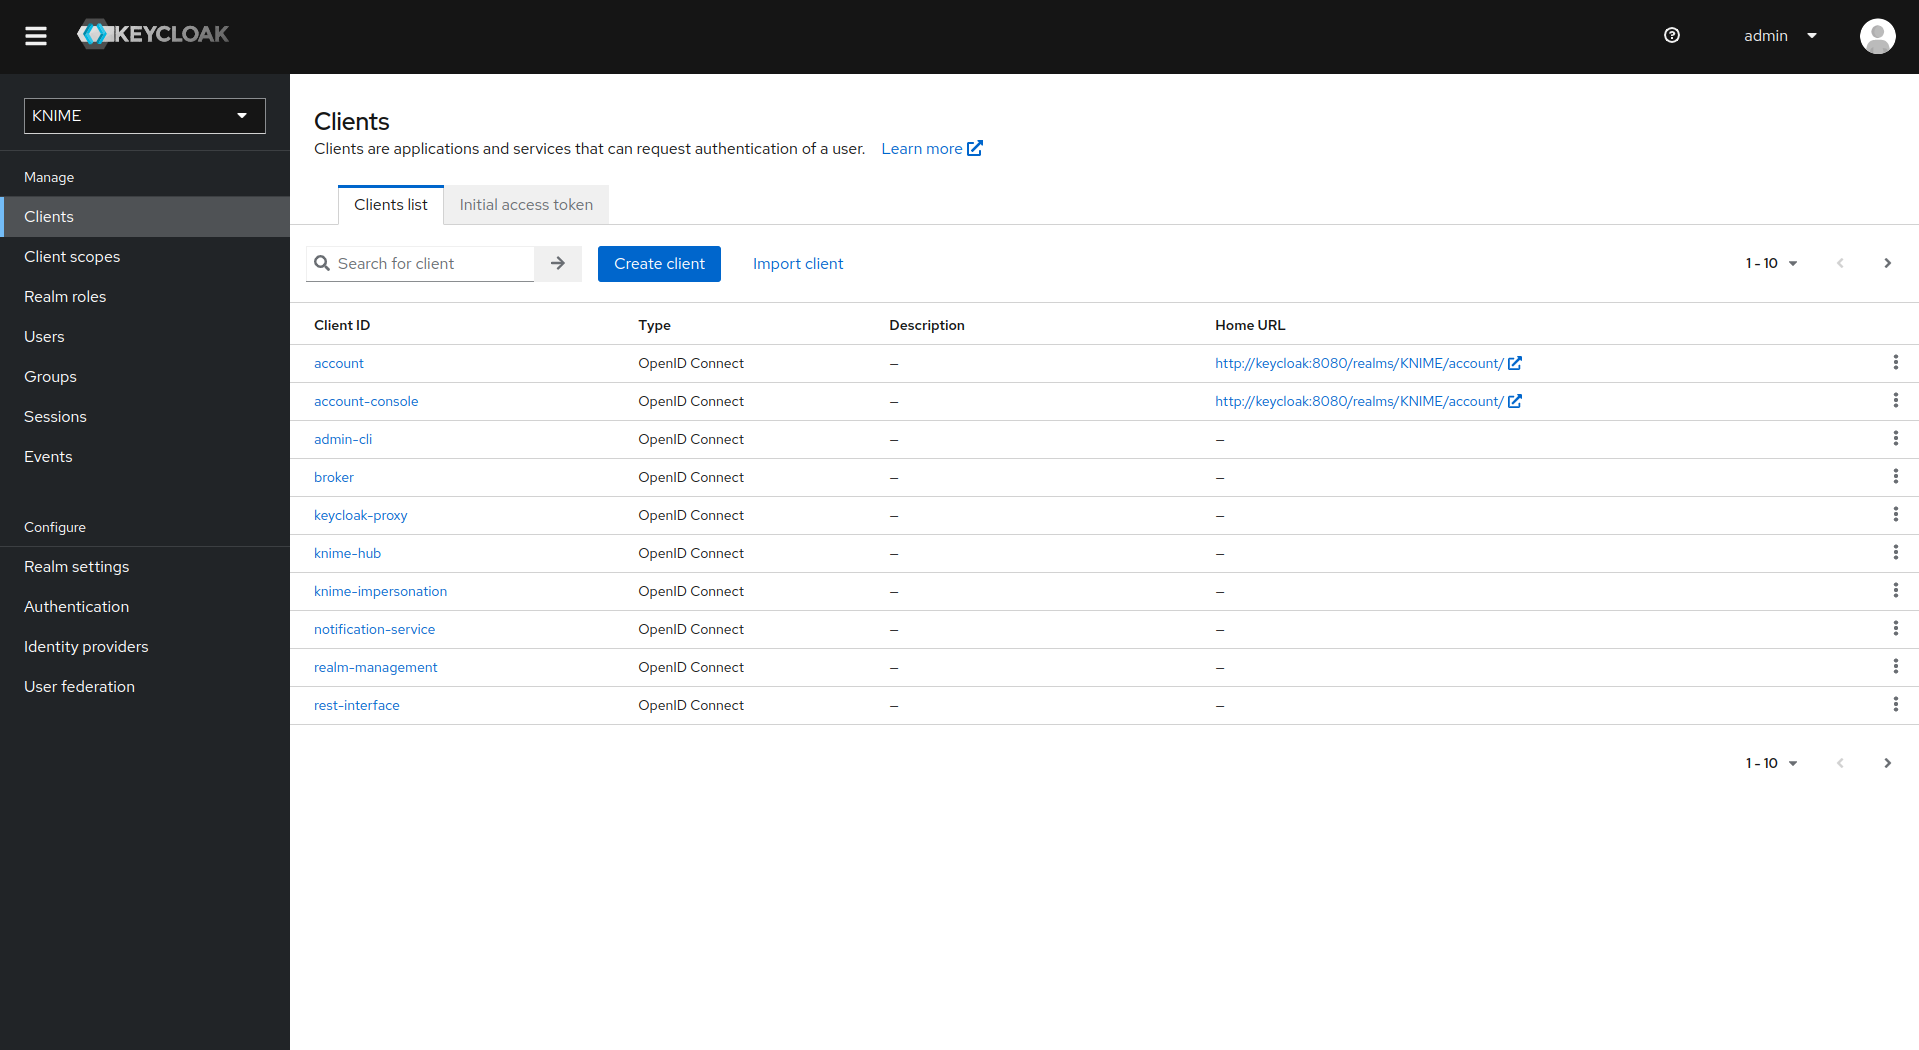
Set Client type to OpenID Connect.
Enter a client ID (in this example,
external-group-client), and a useful name and description.Click Next.
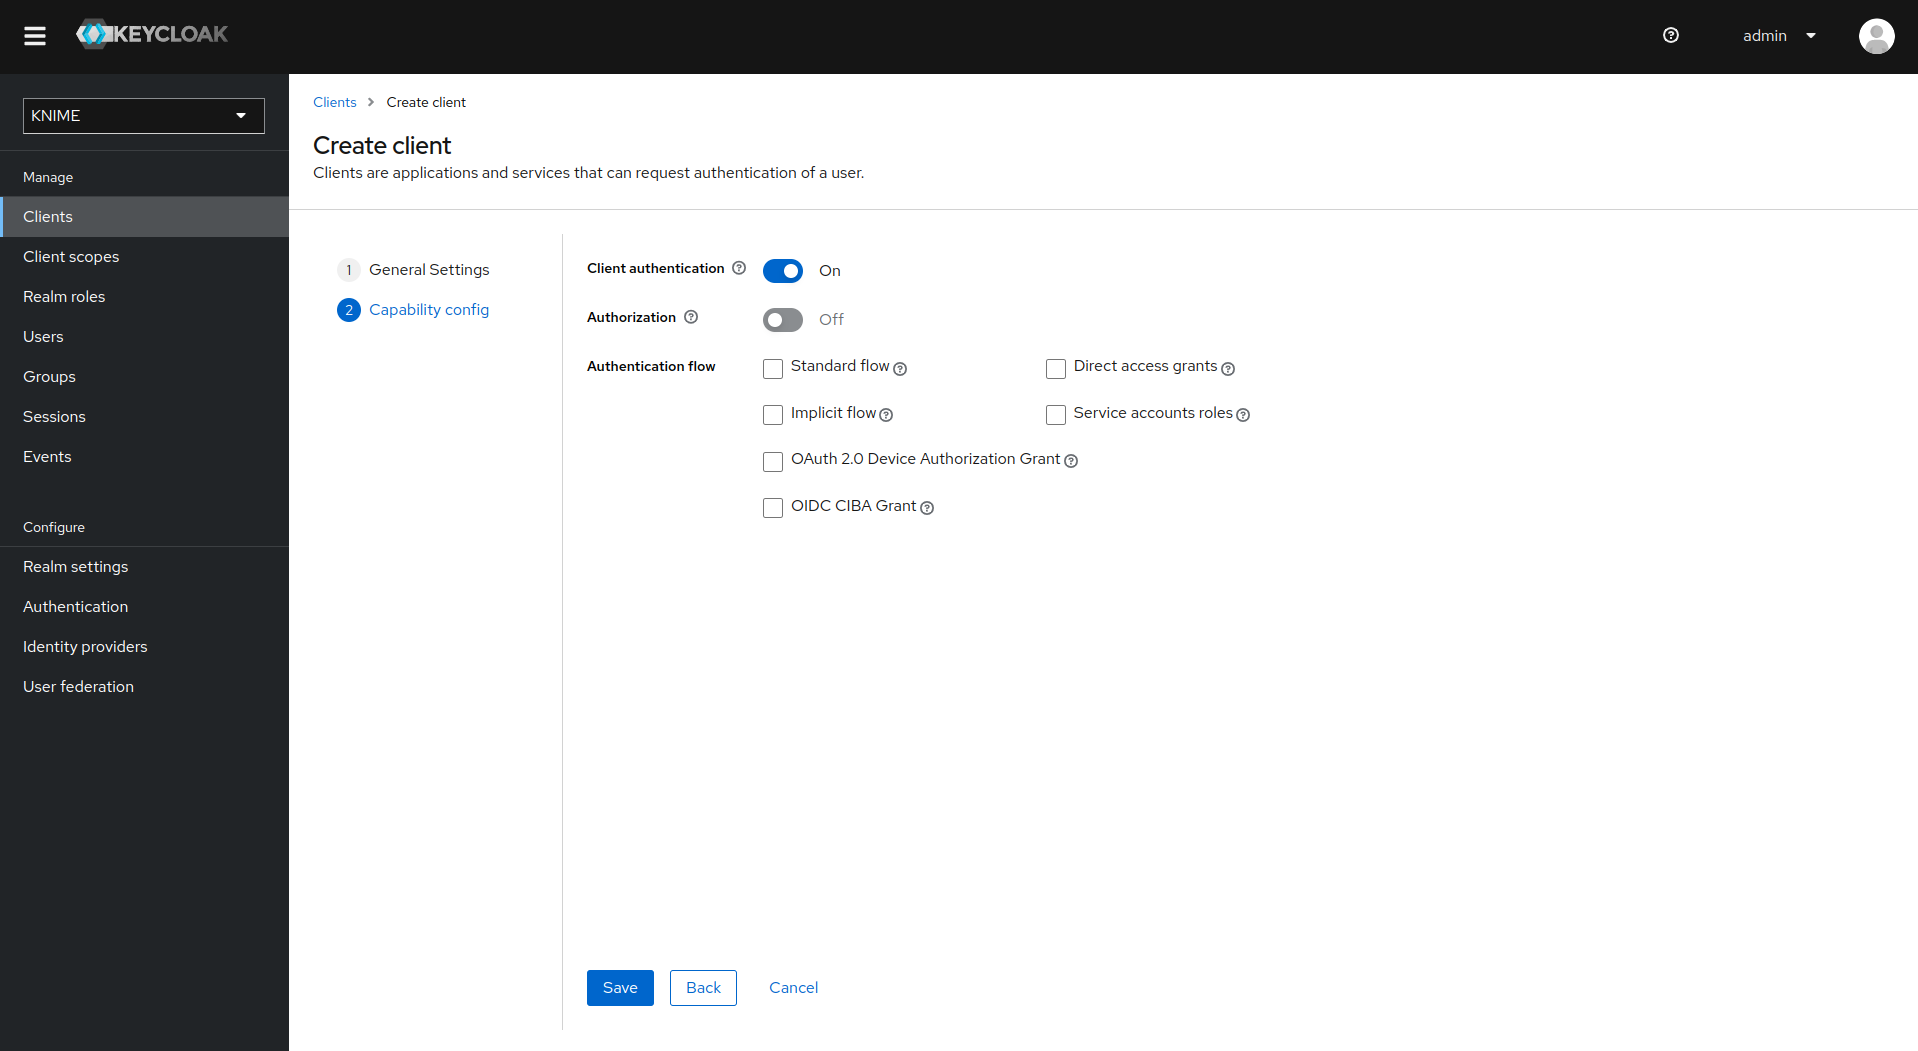
Deselect all checkboxes of Authentication flow in the Capability config section, since this client does not require any capabilities.
Enable Client authentication.
Click Save.
Map LDAP groups to client roles
With the dummy client set up, create a mapper that maps the user groups from LDAP to roles inside the dummy client:
On the left tab, select User federation and click your LDAP configuration.
Switch to the Mappers tab.
Click Add mapper.
Provide a name, for example
ldap-group-to-dummy-client-role-mapper.Set Mapper type to role-ldap-mapper.
Set up the mapper according to your LDAP configuration.
Disable User Realm Roles Mapping.
Set Client ID to the dummy client created earlier (in this example,
external-group-client).Click Save.
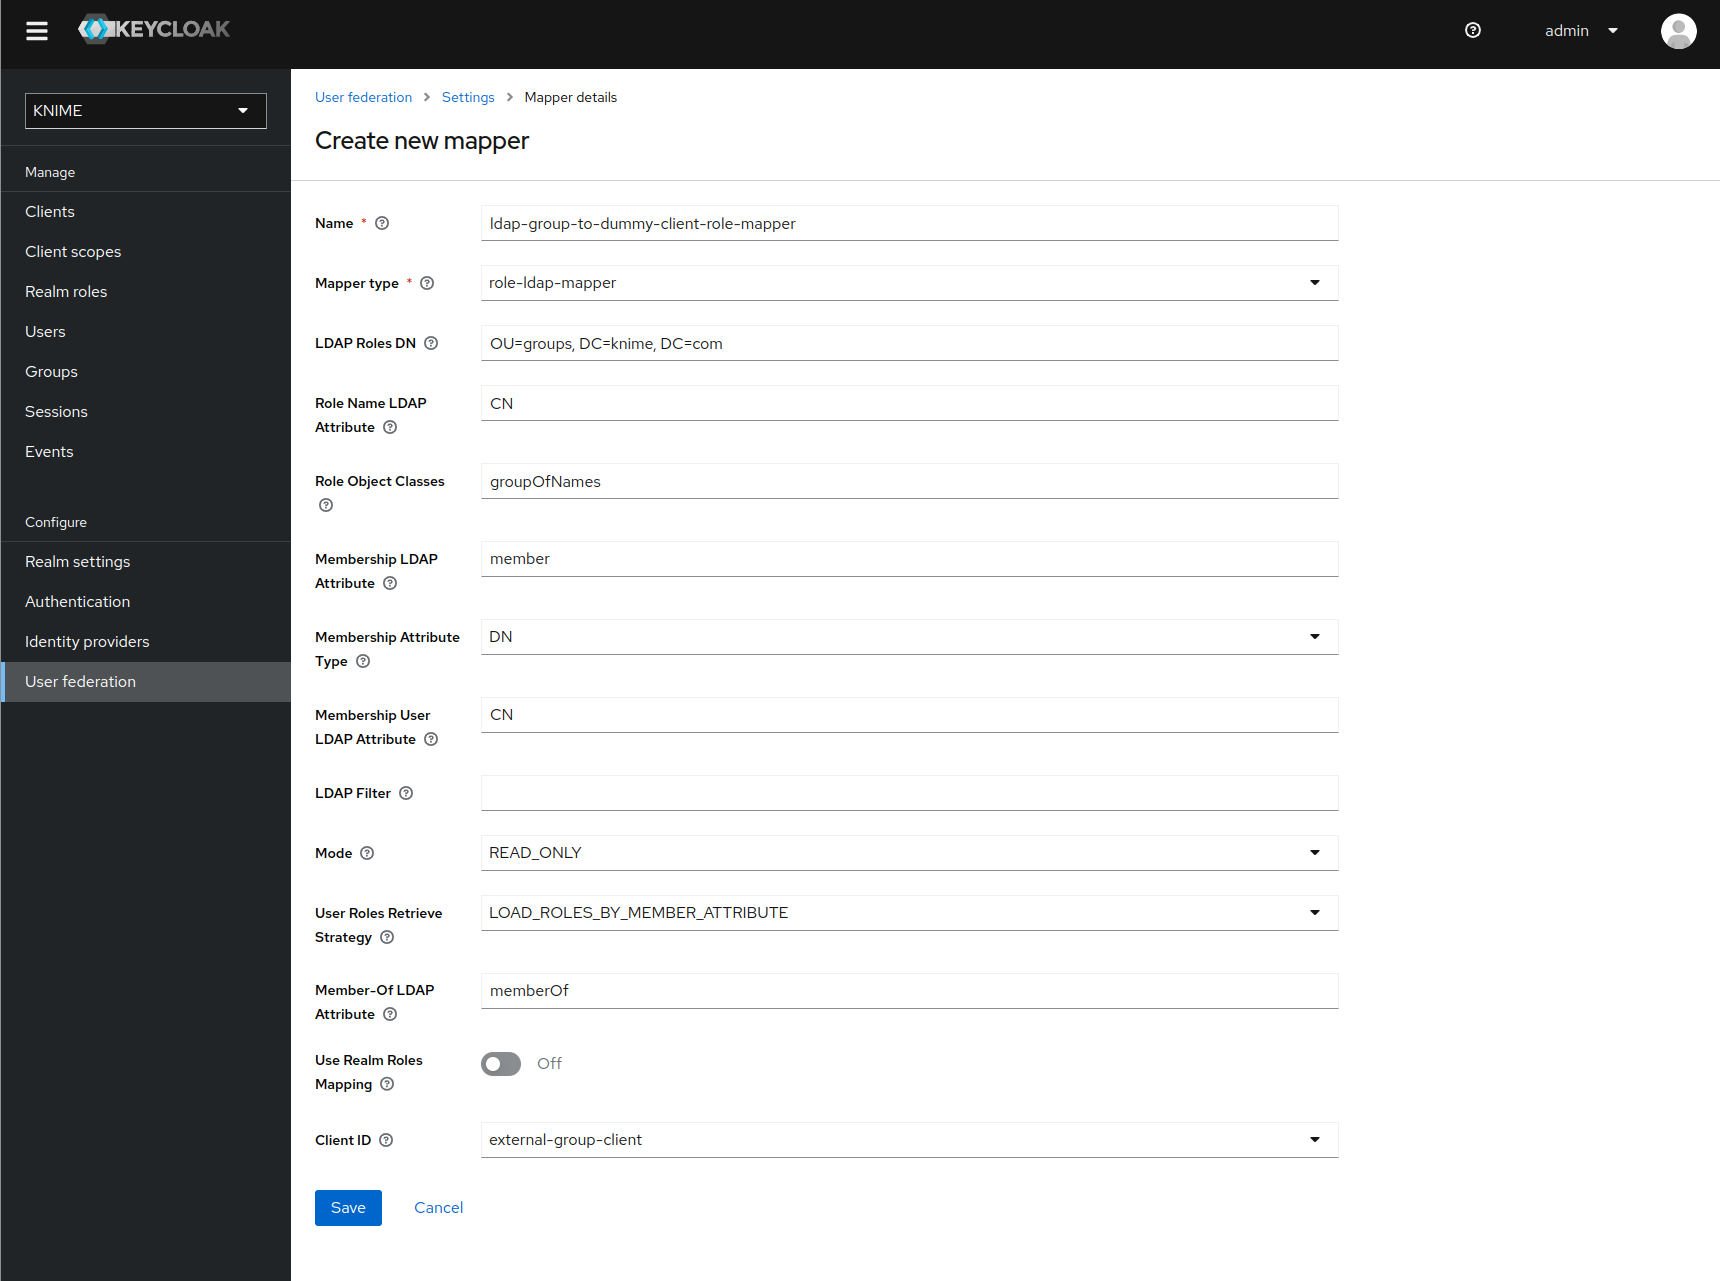
When a user logs in with LDAP credentials, Knime maps the user's groups to ad-hoc client roles inside external-group-client.
Map client roles to a token claim
Create a mapper that maps a user's realm roles from the dummy realm to the access tokens:
On the left tab, select Client scopes.
Select groups.
Switch to the Mappers tab.
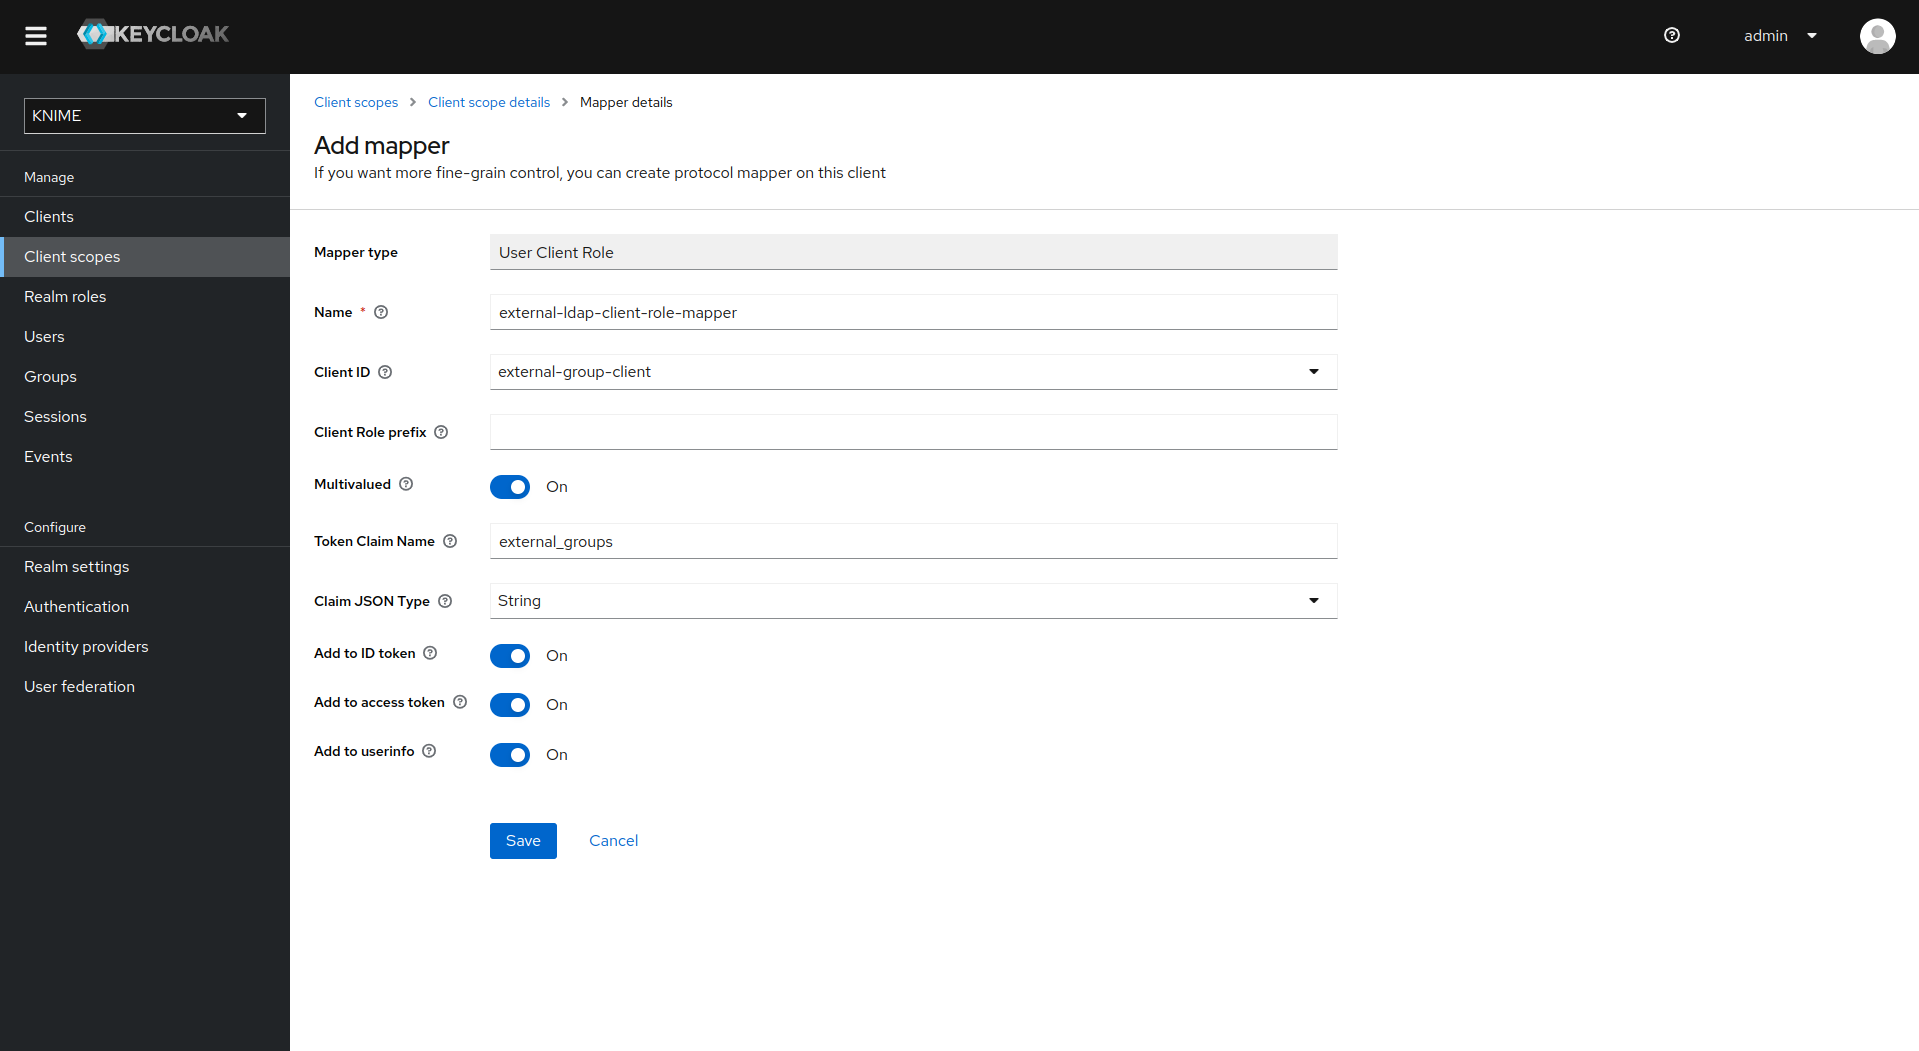
Click Add mapper > By configuration and select User Client Role from the list.
Provide a name, for example
external-ldap-client-role-mapper.Set Client ID to the dummy client created earlier (in this example,
external-group-client).Set Token Claim Name to
external_groups.Set Claim JSON Type to String.
Ensure Add to ID token, Add to access token, Add to userinfo, and Multivalued are turned on.
Click Save.
Enable external groups
Once you configure the external groups in Keycloak, create the groups you want available inside Knime.
Make a PUT request to the corresponding endpoint:
PUT https://api.<base-url>/accounts/hub:global/groups/<external-group-name><external-group-name> is the name of the group, and it must match the group name in the external identity provider.
Use the following JSON body to set a display name for the group shown in Knime:
json
{
  "displayName": "My Group Display Name",
  "external": true
}